


Stark Vibratory Plate Compactor 29160
Need answers fast?
Explore the manual using AI.
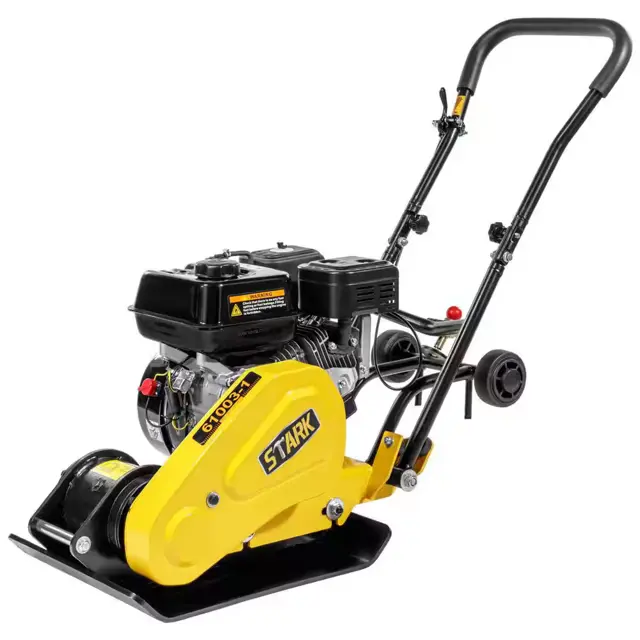
The Stark Vibratory Plate Compactor 29160 is a robust and efficient equipment designed for compacting soil and asphalt in various construction applications. Known for its durability and performance, this model ensures optimal compaction results, making it a reliable choice for contractors and construction professionals.
Turn manuals into instant answers
with your AI-powered assistantTurn manuals into instant answers
with your AI-powered assistant
Manual for Stark Vibratory Plate Compactor 29160
Complete asset maintenance, one click away
Get instant access to all the maintenance information you need. Empower technicians to perform preventive maintenance with asset packages, ready to use right out of the box.

Documents & Manuals
Find all the essential guides in one place.
 Tensioning Guide
- Belt-diagram
- C-120 pulleys
+ 13 more

Work Order Templates
Pre-built workflows to keep your asset running smoothly.
- Daily Electrical System Inspection
- Replace Roller and Pulley
- Install Engine B-120
+ 29 more

Procedures
Integrate maintenance plans directly into your work orders.
- Motion Industries
- Applied Industrial Technologies
- Electrical Brothers
+ 5 more

Parts
Access the parts list for your equipment in MaintainX.
- Drive Motor
- B2 Rollers
- Tensioning System
+ 40 more
Stark Vibratory Plate Compactor 29160
Create an account to install this asset package.
Maintenance Plans for Stark Vibratory Plate Compactor Model 29160
Integrate maintenance plans directly into your work orders in MaintainX.
Initial 20 Hours V-Belts Check
Warning: Ensure the engine is turned off and cool before starting the procedure.
Engine turned off?
Engine cool?
Remove the belt guard to access the V-belt(s).
Belt guard removed?
V-belt(s) in good condition? (No cracks, frays, or glazing)
Enter the deflection on each side of the V-belt(s) in mm
Is the deflection between 9mm and 13mm?
Sign off on the V-belts check

200 Hourly Exciter Lubrication
Warning: Let exciter cool before changing exciter oil.
Remove the belt guard and V-belt(s)
Remove the bolts that hold the deck to the housing
Lift entire deck with engine from housing
Remove pipe plug from top of exciter housing. Tilt housing upside down so oil drains from exciter. Examine oil for metal chips as a precaution to future problems.
Return plate housing to the upright position
Fill the exciter housing with exciter oil. Do not overfill - overfilling can result in excessive temperatures in the exciter.
Apply pipe sealant to pipe plug and reinstall into top of exciter housing.
Reinstall deck, V-belt(s) and belt guard.
Vibratory Plate Compactor Preventive Maintenance
Engine turned off and cool
Engine’s throttle lever in its SLOW position
Spark plug wire removed and secured
General condition of the plate compactor inspected
All debris removed from the plate compactor
All moving parts lubricated with premium quality lightweight machine oil
Bottom of the compactor base cleaned
Spark plug wire replaced
CAUTION! Never use a “pressure washer” to clean your plate compactor. Water can penetrate tight areas of the unit and cause damage to spindles, pulleys, bearings, or the engine. The use of pressure washers will result in shortened life and reduce serviceability.
50 Hourly V-Belts Maintenance
1) Checking V-Belt(s)
• To ensure optimum power transmission from the engine to the eccentric shaft, the V-belt(s) must be in good condition and operate under proper tension.
1. Turn off engine. Engine must be cool.
2. Remove the belt guard to access the V-belt(s).
3. Check the condition of the V-belt(s). If any V-belt is cracked, frayed, or glazed, it should be replaced as soon as convenient.
4. Check the V-belt tension by squeezing them in the center. The normal deflection on each side should be 9mm (3/8”) to 13mm (1/2”) with moderate pressure from your thumb or finger.
2) Tensioning V-Belt(s)
• Proper belt tension is critical to good performance.
• Proper adjustment will assure long belt life.
Unlock efficiency
with MaintainX CoPilot
MaintainX CoPilot is your expert colleague, on call 24/7, helping your team find the answers they need to keep equipment running.
Reduce Unplanned Downtime
Ensure your team follows consistent procedures to minimize equipment failures and costly delays.
Maximize Asset Availability
Keep your assets running longer and more reliably, with standardized maintenance workflows from OEM manuals.
Lower Maintenance Costs
Turn any technician into an expert to streamline operations, maintain more assets, and reduce overall costs.
Thousands of companies manage their assets with MaintainX

'%3e%3cpath%20fill='url(%23b)'%20d='M66.008%2080.068c-5.084-.786-9.763-3.834-12.442-8.68a16.942%2016.942%200%200%201-1.87-5.18c1.096.19%202.203.476%203.298.87%206.525%202.333%2010.836%207.68%2011.014%2012.99ZM51.47%2061.576c.488-5.524%203.62-10.716%208.847-13.597a17.132%2017.132%200%200%201%2011.335-1.882c-.798%208.145-7.43%2014.848-16.038%2015.599-1.417.119-2.799.07-4.144-.12Zm28.564-11.478a17.513%2017.513%200%200%201%203.727%204.62c4.608%208.335%201.584%2018.813-6.75%2023.409a16.988%2016.988%200%200%201-4.359%201.679%2019.624%2019.624%200%200%201-3.977-12.776c.346-7.561%204.942-13.931%2011.36-16.932Z'/%3e%3cpath%20fill='%23110F0D'%20fill-rule='evenodd'%20d='M142.831%2048.324h4.977V77.03h-4.977V48.324Zm27.278%2013.002c.322%201.048.453%202.263.453%203.62v12.073h-4.787V66.208c0-.75-.047-1.572-.154-2.143-.453-2.382-1.822-3.572-4.215-3.572-2.31%200-3.882%201.274-4.43%203.476-.143.596-.226%201.405-.226%202.25v10.8h-4.787V56.623h4.477v2.989c1.536-2.5%203.906-3.43%206.371-3.43%203.488%200%206.263%201.68%207.298%205.144Zm24.636%207.323c0%203.882-2.358%206.525-5.763%207.727-1.298.453-2.632.643-4.62.643h-10.169V48.324h9.085c1.691%200%203.156.143%204.049.38%203.465.93%205.727%203.68%205.727%207.335%200%202.441-.81%204.156-2.762%205.644%202.905%201.417%204.453%203.727%204.453%206.966Zm-15.634-8.656h4.584c1.024%200%201.917-.143%202.536-.417%201.215-.548%201.905-1.608%201.905-3.167%200-1.548-.643-2.572-1.845-3.132-.691-.31-1.762-.452-2.763-.452h-4.417v7.168Zm10.716%208.465c0-1.536-.893-3.37-3.227-3.893-.428-.095-1.036-.143-1.571-.143h-5.918v8.085h5.501c.56%200%201.429-.048%201.953-.167%201.94-.453%203.262-1.846%203.262-3.882Zm47.747-11.847-8.097%2020.408h-4.429l-8.109-20.408h5.191l5.192%2014.574%205.108-14.574h5.144Zm-20.218%2010.002c0%20.69-.036%201.262-.155%201.94h-15.943c.631%202.87%202.714%204.728%205.882%204.728%202.131%200%203.607-.882%204.703-2.525h4.87c-1.762%204.144-5.204%206.692-9.657%206.692-6.084%200-10.537-4.858-10.537-10.49%200-6.108%204.524-10.776%2010.335-10.776%206.239%200%2010.442%204.954%2010.502%2010.43Zm-4.763-1.405c-.333-2.846-2.643-4.858-5.691-4.858-2.894%200-5.287%201.929-5.621%204.858h11.312Zm-72.667%203.44c0%204.787-3.287%208.371-9.419%208.371H119.363V64.66c-1.917.274-3.87.69-5.811%201.238l4.537%2011.121h-5.418l-3.596-9.585c-5.144%202.084-10.085%205.216-14.217%209.585h-4.786L101.8%2048.312h4.56l5.68%2013.883a44.112%2044.112%200%200%201%207.323-1.774V48.312h9.084c1.703%200%203.156.143%204.061.393%203.453.929%205.727%203.667%205.727%207.323%200%201.917-.738%204.179-2.81%205.691%203.06%201.56%204.501%204.025%204.501%206.93Zm-15.634-8.667a62.664%2062.664%200%200%201%202.06-.036c1.703.012%203.239.131%204.608.37%201.441-.549%202.357-1.727%202.357-3.537%200-1.941-.881-3.144-2.488-3.667-.548-.18-1.358-.286-2.322-.286h-4.215v7.156Zm-16.55%203.905-3.715-9.894-6.394%2016.502c2.833-2.595%206.263-4.858%2010.109-6.608Zm27.254%204.74c0-2.775-3.131-4.347-8.513-4.418-.715%200-1.441.011-2.191.047v8.252h5.918c2.548%200%204.786-1.37%204.786-3.882Z'%20clip-rule='evenodd'/%3e%3c/g%3e%3cdefs%3e%3clinearGradient%20id='b'%20x1='51.47'%20x2='85.916'%20y1='62.946'%20y2='62.946'%20gradientUnits='userSpaceOnUse'%3e%3cstop%20stop-color='%23CD9F28'/%3e%3cstop%20offset='1'%20stop-color='%23ECD80B'/%3e%3c/linearGradient%3e%3cclipPath%20id='a'%3e%3cpath%20fill='%23fff'%20d='M51.47%2045.728h186.104V80.14H51.47z'/%3e%3c/clipPath%3e%3c/defs%3e%3c/svg%3e)


More from Stark


Explore Other Assets


© 2026 MaintainX. All rights reserved.