


John Deere Tractor 5403
Need answers fast?
Explore the manual using AI.
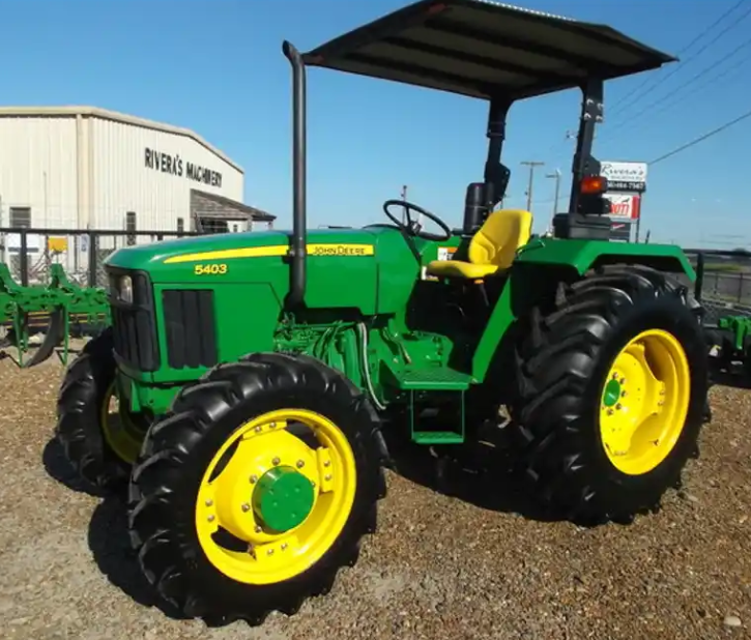
The John Deere Tractor 5403 is a robust agricultural machine designed for efficiency and reliability. Known for its powerful performance, this tractor is ideal for various farming tasks, ensuring optimal productivity in the field. With regular maintenance, the 5403 can deliver exceptional service for years to come.
Turn manuals into instant answers
with your AI-powered assistantTurn manuals into instant answers
with your AI-powered assistant
Manual for John Deere Tractor 5403
Complete asset maintenance, one click away
Get instant access to all the maintenance information you need. Empower technicians to perform preventive maintenance with asset packages, ready to use right out of the box.

Documents & Manuals
Find all the essential guides in one place.
 Tensioning Guide
- Belt-diagram
- C-120 pulleys
+ 13 more

Work Order Templates
Pre-built workflows to keep your asset running smoothly.
- Daily Electrical System Inspection
- Replace Roller and Pulley
- Install Engine B-120
+ 29 more

Procedures
Integrate maintenance plans directly into your work orders.
- Motion Industries
- Applied Industrial Technologies
- Electrical Brothers
+ 5 more

Parts
Access the parts list for your equipment in MaintainX.
- Drive Motor
- B2 Rollers
- Tensioning System
+ 40 more
John Deere Tractor 5403
Create an account to install this asset package.
Maintenance Plans for John Deere Tractor Model 5403
Integrate maintenance plans directly into your work orders in MaintainX.
Yearly Maintenance
Change engine oil and filter
Replace air cleaner elements
Open hood and remove side screen
Release clips (A)
Remove cover (B)
Remove primary element (C)
Clean out any dirt in canister taking care not to damage the secondary filter element
Removal of the secondary element (D) is similar to removal of the primary element
Install secondary element, primary element and cover

100 Hourly Maintenance
Replace transmission-hydraulic filter element
Remove filter (A). Apply a film of oil to new gasket and install new filter. Hand tighten plus 1/2 turn.
Run engine several seconds and recheck transmissionhydraulic oil level.
Add transmission fluid if required (See Fuels, Lubricants and Coolant section).
Change engine oil and filter
Run engine to heat oil.
Remove oil drain plug (A) and drain oil.
Replace engine oil filter (B) while changing oil. Apply a film of oil on the new oil filter gasket and install new filter. Hand tighten plus 1/2 turn.
Install drain plug.
50 Hourly Maintenance
Wheel hardware tightened?
Alternator/fan belt tension checked?
Air intake and cooling system hose clamps tightened?
Sign off on the 50 Hourly Maintenance
50 Hourly Maintenance
Check transmission-hydraulic system oil level
Remove dipstick (A) and wipe it clean. Insert dipstick fully. Is oil level between full mark and end of dipstick?
Add oil if level is low. (See AntiChatter Transmission/Hydraulic Oil in Fuels, Lubricants and Coolant section.)
Check MFWD axle hub oil level
Park tractor so that oil fill mark (A) on MFWD hub is level with the ground. Remove filler plug (B). Is oil level even with bottom of the filler plug hole?
Remove plug (C) to check oil level in axle housing. Is oil level even with bottom of hole?
If level is low, add John Deere HY-GARDR Gear Lubricant or its equivalent. (See Fuels, Lubricants and Coolant section.)
Clean and check battery
Is the battery clean and in good condition?
Daily Maintenance
Check engine oil level. Clean dipstick (A) and reinsert fully. Withdraw it again and check oil level. The window for safe operation of engine is when the oil level is between the upper and lower marks of the dipstick. Do not operate the engine if oil level is below minimum mark. In this case, add recommended oil.
Check coolant level of radiator expansion tank (A). If the engine is cold and coolant level is below LOW, add coolant to expansion tank until level reaches LOW mark.
Lubricate the following points every 10 hours if operating the tractor in extremely wet or excessively muddy conditions.
Check hydraulic oil level of transmission. Withdraw dipstick and clean it. Insert dipstick fully. Oil level should be between the marks on the dipstick. If level is low add oil.
Remove deposits by squeezing the valve. During harvesting, grass and chaff may adversely affect the performance of the dust unloading valve. Remove and clean the dust unloading valve as necessary. Replace damaged valve immediately.
Make sure the hose of the rocker arm cover ventilation is not pinched. Remove any dirt from the hose end.
Sign off on the daily maintenance
Unlock efficiency
with MaintainX CoPilot
MaintainX CoPilot is your expert colleague, on call 24/7, helping your team find the answers they need to keep equipment running.
Reduce Unplanned Downtime
Ensure your team follows consistent procedures to minimize equipment failures and costly delays.
Maximize Asset Availability
Keep your assets running longer and more reliably, with standardized maintenance workflows from OEM manuals.
Lower Maintenance Costs
Turn any technician into an expert to streamline operations, maintain more assets, and reduce overall costs.
Thousands of companies manage their assets with MaintainX

'%3e%3cpath%20fill='url(%23b)'%20d='M66.008%2080.068c-5.084-.786-9.763-3.834-12.442-8.68a16.942%2016.942%200%200%201-1.87-5.18c1.096.19%202.203.476%203.298.87%206.525%202.333%2010.836%207.68%2011.014%2012.99ZM51.47%2061.576c.488-5.524%203.62-10.716%208.847-13.597a17.132%2017.132%200%200%201%2011.335-1.882c-.798%208.145-7.43%2014.848-16.038%2015.599-1.417.119-2.799.07-4.144-.12Zm28.564-11.478a17.513%2017.513%200%200%201%203.727%204.62c4.608%208.335%201.584%2018.813-6.75%2023.409a16.988%2016.988%200%200%201-4.359%201.679%2019.624%2019.624%200%200%201-3.977-12.776c.346-7.561%204.942-13.931%2011.36-16.932Z'/%3e%3cpath%20fill='%23110F0D'%20fill-rule='evenodd'%20d='M142.831%2048.324h4.977V77.03h-4.977V48.324Zm27.278%2013.002c.322%201.048.453%202.263.453%203.62v12.073h-4.787V66.208c0-.75-.047-1.572-.154-2.143-.453-2.382-1.822-3.572-4.215-3.572-2.31%200-3.882%201.274-4.43%203.476-.143.596-.226%201.405-.226%202.25v10.8h-4.787V56.623h4.477v2.989c1.536-2.5%203.906-3.43%206.371-3.43%203.488%200%206.263%201.68%207.298%205.144Zm24.636%207.323c0%203.882-2.358%206.525-5.763%207.727-1.298.453-2.632.643-4.62.643h-10.169V48.324h9.085c1.691%200%203.156.143%204.049.38%203.465.93%205.727%203.68%205.727%207.335%200%202.441-.81%204.156-2.762%205.644%202.905%201.417%204.453%203.727%204.453%206.966Zm-15.634-8.656h4.584c1.024%200%201.917-.143%202.536-.417%201.215-.548%201.905-1.608%201.905-3.167%200-1.548-.643-2.572-1.845-3.132-.691-.31-1.762-.452-2.763-.452h-4.417v7.168Zm10.716%208.465c0-1.536-.893-3.37-3.227-3.893-.428-.095-1.036-.143-1.571-.143h-5.918v8.085h5.501c.56%200%201.429-.048%201.953-.167%201.94-.453%203.262-1.846%203.262-3.882Zm47.747-11.847-8.097%2020.408h-4.429l-8.109-20.408h5.191l5.192%2014.574%205.108-14.574h5.144Zm-20.218%2010.002c0%20.69-.036%201.262-.155%201.94h-15.943c.631%202.87%202.714%204.728%205.882%204.728%202.131%200%203.607-.882%204.703-2.525h4.87c-1.762%204.144-5.204%206.692-9.657%206.692-6.084%200-10.537-4.858-10.537-10.49%200-6.108%204.524-10.776%2010.335-10.776%206.239%200%2010.442%204.954%2010.502%2010.43Zm-4.763-1.405c-.333-2.846-2.643-4.858-5.691-4.858-2.894%200-5.287%201.929-5.621%204.858h11.312Zm-72.667%203.44c0%204.787-3.287%208.371-9.419%208.371H119.363V64.66c-1.917.274-3.87.69-5.811%201.238l4.537%2011.121h-5.418l-3.596-9.585c-5.144%202.084-10.085%205.216-14.217%209.585h-4.786L101.8%2048.312h4.56l5.68%2013.883a44.112%2044.112%200%200%201%207.323-1.774V48.312h9.084c1.703%200%203.156.143%204.061.393%203.453.929%205.727%203.667%205.727%207.323%200%201.917-.738%204.179-2.81%205.691%203.06%201.56%204.501%204.025%204.501%206.93Zm-15.634-8.667a62.664%2062.664%200%200%201%202.06-.036c1.703.012%203.239.131%204.608.37%201.441-.549%202.357-1.727%202.357-3.537%200-1.941-.881-3.144-2.488-3.667-.548-.18-1.358-.286-2.322-.286h-4.215v7.156Zm-16.55%203.905-3.715-9.894-6.394%2016.502c2.833-2.595%206.263-4.858%2010.109-6.608Zm27.254%204.74c0-2.775-3.131-4.347-8.513-4.418-.715%200-1.441.011-2.191.047v8.252h5.918c2.548%200%204.786-1.37%204.786-3.882Z'%20clip-rule='evenodd'/%3e%3c/g%3e%3cdefs%3e%3clinearGradient%20id='b'%20x1='51.47'%20x2='85.916'%20y1='62.946'%20y2='62.946'%20gradientUnits='userSpaceOnUse'%3e%3cstop%20stop-color='%23CD9F28'/%3e%3cstop%20offset='1'%20stop-color='%23ECD80B'/%3e%3c/linearGradient%3e%3cclipPath%20id='a'%3e%3cpath%20fill='%23fff'%20d='M51.47%2045.728h186.104V80.14H51.47z'/%3e%3c/clipPath%3e%3c/defs%3e%3c/svg%3e)


More from John Deere


Explore Other Assets


© 2026 MaintainX. All rights reserved.