


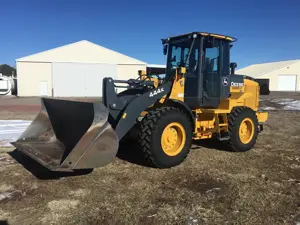
John Deere Tractor 5105
Need answers fast?
Explore the manual using AI.

The John Deere Tractor 5105 is a versatile and reliable agricultural machine designed for various farming tasks. Known for its durability and efficiency, this tractor model offers exceptional performance in both fieldwork and transport applications, making it a preferred choice for farmers and contractors alike.
Turn manuals into instant answers
with your AI-powered assistantTurn manuals into instant answers
with your AI-powered assistant
Manual for John Deere Tractor 5105
Complete asset maintenance, one click away
Get instant access to all the maintenance information you need. Empower technicians to perform preventive maintenance with asset packages, ready to use right out of the box.

Documents & Manuals
Find all the essential guides in one place.
 Tensioning Guide
- Belt-diagram
- C-120 pulleys
+ 13 more

Work Order Templates
Pre-built workflows to keep your asset running smoothly.
- Daily Electrical System Inspection
- Replace Roller and Pulley
- Install Engine B-120
+ 29 more

Procedures
Integrate maintenance plans directly into your work orders.
- Motion Industries
- Applied Industrial Technologies
- Electrical Brothers
+ 5 more

Parts
Access the parts list for your equipment in MaintainX.
- Drive Motor
- B2 Rollers
- Tensioning System
+ 40 more
John Deere Tractor 5105
Create an account to install this asset package.
Maintenance Plans for John Deere Tractor Model 5105
Integrate maintenance plans directly into your work orders in MaintainX.
250 Hourly Maintenance
• Service air cleaner
• Change engine oil and filter
• Replace transmission-hydraulic filter
• Clean and check battery
• Inspect and adjust alternator/fan belt
• Lubricate 3-point hitch
• Check neutral start system
• Check clutch pedal free travel
1. Park on level surface. Chock wheels to prevent machine movement.

600 Hourly Maintenance
Change oil in MFWD axle housing (if equipped)
Tractor positioned on level ground
Drain/fill plugs (B-D) removed
Wheel hubs drained
Oil level mark (A) parallel to the ground
Drain plug (D) installed
Amount of SAE 80W-90 Gear Lubricant filled
Plugs (B and C) installed
Clean engine crankcase vent tube
100 Hourly Maintenance
Replace transmission-hydraulic filter element
1. Remove filter (A). Apply a film of oil to new gasket and install new filter. Hand tighten plus 1/2 turn.
2. Run engine several seconds and recheck transmission-hydraulic oil level.
3. Add transmission-hydraulic oil if required (See Fuels, Lubricants and Coolant section).
Change engine oil and filter
1. Run engine to heat oil. Turn engine off.
2. Remove oil drain plug (A) and drain oil.
3. Replace engine oil filter (B) while changing oil. Apply a film of oil on the new oil filter gasket and install new filter. Hand tighten plus 1/2 turn.
4. Install drain plug.
500 Hourly Maintenance
Fuel Filter Replacement
Fuel shut-off closed
Retaining ring and filter removed
New filter installed with retaining ring hand tight
Fuel shut-off opened and air bled from filter
Sign off on the fuel filter replacement
2000 Hourly / 2 Yearly Maintenance
• Flush cooling system
1. Drain coolant - Remove radiator cap (A). Open drain valve (B) on radiator and attach a drain hose. Route hose to container and drain coolant from radiator. Drain coolant from engine block by removing plug (C).
2. Remove thermostat cover (D), remove thermostat, and install cover (without thermostat). Tighten cap screws to specification.
3. Flush system with water - Close all drain valves/plugs and fill system with clean water. Run engine about 10 minutes to stir up possible rust or sediment. Stop engine and drain water from system before rust and sediment settle.
4. Flush system with radiator cleaner - Close all drain valve/plugs and fill the cooling system with commercial radiator cleaner and water. Follow instructions provided with cleaner. Stop engine and immediately drain system.
5. Flush system with water - Close all drain valves/plugs and fill with clean water to flush the system. Run the engine about 10 minutes, then drain out flushing water.
6. Remove thermostat cover and clean off the gasket material. Apply gasket sealant to new gasket and install thermostat and cover. Tighten cap screws to specification.
7. Fill with fresh coolant - Close all drain valves/plugs and fill with a mixture of antifreeze, soft water, and coolant conditioner as specified in the Fuels, Lubricants, and Coolant section.
8. Check coolant level - Fill radiator to the top of the filler neck. Run the engine until operating temperature is reached. Let the engine cool (preferably overnight) and recheck the coolant level. Coolant level with a cold engine should be at the bottom of the filler neck. When filling the cooling system it may require several operating/cooling periods to stabilize the coolant level in the system. Add make-up coolant to the radiator as needed to bring the coolant level to the correct level.
Unlock efficiency
with MaintainX CoPilot
MaintainX CoPilot is your expert colleague, on call 24/7, helping your team find the answers they need to keep equipment running.
Reduce Unplanned Downtime
Ensure your team follows consistent procedures to minimize equipment failures and costly delays.
Maximize Asset Availability
Keep your assets running longer and more reliably, with standardized maintenance workflows from OEM manuals.
Lower Maintenance Costs
Turn any technician into an expert to streamline operations, maintain more assets, and reduce overall costs.
Thousands of companies manage their assets with MaintainX

'%3e%3cpath%20fill='url(%23b)'%20d='M66.008%2080.068c-5.084-.786-9.763-3.834-12.442-8.68a16.942%2016.942%200%200%201-1.87-5.18c1.096.19%202.203.476%203.298.87%206.525%202.333%2010.836%207.68%2011.014%2012.99ZM51.47%2061.576c.488-5.524%203.62-10.716%208.847-13.597a17.132%2017.132%200%200%201%2011.335-1.882c-.798%208.145-7.43%2014.848-16.038%2015.599-1.417.119-2.799.07-4.144-.12Zm28.564-11.478a17.513%2017.513%200%200%201%203.727%204.62c4.608%208.335%201.584%2018.813-6.75%2023.409a16.988%2016.988%200%200%201-4.359%201.679%2019.624%2019.624%200%200%201-3.977-12.776c.346-7.561%204.942-13.931%2011.36-16.932Z'/%3e%3cpath%20fill='%23110F0D'%20fill-rule='evenodd'%20d='M142.831%2048.324h4.977V77.03h-4.977V48.324Zm27.278%2013.002c.322%201.048.453%202.263.453%203.62v12.073h-4.787V66.208c0-.75-.047-1.572-.154-2.143-.453-2.382-1.822-3.572-4.215-3.572-2.31%200-3.882%201.274-4.43%203.476-.143.596-.226%201.405-.226%202.25v10.8h-4.787V56.623h4.477v2.989c1.536-2.5%203.906-3.43%206.371-3.43%203.488%200%206.263%201.68%207.298%205.144Zm24.636%207.323c0%203.882-2.358%206.525-5.763%207.727-1.298.453-2.632.643-4.62.643h-10.169V48.324h9.085c1.691%200%203.156.143%204.049.38%203.465.93%205.727%203.68%205.727%207.335%200%202.441-.81%204.156-2.762%205.644%202.905%201.417%204.453%203.727%204.453%206.966Zm-15.634-8.656h4.584c1.024%200%201.917-.143%202.536-.417%201.215-.548%201.905-1.608%201.905-3.167%200-1.548-.643-2.572-1.845-3.132-.691-.31-1.762-.452-2.763-.452h-4.417v7.168Zm10.716%208.465c0-1.536-.893-3.37-3.227-3.893-.428-.095-1.036-.143-1.571-.143h-5.918v8.085h5.501c.56%200%201.429-.048%201.953-.167%201.94-.453%203.262-1.846%203.262-3.882Zm47.747-11.847-8.097%2020.408h-4.429l-8.109-20.408h5.191l5.192%2014.574%205.108-14.574h5.144Zm-20.218%2010.002c0%20.69-.036%201.262-.155%201.94h-15.943c.631%202.87%202.714%204.728%205.882%204.728%202.131%200%203.607-.882%204.703-2.525h4.87c-1.762%204.144-5.204%206.692-9.657%206.692-6.084%200-10.537-4.858-10.537-10.49%200-6.108%204.524-10.776%2010.335-10.776%206.239%200%2010.442%204.954%2010.502%2010.43Zm-4.763-1.405c-.333-2.846-2.643-4.858-5.691-4.858-2.894%200-5.287%201.929-5.621%204.858h11.312Zm-72.667%203.44c0%204.787-3.287%208.371-9.419%208.371H119.363V64.66c-1.917.274-3.87.69-5.811%201.238l4.537%2011.121h-5.418l-3.596-9.585c-5.144%202.084-10.085%205.216-14.217%209.585h-4.786L101.8%2048.312h4.56l5.68%2013.883a44.112%2044.112%200%200%201%207.323-1.774V48.312h9.084c1.703%200%203.156.143%204.061.393%203.453.929%205.727%203.667%205.727%207.323%200%201.917-.738%204.179-2.81%205.691%203.06%201.56%204.501%204.025%204.501%206.93Zm-15.634-8.667a62.664%2062.664%200%200%201%202.06-.036c1.703.012%203.239.131%204.608.37%201.441-.549%202.357-1.727%202.357-3.537%200-1.941-.881-3.144-2.488-3.667-.548-.18-1.358-.286-2.322-.286h-4.215v7.156Zm-16.55%203.905-3.715-9.894-6.394%2016.502c2.833-2.595%206.263-4.858%2010.109-6.608Zm27.254%204.74c0-2.775-3.131-4.347-8.513-4.418-.715%200-1.441.011-2.191.047v8.252h5.918c2.548%200%204.786-1.37%204.786-3.882Z'%20clip-rule='evenodd'/%3e%3c/g%3e%3cdefs%3e%3clinearGradient%20id='b'%20x1='51.47'%20x2='85.916'%20y1='62.946'%20y2='62.946'%20gradientUnits='userSpaceOnUse'%3e%3cstop%20stop-color='%23CD9F28'/%3e%3cstop%20offset='1'%20stop-color='%23ECD80B'/%3e%3c/linearGradient%3e%3cclipPath%20id='a'%3e%3cpath%20fill='%23fff'%20d='M51.47%2045.728h186.104V80.14H51.47z'/%3e%3c/clipPath%3e%3c/defs%3e%3c/svg%3e)


More from John Deere


Explore Other Assets


© 2026 MaintainX. All rights reserved.