


Ingersoll Rand Mobile Compressor 9/300HA
Need answers fast?
Explore the manual using AI.
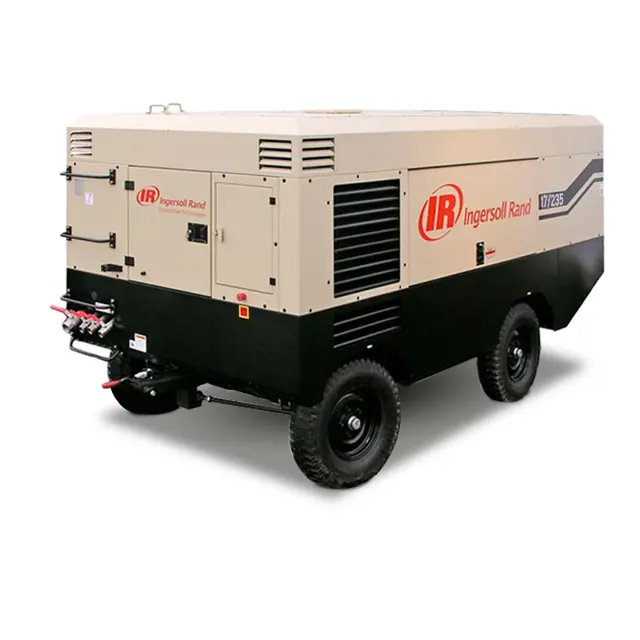
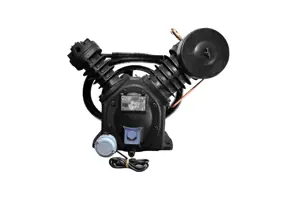
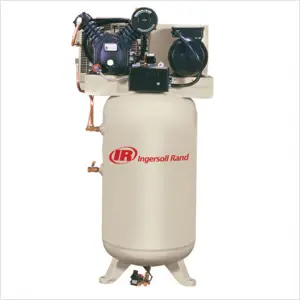
The Ingersoll Rand Mobile Compressor 9/300HA is a robust and efficient industrial air compressor designed for demanding applications. Known for its reliability and performance, this model offers exceptional portability and power, making it ideal for construction and maintenance tasks. Experience superior air delivery with the trusted quality of Ingersoll Rand.
Turn manuals into instant answers
with your AI-powered assistantTurn manuals into instant answers
with your AI-powered assistant
Manual for Ingersoll Rand Mobile Compressor 9/300HA
Complete asset maintenance, one click away
Get instant access to all the maintenance information you need. Empower technicians to perform preventive maintenance with asset packages, ready to use right out of the box.

Documents & Manuals
Find all the essential guides in one place.
 Tensioning Guide
- Belt-diagram
- C-120 pulleys
+ 13 more

Work Order Templates
Pre-built workflows to keep your asset running smoothly.
- Daily Electrical System Inspection
- Replace Roller and Pulley
- Install Engine B-120
+ 29 more

Procedures
Integrate maintenance plans directly into your work orders.
- Motion Industries
- Applied Industrial Technologies
- Electrical Brothers
+ 5 more

Parts
Access the parts list for your equipment in MaintainX.
- Drive Motor
- B2 Rollers
- Tensioning System
+ 40 more
Ingersoll Rand Mobile Compressor 9/300HA
Create an account to install this asset package.
Maintenance Plans for Ingersoll Rand Mobile Compressor Model 9/300HA
Integrate maintenance plans directly into your work orders in MaintainX.
Speed and Pressure Regulation Adjustment
Warning: This procedure requires trained personnel only!
Is the machine started?
Is the service valve adjusted to maintain normal operating discharge pressure and full speed position?
Does the tachometer move away from the full speed position before normal operating discharge pressure is attained?
If yes, turn the adjusting screw ‘A’ clockwise to increase the pressure.
Is the optimum adjustment achieved when the throttle just moves from its full speed position and the pressure increases slightly?
Is the service valve closed?
Has the engine slowed to idle speed?
CAUTION: Never allow the idle pressure to exceed maximum allowable pressure.

6 Monthly / 1000 Hourly Scavenge Line Inspection
Warning: This inspection requires trained personnel with PPE!
Scavenge line clear of any obstruction
Orifice, check valve and hoses examined
No oil carryover into the discharge air
Enter the compressor's hour meter reading
Sign off on the scavenge line inspection
3 Monthly / 3000 Hourly Mobile Compressor Maintenance
Maintenance Tasks
Sign off on the maintenance tasks
500 Hourly Air Filter Element Replacement
Warning: Never remove and replace element(s) when the machine is running.
Cleaned the exterior of the filter housing?
Removed the filter element by releasing the nut?
Is the safety element to be renewed?
Cleaned the interior of the filter housing prior to removing the safety element?
Checked for cracks, holes or any other damage to the element?
Checked the seal at the end of the element and replaced if any sign of damage is evident?
Assembled the new element into the filter housing ensuring that the seal seats properly?
Secured the element in the housing by hand tightening the nut?
3 Monthly / 500 Hourly Compressor Oil Filter Element Replacement
WARNING: Do not remove the filter(s) without first making sure that the machine is stopped and the system has been completely relieved of all air pressure.
1. Removal
• Clean the exterior of the filter housing and remove the spin–on element by turning it in a counter–clockwise direction.
2. Inspection
• Examine the filter element.
CAUTION: If there is any indication of the formation of varnishes, shellacs or lacquers on the filter element, it is a warning that the compressor lubricating and cooling oil has deteriorated and that it should be changed immediately. Refer to LUBRICATION later in this section.
3. Reassembly
• Clean the filter gasket contact area and install the new element by screwing in a clockwise direction until the gasket makes contact with the filter housing. Tighten a further 1/2 to 3/4 of a revolution.
CAUTION: Start the machine and check for leakage before the machine is put back into service.;
Parts for Ingersoll Rand Mobile Compressor 9/300HA
Access the parts list for your equipment in MaintainX.
Pro–Tec, 208 Litre
89292981
Coolant Level Switch
54474572
Pro–Tec, 1 Gal.
36899698
XHP 505, 5 Gal.
54418835
Frame Ground Strap
22132153
Pro–Tec, 208 Litre
89292981
Coolant Level Switch
54474572
Pro–Tec, 1 Gal.
36899698
XHP 505, 5 Gal.
54418835
Frame Ground Strap
22132153
Pro–Tec, 208 Litre
89292981
Coolant Level Switch
54474572
Pro–Tec, 1 Gal.
36899698
XHP 505, 5 Gal.
54418835
Frame Ground Strap
22132153
Unlock efficiency
with MaintainX CoPilot
MaintainX CoPilot is your expert colleague, on call 24/7, helping your team find the answers they need to keep equipment running.
Reduce Unplanned Downtime
Ensure your team follows consistent procedures to minimize equipment failures and costly delays.
Maximize Asset Availability
Keep your assets running longer and more reliably, with standardized maintenance workflows from OEM manuals.
Lower Maintenance Costs
Turn any technician into an expert to streamline operations, maintain more assets, and reduce overall costs.
Thousands of companies manage their assets with MaintainX

'%3e%3cpath%20fill='url(%23b)'%20d='M66.008%2080.068c-5.084-.786-9.763-3.834-12.442-8.68a16.942%2016.942%200%200%201-1.87-5.18c1.096.19%202.203.476%203.298.87%206.525%202.333%2010.836%207.68%2011.014%2012.99ZM51.47%2061.576c.488-5.524%203.62-10.716%208.847-13.597a17.132%2017.132%200%200%201%2011.335-1.882c-.798%208.145-7.43%2014.848-16.038%2015.599-1.417.119-2.799.07-4.144-.12Zm28.564-11.478a17.513%2017.513%200%200%201%203.727%204.62c4.608%208.335%201.584%2018.813-6.75%2023.409a16.988%2016.988%200%200%201-4.359%201.679%2019.624%2019.624%200%200%201-3.977-12.776c.346-7.561%204.942-13.931%2011.36-16.932Z'/%3e%3cpath%20fill='%23110F0D'%20fill-rule='evenodd'%20d='M142.831%2048.324h4.977V77.03h-4.977V48.324Zm27.278%2013.002c.322%201.048.453%202.263.453%203.62v12.073h-4.787V66.208c0-.75-.047-1.572-.154-2.143-.453-2.382-1.822-3.572-4.215-3.572-2.31%200-3.882%201.274-4.43%203.476-.143.596-.226%201.405-.226%202.25v10.8h-4.787V56.623h4.477v2.989c1.536-2.5%203.906-3.43%206.371-3.43%203.488%200%206.263%201.68%207.298%205.144Zm24.636%207.323c0%203.882-2.358%206.525-5.763%207.727-1.298.453-2.632.643-4.62.643h-10.169V48.324h9.085c1.691%200%203.156.143%204.049.38%203.465.93%205.727%203.68%205.727%207.335%200%202.441-.81%204.156-2.762%205.644%202.905%201.417%204.453%203.727%204.453%206.966Zm-15.634-8.656h4.584c1.024%200%201.917-.143%202.536-.417%201.215-.548%201.905-1.608%201.905-3.167%200-1.548-.643-2.572-1.845-3.132-.691-.31-1.762-.452-2.763-.452h-4.417v7.168Zm10.716%208.465c0-1.536-.893-3.37-3.227-3.893-.428-.095-1.036-.143-1.571-.143h-5.918v8.085h5.501c.56%200%201.429-.048%201.953-.167%201.94-.453%203.262-1.846%203.262-3.882Zm47.747-11.847-8.097%2020.408h-4.429l-8.109-20.408h5.191l5.192%2014.574%205.108-14.574h5.144Zm-20.218%2010.002c0%20.69-.036%201.262-.155%201.94h-15.943c.631%202.87%202.714%204.728%205.882%204.728%202.131%200%203.607-.882%204.703-2.525h4.87c-1.762%204.144-5.204%206.692-9.657%206.692-6.084%200-10.537-4.858-10.537-10.49%200-6.108%204.524-10.776%2010.335-10.776%206.239%200%2010.442%204.954%2010.502%2010.43Zm-4.763-1.405c-.333-2.846-2.643-4.858-5.691-4.858-2.894%200-5.287%201.929-5.621%204.858h11.312Zm-72.667%203.44c0%204.787-3.287%208.371-9.419%208.371H119.363V64.66c-1.917.274-3.87.69-5.811%201.238l4.537%2011.121h-5.418l-3.596-9.585c-5.144%202.084-10.085%205.216-14.217%209.585h-4.786L101.8%2048.312h4.56l5.68%2013.883a44.112%2044.112%200%200%201%207.323-1.774V48.312h9.084c1.703%200%203.156.143%204.061.393%203.453.929%205.727%203.667%205.727%207.323%200%201.917-.738%204.179-2.81%205.691%203.06%201.56%204.501%204.025%204.501%206.93Zm-15.634-8.667a62.664%2062.664%200%200%201%202.06-.036c1.703.012%203.239.131%204.608.37%201.441-.549%202.357-1.727%202.357-3.537%200-1.941-.881-3.144-2.488-3.667-.548-.18-1.358-.286-2.322-.286h-4.215v7.156Zm-16.55%203.905-3.715-9.894-6.394%2016.502c2.833-2.595%206.263-4.858%2010.109-6.608Zm27.254%204.74c0-2.775-3.131-4.347-8.513-4.418-.715%200-1.441.011-2.191.047v8.252h5.918c2.548%200%204.786-1.37%204.786-3.882Z'%20clip-rule='evenodd'/%3e%3c/g%3e%3cdefs%3e%3clinearGradient%20id='b'%20x1='51.47'%20x2='85.916'%20y1='62.946'%20y2='62.946'%20gradientUnits='userSpaceOnUse'%3e%3cstop%20stop-color='%23CD9F28'/%3e%3cstop%20offset='1'%20stop-color='%23ECD80B'/%3e%3c/linearGradient%3e%3cclipPath%20id='a'%3e%3cpath%20fill='%23fff'%20d='M51.47%2045.728h186.104V80.14H51.47z'/%3e%3c/clipPath%3e%3c/defs%3e%3c/svg%3e)


More from Ingersoll Rand


Explore Other Assets


© 2026 MaintainX. All rights reserved.