


Hobart More HL600
Need answers fast?
Explore the manual using AI.
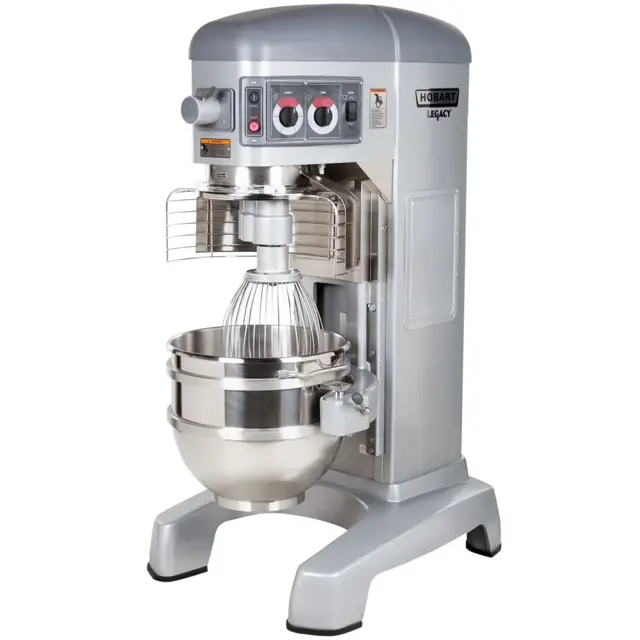
The Hobart More HL600 is a high-performance commercial food processing machine designed for efficiency and reliability. This versatile asset excels in various food preparation tasks, making it an essential tool for restaurants and catering services. Ensure optimal performance with regular maintenance and quality spare parts.
Turn manuals into instant answers
with your AI-powered assistantTurn manuals into instant answers
with your AI-powered assistant
Manual for Hobart More HL600
Complete asset maintenance, one click away
Get instant access to all the maintenance information you need. Empower technicians to perform preventive maintenance with asset packages, ready to use right out of the box.

Documents & Manuals
Find all the essential guides in one place.
 Tensioning Guide
- Belt-diagram
- C-120 pulleys
+ 13 more

Work Order Templates
Pre-built workflows to keep your asset running smoothly.
- Daily Electrical System Inspection
- Replace Roller and Pulley
- Install Engine B-120
+ 29 more

Procedures
Integrate maintenance plans directly into your work orders.
- Motion Industries
- Applied Industrial Technologies
- Electrical Brothers
+ 5 more

Parts
Access the parts list for your equipment in MaintainX.
- Drive Motor
- B2 Rollers
- Tensioning System
+ 40 more
Hobart More HL600
Create an account to install this asset package.
Maintenance Plans for Hobart More Model HL600
Integrate maintenance plans directly into your work orders in MaintainX.
Wire Cage Cleaning
- Remove and clean wire cage:
1. Lower the bowl. Remove the agitator and bowl
2. While holding the wire cage securely with both hands, rotate it to your left until the front-center retainer shoe reaches the gap in the circular ridge of the planetary drip cup
3. Lower the front of the wire cage and move the wire cage slightly to the rear so the rear retainer shoes clear the ridge of the drip cup. The wire cage can now be removed
4. Wash the wire cage in a sink, rinse with clear water, and dry with a clean cloth
5. The stainless steel splash guard can be wiped off and/or washed with a cloth or sponge using warm, soapy water. Rinse with clear water and dry with a clean cloth
Reinstall Wire Cage:
1. Position the ring of the wire cage so the front-center retainer shoe is positioned below the gap in the circular ridge of the planetary drip cup
2. Position the grooves so the rear retainer shoes straddle the circular ridge on the planetary drip cup

1 Daily Mixer Cleaning
WARNING! Disconnect the electrical power to the mixer and follow lockout / tagout procedures
Clean the mixer
New mixer bowls and accessories (beaters, whips, and dough arms) should be thoroughly washed with hot water and a mild soap solution, rinsed with either a mild soda or vinegar solution and thoroughly rinsed with clear water before being used
The mixer should be thoroughly cleaned daily. DO NOT use a hose to clean the mixer; it should be washed with a clean, damp cloth. The base allows ample room for cleaning under the mixer. The apron may be removed for cleaning by loosening the thumb screws. DO NOT wipe down slideways when cleaning
The drip cup-splash guard assembly should be removed periodically and wiped clean
For cleaning the wire cage refer to the Wire Cage section
Sign off on the daily mixer cleaning
Agitator Maintenance
Agitator Clearance Check
Agitator not touching the bowl
Select the agitator model
Enter the clearance between the bottom of the bowl and the agitator in mm
Bowl and beater not coming into contact before the bowl support reaches its stop
Adjust the Bowl/Agitator Clearance
Apron removed
Stop screw adjusted
Locking nut tightened while holding the stop screw
Initial Mixer Check
- Perform checks before use
WARNING! To avoid risk of serious injury, keep hands, feet, clothing, and utensils away from the bowl, bowl support, slideways, and agitator when the mixer is in operation or when any of the components are moving
WARNING! This food mixer is only for professional use by properly trained persons
WARNING! Ensure operators have read and understood this manual and have received proper training
WARNING! Do not use the mixer without the interlocked wire cage in place
The Legacy+® mixer is equipped with SmartTimer™ controls and a power bowl lift. Other operating parts and their functions are described throughout the Operation section
- The wire cage must be in position or the mixer will not operate
- The bowl must stay in the locked position on the bowl support or the mixer will not operate
- If the bowl support is not all the way up (mix position), the mixer will not operate unless the START button is pressed and held
1 Yearly Transmission Belt Maintenance
- Inspect the transmission belt yearly for wear and replace by a Hobart Service Technician if worn
- Check transmission oil level
1. To check the oil level, remove the top cover, which is secured by two screws
2. Remove the Transmission Fill Plug and check the oil level
3. If the oil level is below the line on the oil dipstick, add a small amount of the recommended transmission oil until it returns to the proper level
4. Do not overfill the transmission, as leakage may result. Contact your local Hobart Service Office for the recommended transmission oil;
Parts for Hobart More HL600
Access the parts list for your equipment in MaintainX.
Lubrication oil Lubriplate
630AA
Lubrication oil Lubriplate
630AA
Lubrication oil Lubriplate
630AA
Unlock efficiency
with MaintainX CoPilot
MaintainX CoPilot is your expert colleague, on call 24/7, helping your team find the answers they need to keep equipment running.
Reduce Unplanned Downtime
Ensure your team follows consistent procedures to minimize equipment failures and costly delays.
Maximize Asset Availability
Keep your assets running longer and more reliably, with standardized maintenance workflows from OEM manuals.
Lower Maintenance Costs
Turn any technician into an expert to streamline operations, maintain more assets, and reduce overall costs.
Thousands of companies manage their assets with MaintainX

'%3e%3cpath%20fill='url(%23b)'%20d='M66.008%2080.068c-5.084-.786-9.763-3.834-12.442-8.68a16.942%2016.942%200%200%201-1.87-5.18c1.096.19%202.203.476%203.298.87%206.525%202.333%2010.836%207.68%2011.014%2012.99ZM51.47%2061.576c.488-5.524%203.62-10.716%208.847-13.597a17.132%2017.132%200%200%201%2011.335-1.882c-.798%208.145-7.43%2014.848-16.038%2015.599-1.417.119-2.799.07-4.144-.12Zm28.564-11.478a17.513%2017.513%200%200%201%203.727%204.62c4.608%208.335%201.584%2018.813-6.75%2023.409a16.988%2016.988%200%200%201-4.359%201.679%2019.624%2019.624%200%200%201-3.977-12.776c.346-7.561%204.942-13.931%2011.36-16.932Z'/%3e%3cpath%20fill='%23110F0D'%20fill-rule='evenodd'%20d='M142.831%2048.324h4.977V77.03h-4.977V48.324Zm27.278%2013.002c.322%201.048.453%202.263.453%203.62v12.073h-4.787V66.208c0-.75-.047-1.572-.154-2.143-.453-2.382-1.822-3.572-4.215-3.572-2.31%200-3.882%201.274-4.43%203.476-.143.596-.226%201.405-.226%202.25v10.8h-4.787V56.623h4.477v2.989c1.536-2.5%203.906-3.43%206.371-3.43%203.488%200%206.263%201.68%207.298%205.144Zm24.636%207.323c0%203.882-2.358%206.525-5.763%207.727-1.298.453-2.632.643-4.62.643h-10.169V48.324h9.085c1.691%200%203.156.143%204.049.38%203.465.93%205.727%203.68%205.727%207.335%200%202.441-.81%204.156-2.762%205.644%202.905%201.417%204.453%203.727%204.453%206.966Zm-15.634-8.656h4.584c1.024%200%201.917-.143%202.536-.417%201.215-.548%201.905-1.608%201.905-3.167%200-1.548-.643-2.572-1.845-3.132-.691-.31-1.762-.452-2.763-.452h-4.417v7.168Zm10.716%208.465c0-1.536-.893-3.37-3.227-3.893-.428-.095-1.036-.143-1.571-.143h-5.918v8.085h5.501c.56%200%201.429-.048%201.953-.167%201.94-.453%203.262-1.846%203.262-3.882Zm47.747-11.847-8.097%2020.408h-4.429l-8.109-20.408h5.191l5.192%2014.574%205.108-14.574h5.144Zm-20.218%2010.002c0%20.69-.036%201.262-.155%201.94h-15.943c.631%202.87%202.714%204.728%205.882%204.728%202.131%200%203.607-.882%204.703-2.525h4.87c-1.762%204.144-5.204%206.692-9.657%206.692-6.084%200-10.537-4.858-10.537-10.49%200-6.108%204.524-10.776%2010.335-10.776%206.239%200%2010.442%204.954%2010.502%2010.43Zm-4.763-1.405c-.333-2.846-2.643-4.858-5.691-4.858-2.894%200-5.287%201.929-5.621%204.858h11.312Zm-72.667%203.44c0%204.787-3.287%208.371-9.419%208.371H119.363V64.66c-1.917.274-3.87.69-5.811%201.238l4.537%2011.121h-5.418l-3.596-9.585c-5.144%202.084-10.085%205.216-14.217%209.585h-4.786L101.8%2048.312h4.56l5.68%2013.883a44.112%2044.112%200%200%201%207.323-1.774V48.312h9.084c1.703%200%203.156.143%204.061.393%203.453.929%205.727%203.667%205.727%207.323%200%201.917-.738%204.179-2.81%205.691%203.06%201.56%204.501%204.025%204.501%206.93Zm-15.634-8.667a62.664%2062.664%200%200%201%202.06-.036c1.703.012%203.239.131%204.608.37%201.441-.549%202.357-1.727%202.357-3.537%200-1.941-.881-3.144-2.488-3.667-.548-.18-1.358-.286-2.322-.286h-4.215v7.156Zm-16.55%203.905-3.715-9.894-6.394%2016.502c2.833-2.595%206.263-4.858%2010.109-6.608Zm27.254%204.74c0-2.775-3.131-4.347-8.513-4.418-.715%200-1.441.011-2.191.047v8.252h5.918c2.548%200%204.786-1.37%204.786-3.882Z'%20clip-rule='evenodd'/%3e%3c/g%3e%3cdefs%3e%3clinearGradient%20id='b'%20x1='51.47'%20x2='85.916'%20y1='62.946'%20y2='62.946'%20gradientUnits='userSpaceOnUse'%3e%3cstop%20stop-color='%23CD9F28'/%3e%3cstop%20offset='1'%20stop-color='%23ECD80B'/%3e%3c/linearGradient%3e%3cclipPath%20id='a'%3e%3cpath%20fill='%23fff'%20d='M51.47%2045.728h186.104V80.14H51.47z'/%3e%3c/clipPath%3e%3c/defs%3e%3c/svg%3e)


More from Hobart


Explore Other Assets


© 2026 MaintainX. All rights reserved.