


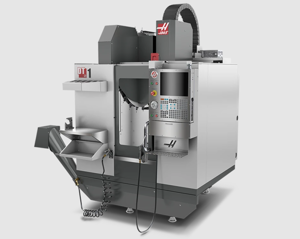
Haas Automation CNC Horizontal Machining Center HS-6
Need answers fast?
Explore the manual using AI.
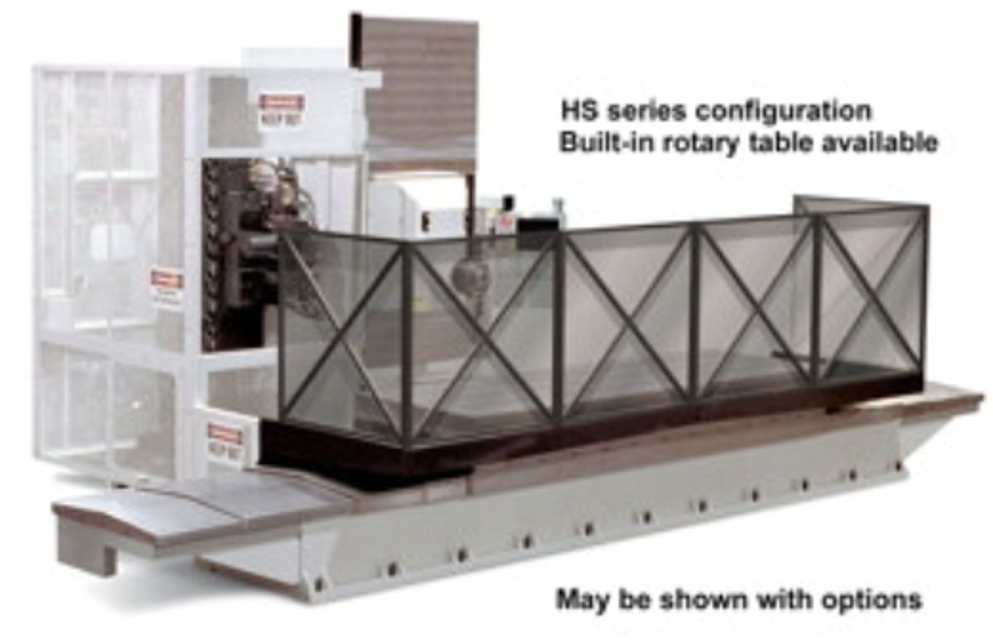
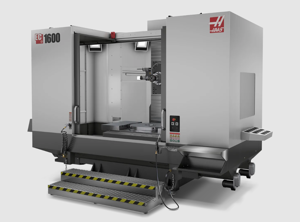
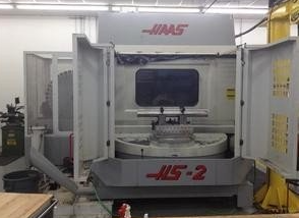
The Haas Automation CNC Horizontal Machining Center HS-6 is a high-performance machining solution designed for precision and efficiency in industrial applications. This advanced CNC machine offers robust features and reliable operation, making it ideal for a variety of machining tasks in manufacturing environments.
Turn manuals into instant answers
with your AI-powered assistantTurn manuals into instant answers
with your AI-powered assistant
Manual for Haas Automation CNC Horizontal Machining Center HS-6
Complete asset maintenance, one click away
Get instant access to all the maintenance information you need. Empower technicians to perform preventive maintenance with asset packages, ready to use right out of the box.

Documents & Manuals
Find all the essential guides in one place.
 Tensioning Guide
- Belt-diagram
- C-120 pulleys
+ 13 more

Work Order Templates
Pre-built workflows to keep your asset running smoothly.
- Daily Electrical System Inspection
- Replace Roller and Pulley
- Install Engine B-120
+ 29 more

Procedures
Integrate maintenance plans directly into your work orders.
- Motion Industries
- Applied Industrial Technologies
- Electrical Brothers
+ 5 more

Parts
Access the parts list for your equipment in MaintainX.
- Drive Motor
- B2 Rollers
- Tensioning System
+ 40 more
Haas Automation CNC Horizontal Machining Center HS-6
Create an account to install this asset package.
Maintenance Plans for Haas Automation CNC Horizontal Machining Center Model HS-6
Integrate maintenance plans directly into your work orders in MaintainX.
Oil Filter Lubrication
Warning: This procedure requires trained personnel with PPE!
Remove the screws that hold the oil reservoir to the pump body, carefully lower the reservoir and set aside.
Use a strap wrench, pipe wrench or adjustable pliers to unscrew the end cap. Use a screwdriver or similar tool to stop the filter from turning while the end cap is removed.
Remove the oil filter element from the filter body once the end cap is removed.
Clean the inside of the filter housing and the filter end cap as required.
Install the new oil filter element (p/n 94-3059), O-ring and the end cap. Use the same tools that were used to remove the filter end cap, to tighten it - Do Not Over Tighten.
Replace the oil reservoir; ensure the gasket seats properly between the reservoir and the top flange.
Sign off on the oil filter lubrication

1 Daily CNC Horizontal Machining Center Maintenance
Check coolant level
Check way lube lubrication tank level
Clean chips from way covers and bottom pan
Clean chips from tool changer
Wipe spindle taper with a clean cloth rag and apply light oil
Sign off on the daily CNC horizontal machining center maintenance
2 Yearly CNC Horizontal Machining Center Maintenance
• Replace air filter on control box every 2 years.
• EC-400 Replace the Rotary A-axis oil
1. Remove the fourteen (14) BHCS on the right Z-axis way cover at the receiver end and slide it toward the column.
2. Remove the left Z-axis way cover: Jog the Z-axis all the way toward the column and rotate the H-frame 45° counter clockwise. Remove the thirteen (13) BHCS that fasten the waycover to the receiver and remove it through the door at the control pendant.
3. Disconnect the reservoir at the rotary indexer end and plug the end of the hose.
4. Remove the drain plug on the opposite side of the rotary indexer. Replug the hole when the oil has drained.
5. Remove the air escape hole plug on the side of the platter.
6. Fill the rotary table until oil begins to escape from the air escape hole and plug it.
7. Replace the reservoir hose and the way covers. Command the receiver 180° to 0° repeatedly for fifteen minutes.
6 Monthly CNC Horizontal Machining Center Maintenance
Coolant replaced and coolant tank cleaned?
All hoses and lubrication lines checked for cracking?
Rotary A-axis checked and oil added if necessary?
Parts lubricated with red grease
Arm Shaft lubricated with Moly grease?
Sign off on the maintenance
1 Weekly CNC Horizontal Machining Center Maintenance
• Check Through the Spindle Coolant (TSC) filters. Clean or replace element if needed.
• Check for proper operation of auto drain on filter regulator.
• On machines with the TSC option, clean the chip basket on the coolant tank.
Remove the tank cover and remove any sediment inside the tank. Disconnect the coolant pump from the cabinet and power off the machine before working on the coolant tank.
Do this MONTHLY for machines without the TSC option.
• Check air gauge/regulator for 85 psi. Check the spindle air pressure regulator for 17 psi. For 15K-spindle machines, check spindle air pressure regulator for 20 psi.
• For machines with the TSC option, place a dab of grease on the V-flange of tools.
Do this MONTHLY for machines without the TSC option.
• Clean exterior surfaces with mild cleaner. DO NOT use solvents.
Parts for Haas Automation CNC Horizontal Machining Center HS-6
Access the parts list for your equipment in MaintainX.
Cam Backlash Adjuster (Hs3R)
20-6048
Tube Backlash Adjuster (Hs3R)
20-6047
Push Block (Hs3R)
20-6005
Yasakawa Motor Key
22-2627
Machined Platter
20-6101
Cam Backlash Adjuster (Hs3R)
20-6048
Tube Backlash Adjuster (Hs3R)
20-6047
Push Block (Hs3R)
20-6005
Yasakawa Motor Key
22-2627
Machined Platter
20-6101
Cam Backlash Adjuster (Hs3R)
20-6048
Tube Backlash Adjuster (Hs3R)
20-6047
Push Block (Hs3R)
20-6005
Yasakawa Motor Key
22-2627
Machined Platter
20-6101
Unlock efficiency
with MaintainX CoPilot
MaintainX CoPilot is your expert colleague, on call 24/7, helping your team find the answers they need to keep equipment running.
Reduce Unplanned Downtime
Ensure your team follows consistent procedures to minimize equipment failures and costly delays.
Maximize Asset Availability
Keep your assets running longer and more reliably, with standardized maintenance workflows from OEM manuals.
Lower Maintenance Costs
Turn any technician into an expert to streamline operations, maintain more assets, and reduce overall costs.
Thousands of companies manage their assets with MaintainX

'%3e%3cpath%20fill='url(%23b)'%20d='M66.008%2080.068c-5.084-.786-9.763-3.834-12.442-8.68a16.942%2016.942%200%200%201-1.87-5.18c1.096.19%202.203.476%203.298.87%206.525%202.333%2010.836%207.68%2011.014%2012.99ZM51.47%2061.576c.488-5.524%203.62-10.716%208.847-13.597a17.132%2017.132%200%200%201%2011.335-1.882c-.798%208.145-7.43%2014.848-16.038%2015.599-1.417.119-2.799.07-4.144-.12Zm28.564-11.478a17.513%2017.513%200%200%201%203.727%204.62c4.608%208.335%201.584%2018.813-6.75%2023.409a16.988%2016.988%200%200%201-4.359%201.679%2019.624%2019.624%200%200%201-3.977-12.776c.346-7.561%204.942-13.931%2011.36-16.932Z'/%3e%3cpath%20fill='%23110F0D'%20fill-rule='evenodd'%20d='M142.831%2048.324h4.977V77.03h-4.977V48.324Zm27.278%2013.002c.322%201.048.453%202.263.453%203.62v12.073h-4.787V66.208c0-.75-.047-1.572-.154-2.143-.453-2.382-1.822-3.572-4.215-3.572-2.31%200-3.882%201.274-4.43%203.476-.143.596-.226%201.405-.226%202.25v10.8h-4.787V56.623h4.477v2.989c1.536-2.5%203.906-3.43%206.371-3.43%203.488%200%206.263%201.68%207.298%205.144Zm24.636%207.323c0%203.882-2.358%206.525-5.763%207.727-1.298.453-2.632.643-4.62.643h-10.169V48.324h9.085c1.691%200%203.156.143%204.049.38%203.465.93%205.727%203.68%205.727%207.335%200%202.441-.81%204.156-2.762%205.644%202.905%201.417%204.453%203.727%204.453%206.966Zm-15.634-8.656h4.584c1.024%200%201.917-.143%202.536-.417%201.215-.548%201.905-1.608%201.905-3.167%200-1.548-.643-2.572-1.845-3.132-.691-.31-1.762-.452-2.763-.452h-4.417v7.168Zm10.716%208.465c0-1.536-.893-3.37-3.227-3.893-.428-.095-1.036-.143-1.571-.143h-5.918v8.085h5.501c.56%200%201.429-.048%201.953-.167%201.94-.453%203.262-1.846%203.262-3.882Zm47.747-11.847-8.097%2020.408h-4.429l-8.109-20.408h5.191l5.192%2014.574%205.108-14.574h5.144Zm-20.218%2010.002c0%20.69-.036%201.262-.155%201.94h-15.943c.631%202.87%202.714%204.728%205.882%204.728%202.131%200%203.607-.882%204.703-2.525h4.87c-1.762%204.144-5.204%206.692-9.657%206.692-6.084%200-10.537-4.858-10.537-10.49%200-6.108%204.524-10.776%2010.335-10.776%206.239%200%2010.442%204.954%2010.502%2010.43Zm-4.763-1.405c-.333-2.846-2.643-4.858-5.691-4.858-2.894%200-5.287%201.929-5.621%204.858h11.312Zm-72.667%203.44c0%204.787-3.287%208.371-9.419%208.371H119.363V64.66c-1.917.274-3.87.69-5.811%201.238l4.537%2011.121h-5.418l-3.596-9.585c-5.144%202.084-10.085%205.216-14.217%209.585h-4.786L101.8%2048.312h4.56l5.68%2013.883a44.112%2044.112%200%200%201%207.323-1.774V48.312h9.084c1.703%200%203.156.143%204.061.393%203.453.929%205.727%203.667%205.727%207.323%200%201.917-.738%204.179-2.81%205.691%203.06%201.56%204.501%204.025%204.501%206.93Zm-15.634-8.667a62.664%2062.664%200%200%201%202.06-.036c1.703.012%203.239.131%204.608.37%201.441-.549%202.357-1.727%202.357-3.537%200-1.941-.881-3.144-2.488-3.667-.548-.18-1.358-.286-2.322-.286h-4.215v7.156Zm-16.55%203.905-3.715-9.894-6.394%2016.502c2.833-2.595%206.263-4.858%2010.109-6.608Zm27.254%204.74c0-2.775-3.131-4.347-8.513-4.418-.715%200-1.441.011-2.191.047v8.252h5.918c2.548%200%204.786-1.37%204.786-3.882Z'%20clip-rule='evenodd'/%3e%3c/g%3e%3cdefs%3e%3clinearGradient%20id='b'%20x1='51.47'%20x2='85.916'%20y1='62.946'%20y2='62.946'%20gradientUnits='userSpaceOnUse'%3e%3cstop%20stop-color='%23CD9F28'/%3e%3cstop%20offset='1'%20stop-color='%23ECD80B'/%3e%3c/linearGradient%3e%3cclipPath%20id='a'%3e%3cpath%20fill='%23fff'%20d='M51.47%2045.728h186.104V80.14H51.47z'/%3e%3c/clipPath%3e%3c/defs%3e%3c/svg%3e)


More from Haas Automation


Explore Other Assets


© 2026 MaintainX. All rights reserved.