


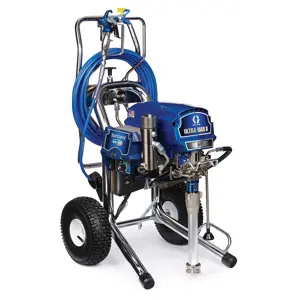
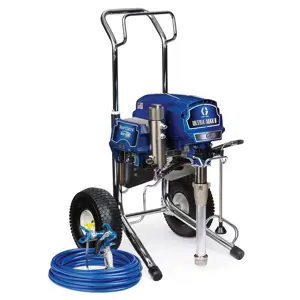
Graco Electric Airless Sprayer Ultimate MX II 695 Standard Hi-Boy
Need answers fast?
Explore the manual using AI.

Turn manuals into instant answers
with your AI-powered assistantTurn manuals into instant answers
with your AI-powered assistant
Manual for Graco Electric Airless Sprayer Ultimate MX II 695 Standard Hi-Boy
Complete asset maintenance, one click away
Get instant access to all the maintenance information you need. Empower technicians to perform preventive maintenance with asset packages, ready to use right out of the box.

Documents & Manuals
Find all the essential guides in one place.
 Tensioning Guide
- Belt-diagram
- C-120 pulleys
+ 13 more

Work Order Templates
Pre-built workflows to keep your asset running smoothly.
- Daily Electrical System Inspection
- Replace Roller and Pulley
- Install Engine B-120
+ 29 more

Procedures
Integrate maintenance plans directly into your work orders.
- Motion Industries
- Applied Industrial Technologies
- Electrical Brothers
+ 5 more

Parts
Access the parts list for your equipment in MaintainX.
- Drive Motor
- B2 Rollers
- Tensioning System
+ 40 more
Graco Electric Airless Sprayer Ultimate MX II 695 Standard Hi-Boy
Create an account to install this asset package.
Maintenance Plans for Graco Electric Airless Sprayer Model Ultimate MX II 695 Standard Hi-Boy
Integrate maintenance plans directly into your work orders in MaintainX.
Sprayer Cleaning
Perform Pressure Relief Procedure
Remove Spray Tip Guard and Spray Tip
Remove Suction Tube and Drain Tube from paint
Place Suction Tube in appropriate flushing fluid
Place Drain Tube in waste pail
Flush Drain Tube and pump
Turn Pressure Control Knob to OFF setting
Hold Spray Gun against a grounded metal waste pail
Disengage Trigger Lock

Battery Replacement
Turn sprayer OFF and disconnect power
Remove the control box cover
Remove black battery cover with a philips screwdriver
Slide battery out of the holder, to the left
Replace battery with a new CR2032 battery
Place the battery cover back on the unit
Hook the clip under the control board. NOTE: The cover should not move
Tighten the screw back into place on the battery cover
Close and screw the control box cover back on the unit
Sprayer Throat Packing Adjustment
Warning: This adjustment should be performed by trained personnel only!
Check if pump packing is leaking
If pump packing is leaking, proceed to the next step. If not, end the procedure.
Enter the amount of operation (in gallons) before the leakage started
Tighten the packing nut until leakage stops or lessens
Sign off on the sprayer throat packing adjustment
Spray Tip Clog Clearing
Warning: Ensure the Spray Tip is fully seated and pushed all the way into the Spray Tip Guard.
Engage Trigger Lock
Rotate Spray Tip to UNCLOG position
Disengage Trigger Lock
Trigger Spray Gun at waste area to clear clog
Note: If Spray Tip is difficult to rotate when turning to the UNCLOG position, perform Pressure Relief Procedure, then turn Prime/Spray Valve horizontal to SPRAY position and repeat step 1.
Engage Trigger Lock
Rotate Spray Tip back to SPRAY position
Disengage Trigger Lock and continue spraying
1 Daily Sprayer Inspection
Inspect/clean sprayer filter
Inspect/clean fluid inlet strainer
Inspect/clean Spray gun filter
Inspect motor shield vents for blockage
Fill TSL by adding through TSL fill point
Sign off on the daily sprayer inspection
Parts for Graco Electric Airless Sprayer Ultimate MX II 695 Standard Hi-Boy
Access the parts list for your equipment in MaintainX.
Screw, Mach, Torx, Hex (Ref 6)
15C753
Clip, Retaining (Ref 8)
15E891
Washer, Flat (Ref 10)
156306
Wheel, Pneumatic (Ref 11*)
119420
Wash, Lock, Spring (Ref 12)
106115
Screw, Mach, Torx, Hex (Ref 6)
15C753
Clip, Retaining (Ref 8)
15E891
Washer, Flat (Ref 10)
156306
Wheel, Pneumatic (Ref 11*)
119420
Wash, Lock, Spring (Ref 12)
106115
Screw, Mach, Torx, Hex (Ref 6)
15C753
Clip, Retaining (Ref 8)
15E891
Washer, Flat (Ref 10)
156306
Wheel, Pneumatic (Ref 11*)
119420
Wash, Lock, Spring (Ref 12)
106115
Unlock efficiency
with MaintainX CoPilot
MaintainX CoPilot is your expert colleague, on call 24/7, helping your team find the answers they need to keep equipment running.
Reduce Unplanned Downtime
Ensure your team follows consistent procedures to minimize equipment failures and costly delays.
Maximize Asset Availability
Keep your assets running longer and more reliably, with standardized maintenance workflows from OEM manuals.
Lower Maintenance Costs
Turn any technician into an expert to streamline operations, maintain more assets, and reduce overall costs.
Thousands of companies manage their assets with MaintainX

'%3e%3cpath%20fill='url(%23b)'%20d='M66.008%2080.068c-5.084-.786-9.763-3.834-12.442-8.68a16.942%2016.942%200%200%201-1.87-5.18c1.096.19%202.203.476%203.298.87%206.525%202.333%2010.836%207.68%2011.014%2012.99ZM51.47%2061.576c.488-5.524%203.62-10.716%208.847-13.597a17.132%2017.132%200%200%201%2011.335-1.882c-.798%208.145-7.43%2014.848-16.038%2015.599-1.417.119-2.799.07-4.144-.12Zm28.564-11.478a17.513%2017.513%200%200%201%203.727%204.62c4.608%208.335%201.584%2018.813-6.75%2023.409a16.988%2016.988%200%200%201-4.359%201.679%2019.624%2019.624%200%200%201-3.977-12.776c.346-7.561%204.942-13.931%2011.36-16.932Z'/%3e%3cpath%20fill='%23110F0D'%20fill-rule='evenodd'%20d='M142.831%2048.324h4.977V77.03h-4.977V48.324Zm27.278%2013.002c.322%201.048.453%202.263.453%203.62v12.073h-4.787V66.208c0-.75-.047-1.572-.154-2.143-.453-2.382-1.822-3.572-4.215-3.572-2.31%200-3.882%201.274-4.43%203.476-.143.596-.226%201.405-.226%202.25v10.8h-4.787V56.623h4.477v2.989c1.536-2.5%203.906-3.43%206.371-3.43%203.488%200%206.263%201.68%207.298%205.144Zm24.636%207.323c0%203.882-2.358%206.525-5.763%207.727-1.298.453-2.632.643-4.62.643h-10.169V48.324h9.085c1.691%200%203.156.143%204.049.38%203.465.93%205.727%203.68%205.727%207.335%200%202.441-.81%204.156-2.762%205.644%202.905%201.417%204.453%203.727%204.453%206.966Zm-15.634-8.656h4.584c1.024%200%201.917-.143%202.536-.417%201.215-.548%201.905-1.608%201.905-3.167%200-1.548-.643-2.572-1.845-3.132-.691-.31-1.762-.452-2.763-.452h-4.417v7.168Zm10.716%208.465c0-1.536-.893-3.37-3.227-3.893-.428-.095-1.036-.143-1.571-.143h-5.918v8.085h5.501c.56%200%201.429-.048%201.953-.167%201.94-.453%203.262-1.846%203.262-3.882Zm47.747-11.847-8.097%2020.408h-4.429l-8.109-20.408h5.191l5.192%2014.574%205.108-14.574h5.144Zm-20.218%2010.002c0%20.69-.036%201.262-.155%201.94h-15.943c.631%202.87%202.714%204.728%205.882%204.728%202.131%200%203.607-.882%204.703-2.525h4.87c-1.762%204.144-5.204%206.692-9.657%206.692-6.084%200-10.537-4.858-10.537-10.49%200-6.108%204.524-10.776%2010.335-10.776%206.239%200%2010.442%204.954%2010.502%2010.43Zm-4.763-1.405c-.333-2.846-2.643-4.858-5.691-4.858-2.894%200-5.287%201.929-5.621%204.858h11.312Zm-72.667%203.44c0%204.787-3.287%208.371-9.419%208.371H119.363V64.66c-1.917.274-3.87.69-5.811%201.238l4.537%2011.121h-5.418l-3.596-9.585c-5.144%202.084-10.085%205.216-14.217%209.585h-4.786L101.8%2048.312h4.56l5.68%2013.883a44.112%2044.112%200%200%201%207.323-1.774V48.312h9.084c1.703%200%203.156.143%204.061.393%203.453.929%205.727%203.667%205.727%207.323%200%201.917-.738%204.179-2.81%205.691%203.06%201.56%204.501%204.025%204.501%206.93Zm-15.634-8.667a62.664%2062.664%200%200%201%202.06-.036c1.703.012%203.239.131%204.608.37%201.441-.549%202.357-1.727%202.357-3.537%200-1.941-.881-3.144-2.488-3.667-.548-.18-1.358-.286-2.322-.286h-4.215v7.156Zm-16.55%203.905-3.715-9.894-6.394%2016.502c2.833-2.595%206.263-4.858%2010.109-6.608Zm27.254%204.74c0-2.775-3.131-4.347-8.513-4.418-.715%200-1.441.011-2.191.047v8.252h5.918c2.548%200%204.786-1.37%204.786-3.882Z'%20clip-rule='evenodd'/%3e%3c/g%3e%3cdefs%3e%3clinearGradient%20id='b'%20x1='51.47'%20x2='85.916'%20y1='62.946'%20y2='62.946'%20gradientUnits='userSpaceOnUse'%3e%3cstop%20stop-color='%23CD9F28'/%3e%3cstop%20offset='1'%20stop-color='%23ECD80B'/%3e%3c/linearGradient%3e%3cclipPath%20id='a'%3e%3cpath%20fill='%23fff'%20d='M51.47%2045.728h186.104V80.14H51.47z'/%3e%3c/clipPath%3e%3c/defs%3e%3c/svg%3e)


More from Graco


Explore Other Assets


© 2026 MaintainX. All rights reserved.