


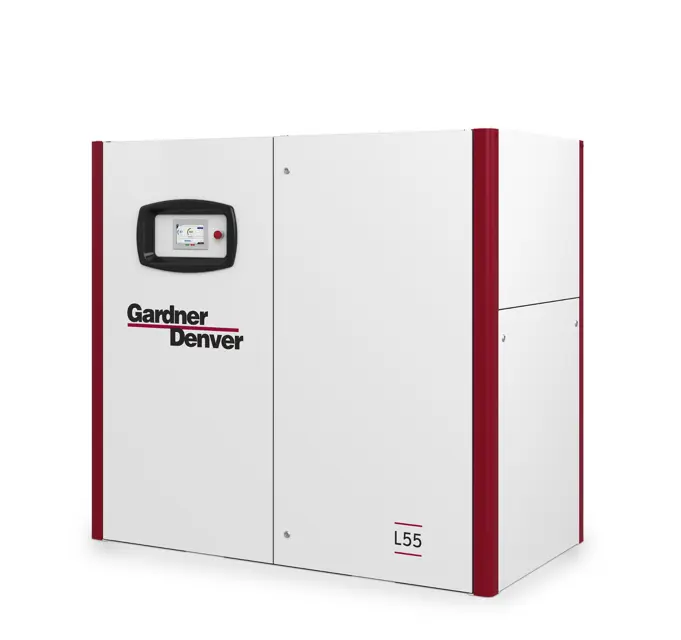
Gardner Denver Base Mounted Compressor LRS90W
Need answers fast?
Explore the manual using AI.
Turn manuals into instant answers
with your AI-powered assistantTurn manuals into instant answers
with your AI-powered assistant
Manual for Gardner Denver Base Mounted Compressor LRS90W
Complete asset maintenance, one click away
Get instant access to all the maintenance information you need. Empower technicians to perform preventive maintenance with asset packages, ready to use right out of the box.

Documents & Manuals
Find all the essential guides in one place.
 Tensioning Guide
- Belt-diagram
- C-120 pulleys
+ 13 more

Work Order Templates
Pre-built workflows to keep your asset running smoothly.
- Daily Electrical System Inspection
- Replace Roller and Pulley
- Install Engine B-120
+ 29 more

Procedures
Integrate maintenance plans directly into your work orders.
- Motion Industries
- Applied Industrial Technologies
- Electrical Brothers
+ 5 more

Parts
Access the parts list for your equipment in MaintainX.
- Drive Motor
- B2 Rollers
- Tensioning System
+ 40 more
Gardner Denver Base Mounted Compressor LRS90W
Create an account to install this asset package.
Maintenance Plans for Gardner Denver Base Mounted Compressor Model LRS90W
Integrate maintenance plans directly into your work orders in MaintainX.
8 Hourly Compressor Inspection
Danger
High voltage – Hazard of shock, burn, or death
Be careful with electricity: only work on screw compressors which are not powered.
Only for L90RS-L132RS: There is a risk of electric shock from charged capacitors! Disconnect the systemfrom the mains and wait 10 minutes before touching electrical components.
The power capacitors need this time to discharge.
Every 8 hours operation 1. Check air/oil reservoir oil level, add oil if required. DO NOT MIX LUBRICANTS.
2. Check operation of the machine, is it loadingand unloading properly.
3. Check discharge pressure and temperature.
4. Check control panel for advisory text messages.

2000 Hourly / 6 Monthly Oil Filter Cartridge Replacement
Danger! Air/oil under pressure will cause severe personal injury or death. Shut down the compressor, relieve the system of all pressure, disconnect, lockout and tagout the power supply to the compressor package before removing valves, caps, plugs, fittings, bolts and filters.
NOTICE!: Dispose of the oil filter cartridge properly - it is hazardous waste! Look for leaks!
Caution! Fire hazard and slip hazard! Do not spill any oil! Look for leaks! Immediately take care of any spilled oil!
Switch off the screw compressor unit, secure it against an accidental restart and ensure that it is depressurized.
Wait at least 5 minutes until the oil has settled, i.e. until the air has bubbled out.
Unscrew the oil filter cartridge with a suitable tool
Dispose of the oil filter cartridge properly
Lightly oil the seal of the new oil filter cartridge
Screw on the new oil filter cartridge and tighten by hand (see the notes on the oil filter cartridge)
Air Compressor Cleaning
Warning! Danger when cleaning system parts with compressed air: Small parts propelled at high speed by compressed air can penetrate the skin or destroy an eye.
Do not aim the compressed air at people
Caution! Fire hazard from oil residues
Oil residue and other deposits must be removed from the compressor coolers which are exposed to hot air in accordance with the user manual.
Screw compressor blown off with compressed air at the given intervals?
Select the components cleaned
Dirt trap strainer removed and cleaned (only for water-cooled units)?
Sign off on the air compressor cleaning
Interceptor Celaning
Danger! Only perform checks and carry out work on the screw compressor when the unit is out of operation, depressurized, and secured from being switched on again!
Lock water inflow and water outflow on the compressor.
Provide a suitable container in order to catch any cooling agents draining from the system.
Carefully loosen the cover of the dirt interceptor.
Catch any cooling agent draining from the system.
Remove cover and pull filter insert from the housing.
Clean filter insert or replace with a new one.
Push filter insert into the dirt interceptor housing.
Screw cover into the housing. Ensure that the seal is correctly positioned and that there is no dirt on the sealing ring and the sealing areas.
8 Hourly Oil Level Check
Danger! Air/oil under pressure will cause severe personal injury or death. Shut down the compressor, relieve the system of all pressure, disconnect, lockout and tagout the power supply to the compressor package before removing valves, caps, plugs, fittings, bolts and filters.
CAUTION! Fire hazard and slip hazard! Do not spill any oil! Look for leaks! Immediately take care of any spilled oil!
NOTICE! Do not mix oils with different specifications. If the compressor system is delivered without oil, oil must first be filled into the pressure reservoir up to the “maximum oil level” mark.
Shut off the compressor with the STOP button.
Wait at least 5 minutes until the oil has settled, i.e. until the air has bubbled out.
Check the oil level at each pause in operation and at regular intervals using the transparent plastic tube on the pressure reservoir.
The oil level must lie between the “maximum oil level” and “minimum oil level” marks on the oil container.
If required, top up oil. Use Gardner Denver oil only.
Close the oil filler cap firmly.
Parts for Gardner Denver Base Mounted Compressor LRS90W
Access the parts list for your equipment in MaintainX.
Oil
AEON 9000SP
Oil
AEON 9000SP
Oil
AEON 9000SP
Unlock efficiency
with MaintainX CoPilot
MaintainX CoPilot is your expert colleague, on call 24/7, helping your team find the answers they need to keep equipment running.
Reduce Unplanned Downtime
Ensure your team follows consistent procedures to minimize equipment failures and costly delays.
Maximize Asset Availability
Keep your assets running longer and more reliably, with standardized maintenance workflows from OEM manuals.
Lower Maintenance Costs
Turn any technician into an expert to streamline operations, maintain more assets, and reduce overall costs.
Thousands of companies manage their assets with MaintainX

'%3e%3cpath%20fill='url(%23b)'%20d='M66.008%2080.068c-5.084-.786-9.763-3.834-12.442-8.68a16.942%2016.942%200%200%201-1.87-5.18c1.096.19%202.203.476%203.298.87%206.525%202.333%2010.836%207.68%2011.014%2012.99ZM51.47%2061.576c.488-5.524%203.62-10.716%208.847-13.597a17.132%2017.132%200%200%201%2011.335-1.882c-.798%208.145-7.43%2014.848-16.038%2015.599-1.417.119-2.799.07-4.144-.12Zm28.564-11.478a17.513%2017.513%200%200%201%203.727%204.62c4.608%208.335%201.584%2018.813-6.75%2023.409a16.988%2016.988%200%200%201-4.359%201.679%2019.624%2019.624%200%200%201-3.977-12.776c.346-7.561%204.942-13.931%2011.36-16.932Z'/%3e%3cpath%20fill='%23110F0D'%20fill-rule='evenodd'%20d='M142.831%2048.324h4.977V77.03h-4.977V48.324Zm27.278%2013.002c.322%201.048.453%202.263.453%203.62v12.073h-4.787V66.208c0-.75-.047-1.572-.154-2.143-.453-2.382-1.822-3.572-4.215-3.572-2.31%200-3.882%201.274-4.43%203.476-.143.596-.226%201.405-.226%202.25v10.8h-4.787V56.623h4.477v2.989c1.536-2.5%203.906-3.43%206.371-3.43%203.488%200%206.263%201.68%207.298%205.144Zm24.636%207.323c0%203.882-2.358%206.525-5.763%207.727-1.298.453-2.632.643-4.62.643h-10.169V48.324h9.085c1.691%200%203.156.143%204.049.38%203.465.93%205.727%203.68%205.727%207.335%200%202.441-.81%204.156-2.762%205.644%202.905%201.417%204.453%203.727%204.453%206.966Zm-15.634-8.656h4.584c1.024%200%201.917-.143%202.536-.417%201.215-.548%201.905-1.608%201.905-3.167%200-1.548-.643-2.572-1.845-3.132-.691-.31-1.762-.452-2.763-.452h-4.417v7.168Zm10.716%208.465c0-1.536-.893-3.37-3.227-3.893-.428-.095-1.036-.143-1.571-.143h-5.918v8.085h5.501c.56%200%201.429-.048%201.953-.167%201.94-.453%203.262-1.846%203.262-3.882Zm47.747-11.847-8.097%2020.408h-4.429l-8.109-20.408h5.191l5.192%2014.574%205.108-14.574h5.144Zm-20.218%2010.002c0%20.69-.036%201.262-.155%201.94h-15.943c.631%202.87%202.714%204.728%205.882%204.728%202.131%200%203.607-.882%204.703-2.525h4.87c-1.762%204.144-5.204%206.692-9.657%206.692-6.084%200-10.537-4.858-10.537-10.49%200-6.108%204.524-10.776%2010.335-10.776%206.239%200%2010.442%204.954%2010.502%2010.43Zm-4.763-1.405c-.333-2.846-2.643-4.858-5.691-4.858-2.894%200-5.287%201.929-5.621%204.858h11.312Zm-72.667%203.44c0%204.787-3.287%208.371-9.419%208.371H119.363V64.66c-1.917.274-3.87.69-5.811%201.238l4.537%2011.121h-5.418l-3.596-9.585c-5.144%202.084-10.085%205.216-14.217%209.585h-4.786L101.8%2048.312h4.56l5.68%2013.883a44.112%2044.112%200%200%201%207.323-1.774V48.312h9.084c1.703%200%203.156.143%204.061.393%203.453.929%205.727%203.667%205.727%207.323%200%201.917-.738%204.179-2.81%205.691%203.06%201.56%204.501%204.025%204.501%206.93Zm-15.634-8.667a62.664%2062.664%200%200%201%202.06-.036c1.703.012%203.239.131%204.608.37%201.441-.549%202.357-1.727%202.357-3.537%200-1.941-.881-3.144-2.488-3.667-.548-.18-1.358-.286-2.322-.286h-4.215v7.156Zm-16.55%203.905-3.715-9.894-6.394%2016.502c2.833-2.595%206.263-4.858%2010.109-6.608Zm27.254%204.74c0-2.775-3.131-4.347-8.513-4.418-.715%200-1.441.011-2.191.047v8.252h5.918c2.548%200%204.786-1.37%204.786-3.882Z'%20clip-rule='evenodd'/%3e%3c/g%3e%3cdefs%3e%3clinearGradient%20id='b'%20x1='51.47'%20x2='85.916'%20y1='62.946'%20y2='62.946'%20gradientUnits='userSpaceOnUse'%3e%3cstop%20stop-color='%23CD9F28'/%3e%3cstop%20offset='1'%20stop-color='%23ECD80B'/%3e%3c/linearGradient%3e%3cclipPath%20id='a'%3e%3cpath%20fill='%23fff'%20d='M51.47%2045.728h186.104V80.14H51.47z'/%3e%3c/clipPath%3e%3c/defs%3e%3c/svg%3e)


More from Gardner Denver


Explore Other Assets


© 2026 MaintainX. All rights reserved.