


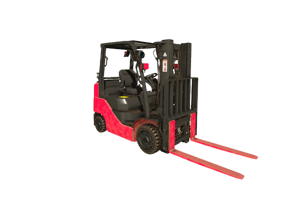
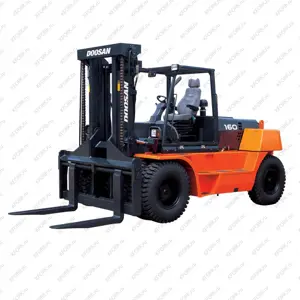
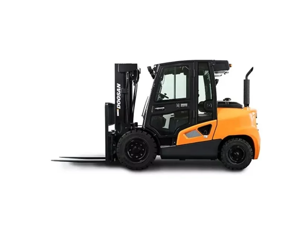
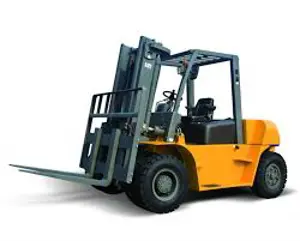
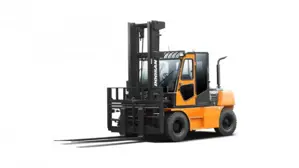
Doosan Forklift D25S-9
Need answers fast?
Explore the manual using AI.
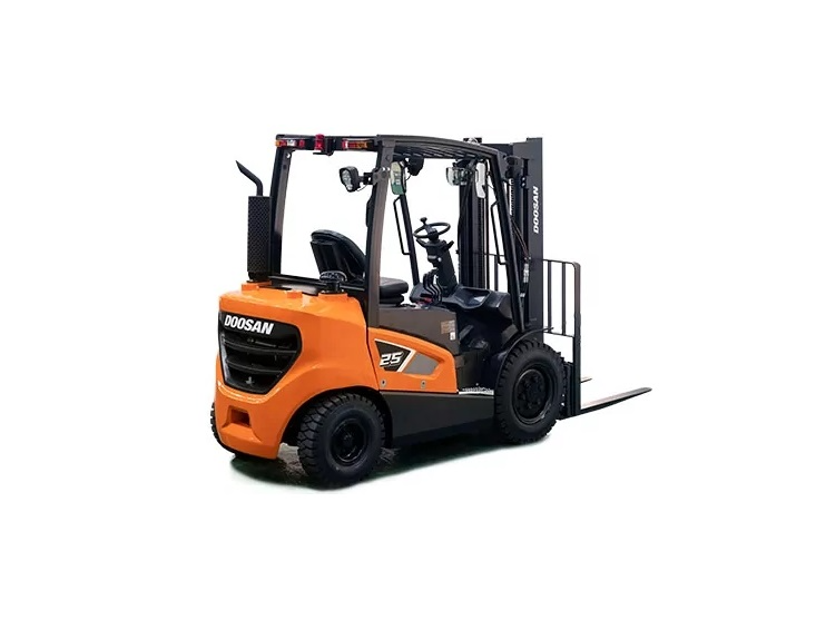
The Doosan Forklift D25S-9 is a robust industrial forklift designed for efficient material handling in various environments. Known for its reliability and performance, this model features advanced technology and ergonomic design, making it an ideal choice for warehouses and construction sites. Optimize your operations with the D25S-9's powerful capabilities.
Turn manuals into instant answers
with your AI-powered assistantTurn manuals into instant answers
with your AI-powered assistant
Manual for Doosan Forklift D25S-9
Complete asset maintenance, one click away
Get instant access to all the maintenance information you need. Empower technicians to perform preventive maintenance with asset packages, ready to use right out of the box.

Documents & Manuals
Find all the essential guides in one place.
 Tensioning Guide
- Belt-diagram
- C-120 pulleys
+ 13 more

Work Order Templates
Pre-built workflows to keep your asset running smoothly.
- Daily Electrical System Inspection
- Replace Roller and Pulley
- Install Engine B-120
+ 29 more

Procedures
Integrate maintenance plans directly into your work orders.
- Motion Industries
- Applied Industrial Technologies
- Electrical Brothers
+ 5 more

Parts
Access the parts list for your equipment in MaintainX.
- Drive Motor
- B2 Rollers
- Tensioning System
+ 40 more
Doosan Forklift D25S-9
Create an account to install this asset package.
Maintenance Plans for Doosan Forklift Model D25S-9
Integrate maintenance plans directly into your work orders in MaintainX.
500 Hourly / 3 Monthly Cylinder Rod Extension Adjustment
NOTE! The following description is for forward tilt. For cylinder rod back tilt, the collar should be stationary by the tilt eye. If it is not, the O-ring inside the collar may need to be replaced.
Check to make sure the tilt cylinders extend and retract evenly
If one cylinder continues to move after the other cylinder has stopped in full forward or backward tilt, an adjustment must be made to one cylinder
To adjust the cylinder rod extension, move the spacer to the rear and loosen the pinch bolt on the clevis
Turn the cylinder rod in or out of the clevis to obtain the proper adjustment
Turning the rod into the clevis shortens the stroke
Turning the rod out of the clevis lengthens the stroke
Tighten the pinch bolts to a torque of 95±15 Name (70 ± 10 abaft)
Check the cylinder rods again for even travel

500 Hourly / 3 Monthly Engine Oil & Filter (DM02VA/P with CJ-4 Grade Only) Change
WARNING! Hot oil and components can cause personal injury. Do not allow hot oil or components to contact skin
Remove the crankcase drain plug and allow oil to drain into a suitable container
Clean and install drain plug
Raise the hood and seat assembly
Remove and discard oil filter element
Wipe sealing surface of oil filter element mounting base
Make sure the entire old gasket is removed
Before installing a new filter element, apply a small amount of clean engine oil to the filter element gasket
Install the new filter element
Primary Filter Element Cleaning
WARNING! Pressure air can cause personal injury. When using pressure air for cleaning, wear a protective face shield, protective clothing and protective shoes. The maximum air pressure must be below 205 kPa (30 psi) for cleaning purposes.
NOTICE! Do not clean the elements by bumping or tapping them. Inspect filter elements after cleaning. Do not use a filter with damaged pleats, gaskets or seals.
When cleaning with pressure air, use 205 kPa (30 psi) maximum pressure to prevent filter element damage. When cleaning with pressure water, use 280 kPa (40 psi) maximum pressure to prevent filter element damage.
Have spare elements on hand to use while cleaning used elements. The primary element should be replaced after 3 months service. In case of harsh application having lots of dirt, please clean and replace the primary element more often.
Direct air on the inside and outside of the element along the length of the pleats.
Check the element for any tears, rips or damage.
Direct water on the inside and outside of the element along the length of the pleats.
Air dry it thoroughly and then examine it.
Wash the element in warm water and mild household detergent.
1000 Hourly / 6 Monthly Universal Joint Inspection
Check the bearings for wear and damage
Check for any loose bolts
Inject a sufficient amount of grease into the grease nipples on the universal joint
Sign off on the universal joint inspection
10 Hourly / 1 Daily Parking Brake Inspection
Push the front side of the parking brake switch to engage the brake and push the rear side to release it
With the parking brake engaged, the direction control lever in NEUTRAL and the engine running, shift the direction control lever to FORWARD
The lift truck should not move forward or feel like it wants to move forward, even when the engine is accelerated briefly
Repeat this procedure in REVERSE
Report truck movement or tendency to move under power with the parking brake engaged
NOTE! The parking brake is required to be adjusted to hold the lift truck with capacity load on a 15% grade
If there is a 15% grade in your workplace, engage a capacity load and drive over to the grade
Raise the forks or load engaging attachment about 30 cm (12 in) from the floor
Drive forward up the grade, or in reverse down the grade, and stop the lift truck with the service brakes
Parts for Doosan Forklift D25S-9
Access the parts list for your equipment in MaintainX.
Oil Fiter Cap
110910-00628
Oil Fiter Cap
110910-00628
Oil Fiter Cap
110910-00628
Unlock efficiency
with MaintainX CoPilot
MaintainX CoPilot is your expert colleague, on call 24/7, helping your team find the answers they need to keep equipment running.
Reduce Unplanned Downtime
Ensure your team follows consistent procedures to minimize equipment failures and costly delays.
Maximize Asset Availability
Keep your assets running longer and more reliably, with standardized maintenance workflows from OEM manuals.
Lower Maintenance Costs
Turn any technician into an expert to streamline operations, maintain more assets, and reduce overall costs.
Thousands of companies manage their assets with MaintainX

'%3e%3cpath%20fill='url(%23b)'%20d='M66.008%2080.068c-5.084-.786-9.763-3.834-12.442-8.68a16.942%2016.942%200%200%201-1.87-5.18c1.096.19%202.203.476%203.298.87%206.525%202.333%2010.836%207.68%2011.014%2012.99ZM51.47%2061.576c.488-5.524%203.62-10.716%208.847-13.597a17.132%2017.132%200%200%201%2011.335-1.882c-.798%208.145-7.43%2014.848-16.038%2015.599-1.417.119-2.799.07-4.144-.12Zm28.564-11.478a17.513%2017.513%200%200%201%203.727%204.62c4.608%208.335%201.584%2018.813-6.75%2023.409a16.988%2016.988%200%200%201-4.359%201.679%2019.624%2019.624%200%200%201-3.977-12.776c.346-7.561%204.942-13.931%2011.36-16.932Z'/%3e%3cpath%20fill='%23110F0D'%20fill-rule='evenodd'%20d='M142.831%2048.324h4.977V77.03h-4.977V48.324Zm27.278%2013.002c.322%201.048.453%202.263.453%203.62v12.073h-4.787V66.208c0-.75-.047-1.572-.154-2.143-.453-2.382-1.822-3.572-4.215-3.572-2.31%200-3.882%201.274-4.43%203.476-.143.596-.226%201.405-.226%202.25v10.8h-4.787V56.623h4.477v2.989c1.536-2.5%203.906-3.43%206.371-3.43%203.488%200%206.263%201.68%207.298%205.144Zm24.636%207.323c0%203.882-2.358%206.525-5.763%207.727-1.298.453-2.632.643-4.62.643h-10.169V48.324h9.085c1.691%200%203.156.143%204.049.38%203.465.93%205.727%203.68%205.727%207.335%200%202.441-.81%204.156-2.762%205.644%202.905%201.417%204.453%203.727%204.453%206.966Zm-15.634-8.656h4.584c1.024%200%201.917-.143%202.536-.417%201.215-.548%201.905-1.608%201.905-3.167%200-1.548-.643-2.572-1.845-3.132-.691-.31-1.762-.452-2.763-.452h-4.417v7.168Zm10.716%208.465c0-1.536-.893-3.37-3.227-3.893-.428-.095-1.036-.143-1.571-.143h-5.918v8.085h5.501c.56%200%201.429-.048%201.953-.167%201.94-.453%203.262-1.846%203.262-3.882Zm47.747-11.847-8.097%2020.408h-4.429l-8.109-20.408h5.191l5.192%2014.574%205.108-14.574h5.144Zm-20.218%2010.002c0%20.69-.036%201.262-.155%201.94h-15.943c.631%202.87%202.714%204.728%205.882%204.728%202.131%200%203.607-.882%204.703-2.525h4.87c-1.762%204.144-5.204%206.692-9.657%206.692-6.084%200-10.537-4.858-10.537-10.49%200-6.108%204.524-10.776%2010.335-10.776%206.239%200%2010.442%204.954%2010.502%2010.43Zm-4.763-1.405c-.333-2.846-2.643-4.858-5.691-4.858-2.894%200-5.287%201.929-5.621%204.858h11.312Zm-72.667%203.44c0%204.787-3.287%208.371-9.419%208.371H119.363V64.66c-1.917.274-3.87.69-5.811%201.238l4.537%2011.121h-5.418l-3.596-9.585c-5.144%202.084-10.085%205.216-14.217%209.585h-4.786L101.8%2048.312h4.56l5.68%2013.883a44.112%2044.112%200%200%201%207.323-1.774V48.312h9.084c1.703%200%203.156.143%204.061.393%203.453.929%205.727%203.667%205.727%207.323%200%201.917-.738%204.179-2.81%205.691%203.06%201.56%204.501%204.025%204.501%206.93Zm-15.634-8.667a62.664%2062.664%200%200%201%202.06-.036c1.703.012%203.239.131%204.608.37%201.441-.549%202.357-1.727%202.357-3.537%200-1.941-.881-3.144-2.488-3.667-.548-.18-1.358-.286-2.322-.286h-4.215v7.156Zm-16.55%203.905-3.715-9.894-6.394%2016.502c2.833-2.595%206.263-4.858%2010.109-6.608Zm27.254%204.74c0-2.775-3.131-4.347-8.513-4.418-.715%200-1.441.011-2.191.047v8.252h5.918c2.548%200%204.786-1.37%204.786-3.882Z'%20clip-rule='evenodd'/%3e%3c/g%3e%3cdefs%3e%3clinearGradient%20id='b'%20x1='51.47'%20x2='85.916'%20y1='62.946'%20y2='62.946'%20gradientUnits='userSpaceOnUse'%3e%3cstop%20stop-color='%23CD9F28'/%3e%3cstop%20offset='1'%20stop-color='%23ECD80B'/%3e%3c/linearGradient%3e%3cclipPath%20id='a'%3e%3cpath%20fill='%23fff'%20d='M51.47%2045.728h186.104V80.14H51.47z'/%3e%3c/clipPath%3e%3c/defs%3e%3c/svg%3e)


More from Doosan


Explore Other Assets


© 2026 MaintainX. All rights reserved.