


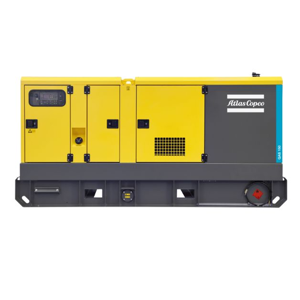
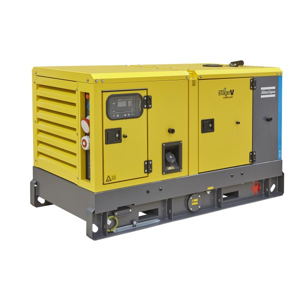
Atlas Copco Industrial Cast Iron Piston Compressor CR5TS80V23V1IS
Need answers fast?
Explore the manual using AI.
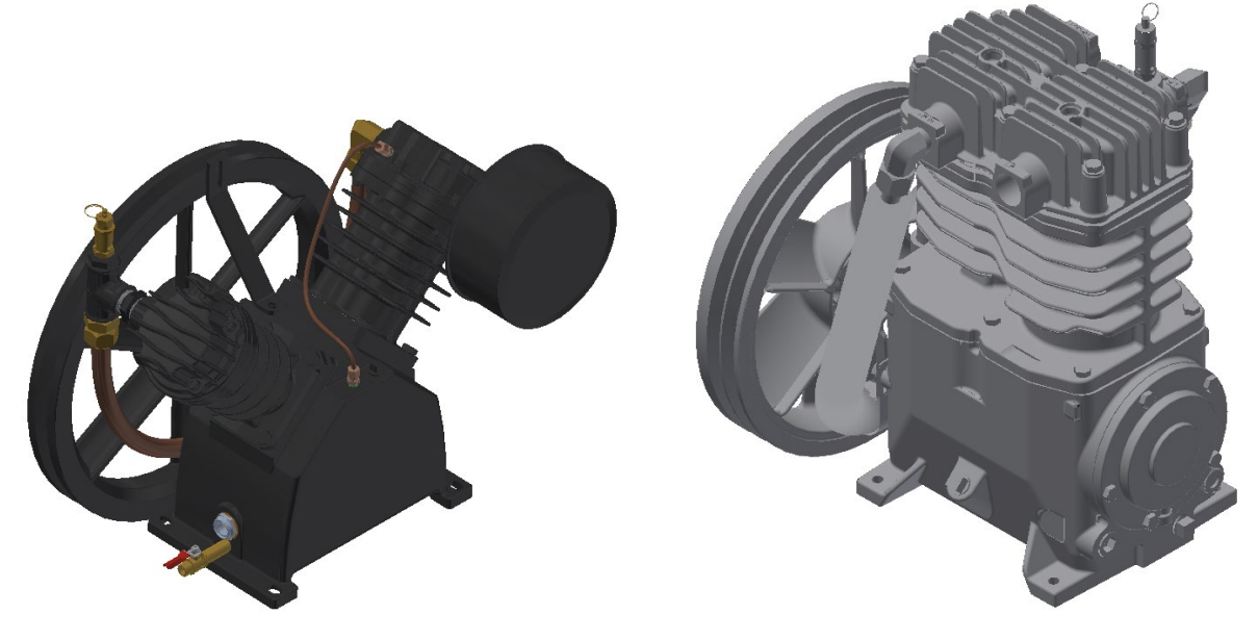
The Atlas Copco Industrial Cast Iron Piston Compressor CR5TS80V23V1IS is a robust and efficient compressor designed for heavy-duty applications. This model offers reliable performance and durability, making it ideal for various industrial environments requiring consistent air supply.
Turn manuals into instant answers
with your AI-powered assistantTurn manuals into instant answers
with your AI-powered assistant
Manual for Atlas Copco Industrial Cast Iron Piston Compressor CR5TS80V23V1IS
Complete asset maintenance, one click away
Get instant access to all the maintenance information you need. Empower technicians to perform preventive maintenance with asset packages, ready to use right out of the box.

Documents & Manuals
Find all the essential guides in one place.
 Tensioning Guide
- Belt-diagram
- C-120 pulleys
+ 13 more

Work Order Templates
Pre-built workflows to keep your asset running smoothly.
- Daily Electrical System Inspection
- Replace Roller and Pulley
- Install Engine B-120
+ 29 more

Procedures
Integrate maintenance plans directly into your work orders.
- Motion Industries
- Applied Industrial Technologies
- Electrical Brothers
+ 5 more

Parts
Access the parts list for your equipment in MaintainX.
- Drive Motor
- B2 Rollers
- Tensioning System
+ 40 more
Atlas Copco Industrial Cast Iron Piston Compressor CR5TS80V23V1IS
Create an account to install this asset package.
Maintenance Plans for Atlas Copco Industrial Cast Iron Piston Compressor Model CR5TS80V23V1IS
Integrate maintenance plans directly into your work orders in MaintainX.
MDR3 Pressure Switch Adjustment
Warning: Switch off the voltage before removing the cover of the switch
Reinstall it after an adjustment has been made and before the voltage is switched on again
Is the switch pressurized?
The stopping pressure is controlled by adjusting screw
Turn the screw
The pressure difference between starting and stopping is adjusted by means of adjusting screw
Turn the screw
Upload a photo of the adjusted switch
Sign off on the MDR3 Pressure Switch Adjustment

Pressure Relief Valve Testing
Depressurization and Disconnection
Air outlet valve closed
Hose or pipe disconnected from the valve
Compressor Start and Adjustment
Compressor started and run until it stops automatically
Voltage switched off
Cover removed from the air pressure switch
Adjusting screw turned one turn clockwise
Cover reinstalled
500 Hourly / 3 Monthly Industrial Cast Iron Piston Compressor Maintenace
Maintenance Instructions
Lubricant changed?
Note: Use a shorter interval in harsh conditions.
Pulley clamp screws or jamnut torqued?
Lubricant completely drained from the crankcase and replaced after initial 100 Hours of operation?
Check the belt tension every 160 Hourly / 1 Monthly.
Sign off on the maintenance procedure
40 Hourly / 1 Weekly Air Intake Filter Replacement
Warning: Ensure the compressor is stopped before starting the procedure
Compressor stopped?
Cap on top of the cover unscrewed?
Cover and filter element lifted off?
No dirt dropped inside the suction silencer?
Filter chamber and cover cleaned with a damp cloth?
Damaged elements discarded?
New element, cover and cap installed?
Sign off on the filter replacement
8 Hourly / 1 Daily Industrial Cast Iron Piston Compressor Maintenance
Warning: Always ensure the compressor is turned off and fully depressurized before starting any maintenance tasks.
Check lubricant levels several minutes after stopping
Drain and replace contaminated lubricant
Drain moisture from the receiver tank, drop legs, and air traps
Visually inspect the compressor and safety guards
Check for unusual noise or vibration
Check for lubricant leaks
Check pressurized components for rust, cracks, or leaks
Sign off on the maintenance tasks
Unlock efficiency
with MaintainX CoPilot
MaintainX CoPilot is your expert colleague, on call 24/7, helping your team find the answers they need to keep equipment running.
Reduce Unplanned Downtime
Ensure your team follows consistent procedures to minimize equipment failures and costly delays.
Maximize Asset Availability
Keep your assets running longer and more reliably, with standardized maintenance workflows from OEM manuals.
Lower Maintenance Costs
Turn any technician into an expert to streamline operations, maintain more assets, and reduce overall costs.
Thousands of companies manage their assets with MaintainX

'%3e%3cpath%20fill='url(%23b)'%20d='M66.008%2080.068c-5.084-.786-9.763-3.834-12.442-8.68a16.942%2016.942%200%200%201-1.87-5.18c1.096.19%202.203.476%203.298.87%206.525%202.333%2010.836%207.68%2011.014%2012.99ZM51.47%2061.576c.488-5.524%203.62-10.716%208.847-13.597a17.132%2017.132%200%200%201%2011.335-1.882c-.798%208.145-7.43%2014.848-16.038%2015.599-1.417.119-2.799.07-4.144-.12Zm28.564-11.478a17.513%2017.513%200%200%201%203.727%204.62c4.608%208.335%201.584%2018.813-6.75%2023.409a16.988%2016.988%200%200%201-4.359%201.679%2019.624%2019.624%200%200%201-3.977-12.776c.346-7.561%204.942-13.931%2011.36-16.932Z'/%3e%3cpath%20fill='%23110F0D'%20fill-rule='evenodd'%20d='M142.831%2048.324h4.977V77.03h-4.977V48.324Zm27.278%2013.002c.322%201.048.453%202.263.453%203.62v12.073h-4.787V66.208c0-.75-.047-1.572-.154-2.143-.453-2.382-1.822-3.572-4.215-3.572-2.31%200-3.882%201.274-4.43%203.476-.143.596-.226%201.405-.226%202.25v10.8h-4.787V56.623h4.477v2.989c1.536-2.5%203.906-3.43%206.371-3.43%203.488%200%206.263%201.68%207.298%205.144Zm24.636%207.323c0%203.882-2.358%206.525-5.763%207.727-1.298.453-2.632.643-4.62.643h-10.169V48.324h9.085c1.691%200%203.156.143%204.049.38%203.465.93%205.727%203.68%205.727%207.335%200%202.441-.81%204.156-2.762%205.644%202.905%201.417%204.453%203.727%204.453%206.966Zm-15.634-8.656h4.584c1.024%200%201.917-.143%202.536-.417%201.215-.548%201.905-1.608%201.905-3.167%200-1.548-.643-2.572-1.845-3.132-.691-.31-1.762-.452-2.763-.452h-4.417v7.168Zm10.716%208.465c0-1.536-.893-3.37-3.227-3.893-.428-.095-1.036-.143-1.571-.143h-5.918v8.085h5.501c.56%200%201.429-.048%201.953-.167%201.94-.453%203.262-1.846%203.262-3.882Zm47.747-11.847-8.097%2020.408h-4.429l-8.109-20.408h5.191l5.192%2014.574%205.108-14.574h5.144Zm-20.218%2010.002c0%20.69-.036%201.262-.155%201.94h-15.943c.631%202.87%202.714%204.728%205.882%204.728%202.131%200%203.607-.882%204.703-2.525h4.87c-1.762%204.144-5.204%206.692-9.657%206.692-6.084%200-10.537-4.858-10.537-10.49%200-6.108%204.524-10.776%2010.335-10.776%206.239%200%2010.442%204.954%2010.502%2010.43Zm-4.763-1.405c-.333-2.846-2.643-4.858-5.691-4.858-2.894%200-5.287%201.929-5.621%204.858h11.312Zm-72.667%203.44c0%204.787-3.287%208.371-9.419%208.371H119.363V64.66c-1.917.274-3.87.69-5.811%201.238l4.537%2011.121h-5.418l-3.596-9.585c-5.144%202.084-10.085%205.216-14.217%209.585h-4.786L101.8%2048.312h4.56l5.68%2013.883a44.112%2044.112%200%200%201%207.323-1.774V48.312h9.084c1.703%200%203.156.143%204.061.393%203.453.929%205.727%203.667%205.727%207.323%200%201.917-.738%204.179-2.81%205.691%203.06%201.56%204.501%204.025%204.501%206.93Zm-15.634-8.667a62.664%2062.664%200%200%201%202.06-.036c1.703.012%203.239.131%204.608.37%201.441-.549%202.357-1.727%202.357-3.537%200-1.941-.881-3.144-2.488-3.667-.548-.18-1.358-.286-2.322-.286h-4.215v7.156Zm-16.55%203.905-3.715-9.894-6.394%2016.502c2.833-2.595%206.263-4.858%2010.109-6.608Zm27.254%204.74c0-2.775-3.131-4.347-8.513-4.418-.715%200-1.441.011-2.191.047v8.252h5.918c2.548%200%204.786-1.37%204.786-3.882Z'%20clip-rule='evenodd'/%3e%3c/g%3e%3cdefs%3e%3clinearGradient%20id='b'%20x1='51.47'%20x2='85.916'%20y1='62.946'%20y2='62.946'%20gradientUnits='userSpaceOnUse'%3e%3cstop%20stop-color='%23CD9F28'/%3e%3cstop%20offset='1'%20stop-color='%23ECD80B'/%3e%3c/linearGradient%3e%3cclipPath%20id='a'%3e%3cpath%20fill='%23fff'%20d='M51.47%2045.728h186.104V80.14H51.47z'/%3e%3c/clipPath%3e%3c/defs%3e%3c/svg%3e)


More from Atlas Copco


Explore Other Assets


© 2026 MaintainX. All rights reserved.