


Trane Precedent® Rooftop Units YHC072
Need answers fast?
Explore the manual using AI.
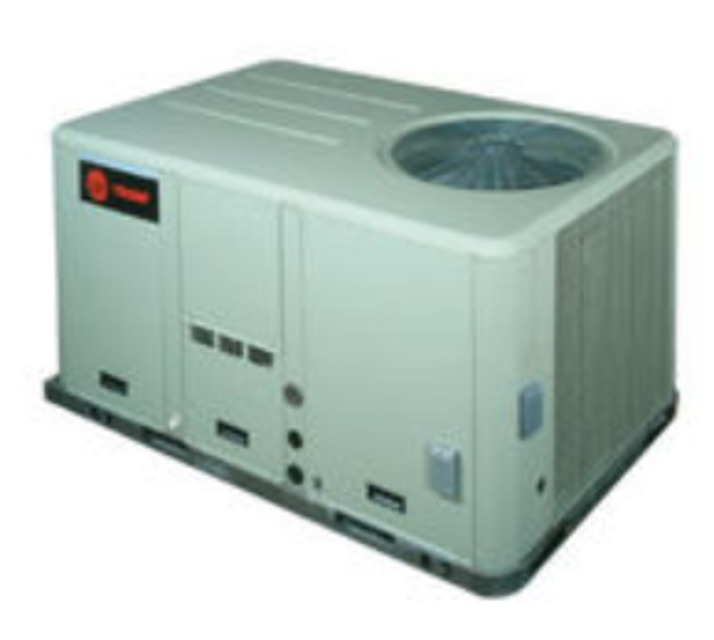
The Trane Precedent® Rooftop Units YHC072 are high-efficiency HVAC solutions designed for commercial applications. These units provide reliable heating and cooling performance, ensuring optimal indoor comfort while minimizing energy consumption. Ideal for various building types, the YHC072 model is engineered for durability and ease of maintenance.
Turn manuals into instant answers
with your AI-powered assistantTurn manuals into instant answers
with your AI-powered assistant
Manual for Trane Precedent® Rooftop Units YHC072
Complete asset maintenance, one click away
Get instant access to all the maintenance information you need. Empower technicians to perform preventive maintenance with asset packages, ready to use right out of the box.

Documents & Manuals
Find all the essential guides in one place.
 Tensioning Guide
- Belt-diagram
- C-120 pulleys
+ 13 more

Work Order Templates
Pre-built workflows to keep your asset running smoothly.
- Daily Electrical System Inspection
- Replace Roller and Pulley
- Install Engine B-120
+ 29 more

Procedures
Integrate maintenance plans directly into your work orders.
- Motion Industries
- Applied Industrial Technologies
- Electrical Brothers
+ 5 more

Parts
Access the parts list for your equipment in MaintainX.
- Drive Motor
- B2 Rollers
- Tensioning System
+ 40 more
Trane Precedent® Rooftop Units YHC072
Create an account to install this asset package.
Maintenance Plans for Trane Precedent® Rooftop Units Model YHC072
Integrate maintenance plans directly into your work orders in MaintainX.
Fan Belt Adjustment- Belt Drive Units
WARNING: Live Electrical Components! During installation, testing, servicing and troubleshooting of this product, it may be necessary to work with live electrical components. Have a qualified licensed electrician or other individual who has been properly trained in handling live electrical components perform these tasks. Failure to follow all electrical safety precautions when exposed to live electrical components could result in death or serious injury.
WARNING: Rotating Components! During installation, testing, servicing and troubleshooting of this product it may be necessary to work with live and exposed rotating components. Have a qualified or licensed service individual who has been properly trained in handling exposed rotating components, perform these tasks. Failure to follow all safety precautions could result in rotating components cutting and slashing technician which could result in death or serious injury.
Fan belts inspected and in good condition?
Replacement necessary due to frayed or worn belts?
Belts loosened using the belt tension adjustment bolts on the motor mounting base?
Enter the center-to-center shaft distance (in inches) between the fan and motor sheaves.
Enter the amount of belt deflection that corresponds to the proper belt tension.
Large O-ring on the belt tension gauge set at the deflection value?
Small O-ring set at zero on the force scale of the gauge plunger?

Precedent® Rooftop Units Replacement
Rigging
WARNING: Heavy Objects! Ensure that all the lifting equipment used is properly rated for the weight of the unit being lifted.
Each of the cables (chains or slings), hooks, and shackles used to lift the unit is capable of supporting the entire weight of the unit.
Lifting cables (chains or slings) are of the same length or adjusted for even unit lift.
WARNING: Improper Unit Lift! Test lift unit approximately 24 inches to verify proper center of gravity lift point.
Unit is properly rigged and balanced after test lift.
Adequate strength lifting slings are attached to all four lifting brackets in the unit base rail.
A lifting bar is installed to protect the unit and to facilitate a uniform lift.
Minimum distance between the lifting hook and the top of the unit (should be 7 feet).
Through-the-Base Gas Replacement
Warning: This procedure requires trained personnel with PPE!
Heat Compartment access panel removed
Pipe assembly removed from the manifold
90° elbow unscrewed from 61/2\ nipple"
Rubber grommet slid off of nipple
Plastic plug removed from the hole in the center post
Grommet inserted into the hole in the center post
90° elbow attached to the gas supply line using pipe sealant
5\ pipe nipple and union disconnected from the \"Through-the-Base Gas\" kit assembly"
1 Monthly Precedent® Rooftop Units Maintenance
WARNING: Hazardous Voltage! Disconnect all electric power, including remote disconnects before servicing. Follow proper lockout/ tagout procedures to ensure the power can not be inadvertently energized. Failure to disconnect power before servicing could result in death or serious injury. Before completing the following checks, turn the unit OFF and lock the main power disconnect switch open.
Inspect the return air filters. Clean or replace them if necessary.
Return Air Smoke Detector Maintenance
Airflow through the unit is affected by the amount of dirt and debris accumulated on the indoor coil and filters.To insure that airflow throughtheunitisadequateforproper sampling by the return air smoke detector, complete adherence to the maintenance procedures, including recommended intervals between filter changes, and coil cleaning is required.
Periodic checks and maintenance procedures must be performed on the smoke detector to insure that it will function properly. For detailed instructions concerning these checks and procedures, refer to the appropriate section(s) of the smoke detector Installation and Maintenance Instructions provided with the literature package for this unit.
During maintenance, the switch float (black ring) must be checked to ensure free movement up and down.
Cooling Season
Check the unit's drain pans and condensate piping to ensure that there are no blockages.
Inspect the evaporator and condenser coils for dirt, bent fins, etc. If the coils appear dirty, clean them according to the instructions described in 'Coil Cleaning' later in this section.
Condensate Drain Configuration
WARNING: Hazardous Voltage!
Disconnect all electric power, including remote disconnects before servicing. Follow proper lockout/ tagout procedures to ensure the power can not be inadvertently energized. Failure to disconnect power before servicing could result in death or serious injury.
An evaporator condensate drain connection is provided on each unit. Refer to Figure 16, p. 25 and Figure 17, p. 25 for the appropriate drain location.
The condensate drain pan is factory installed to drain condensate to the back side of the unit. See Figure 16, p. 25 and Figure 17, p. 25. It can be converted to drain condensate out the front side of the unit or through-the-base.
To convert drain condensate out the front of unit:
1. Remove evaporator access panel and supply air access panels.
2. Remove the support panel that the condensate drain pan exits through.
3. Slide the condensate drain pan out of the unit and rotate 180°.
4. Slide the condensate drain pan back into the unit, align the drain with the grommeted opening in the rear support panel and push until the coupling is seated in the grommet.
Parts for Trane Precedent® Rooftop Units YHC072
Access the parts list for your equipment in MaintainX.
Wall Mounted Relative Humidity Sensor
BAYSENS036
Zone Sensor Module
BAYSENS106
Remote Zone Temperature Sensor
BAYSENS077
The Supply Air Duct Sensor
X1310004002
Duct Mounted Relative Humidity Sensor
BAYSENS037
Wall Mounted Relative Humidity Sensor
BAYSENS036
Zone Sensor Module
BAYSENS106
Remote Zone Temperature Sensor
BAYSENS077
The Supply Air Duct Sensor
X1310004002
Duct Mounted Relative Humidity Sensor
BAYSENS037
Wall Mounted Relative Humidity Sensor
BAYSENS036
Zone Sensor Module
BAYSENS106
Remote Zone Temperature Sensor
BAYSENS077
The Supply Air Duct Sensor
X1310004002
Duct Mounted Relative Humidity Sensor
BAYSENS037
Unlock efficiency
with MaintainX CoPilot
MaintainX CoPilot is your expert colleague, on call 24/7, helping your team find the answers they need to keep equipment running.
Reduce Unplanned Downtime
Ensure your team follows consistent procedures to minimize equipment failures and costly delays.
Maximize Asset Availability
Keep your assets running longer and more reliably, with standardized maintenance workflows from OEM manuals.
Lower Maintenance Costs
Turn any technician into an expert to streamline operations, maintain more assets, and reduce overall costs.
Thousands of companies manage their assets with MaintainX

'%3e%3cpath%20fill='url(%23b)'%20d='M66.008%2080.068c-5.084-.786-9.763-3.834-12.442-8.68a16.942%2016.942%200%200%201-1.87-5.18c1.096.19%202.203.476%203.298.87%206.525%202.333%2010.836%207.68%2011.014%2012.99ZM51.47%2061.576c.488-5.524%203.62-10.716%208.847-13.597a17.132%2017.132%200%200%201%2011.335-1.882c-.798%208.145-7.43%2014.848-16.038%2015.599-1.417.119-2.799.07-4.144-.12Zm28.564-11.478a17.513%2017.513%200%200%201%203.727%204.62c4.608%208.335%201.584%2018.813-6.75%2023.409a16.988%2016.988%200%200%201-4.359%201.679%2019.624%2019.624%200%200%201-3.977-12.776c.346-7.561%204.942-13.931%2011.36-16.932Z'/%3e%3cpath%20fill='%23110F0D'%20fill-rule='evenodd'%20d='M142.831%2048.324h4.977V77.03h-4.977V48.324Zm27.278%2013.002c.322%201.048.453%202.263.453%203.62v12.073h-4.787V66.208c0-.75-.047-1.572-.154-2.143-.453-2.382-1.822-3.572-4.215-3.572-2.31%200-3.882%201.274-4.43%203.476-.143.596-.226%201.405-.226%202.25v10.8h-4.787V56.623h4.477v2.989c1.536-2.5%203.906-3.43%206.371-3.43%203.488%200%206.263%201.68%207.298%205.144Zm24.636%207.323c0%203.882-2.358%206.525-5.763%207.727-1.298.453-2.632.643-4.62.643h-10.169V48.324h9.085c1.691%200%203.156.143%204.049.38%203.465.93%205.727%203.68%205.727%207.335%200%202.441-.81%204.156-2.762%205.644%202.905%201.417%204.453%203.727%204.453%206.966Zm-15.634-8.656h4.584c1.024%200%201.917-.143%202.536-.417%201.215-.548%201.905-1.608%201.905-3.167%200-1.548-.643-2.572-1.845-3.132-.691-.31-1.762-.452-2.763-.452h-4.417v7.168Zm10.716%208.465c0-1.536-.893-3.37-3.227-3.893-.428-.095-1.036-.143-1.571-.143h-5.918v8.085h5.501c.56%200%201.429-.048%201.953-.167%201.94-.453%203.262-1.846%203.262-3.882Zm47.747-11.847-8.097%2020.408h-4.429l-8.109-20.408h5.191l5.192%2014.574%205.108-14.574h5.144Zm-20.218%2010.002c0%20.69-.036%201.262-.155%201.94h-15.943c.631%202.87%202.714%204.728%205.882%204.728%202.131%200%203.607-.882%204.703-2.525h4.87c-1.762%204.144-5.204%206.692-9.657%206.692-6.084%200-10.537-4.858-10.537-10.49%200-6.108%204.524-10.776%2010.335-10.776%206.239%200%2010.442%204.954%2010.502%2010.43Zm-4.763-1.405c-.333-2.846-2.643-4.858-5.691-4.858-2.894%200-5.287%201.929-5.621%204.858h11.312Zm-72.667%203.44c0%204.787-3.287%208.371-9.419%208.371H119.363V64.66c-1.917.274-3.87.69-5.811%201.238l4.537%2011.121h-5.418l-3.596-9.585c-5.144%202.084-10.085%205.216-14.217%209.585h-4.786L101.8%2048.312h4.56l5.68%2013.883a44.112%2044.112%200%200%201%207.323-1.774V48.312h9.084c1.703%200%203.156.143%204.061.393%203.453.929%205.727%203.667%205.727%207.323%200%201.917-.738%204.179-2.81%205.691%203.06%201.56%204.501%204.025%204.501%206.93Zm-15.634-8.667a62.664%2062.664%200%200%201%202.06-.036c1.703.012%203.239.131%204.608.37%201.441-.549%202.357-1.727%202.357-3.537%200-1.941-.881-3.144-2.488-3.667-.548-.18-1.358-.286-2.322-.286h-4.215v7.156Zm-16.55%203.905-3.715-9.894-6.394%2016.502c2.833-2.595%206.263-4.858%2010.109-6.608Zm27.254%204.74c0-2.775-3.131-4.347-8.513-4.418-.715%200-1.441.011-2.191.047v8.252h5.918c2.548%200%204.786-1.37%204.786-3.882Z'%20clip-rule='evenodd'/%3e%3c/g%3e%3cdefs%3e%3clinearGradient%20id='b'%20x1='51.47'%20x2='85.916'%20y1='62.946'%20y2='62.946'%20gradientUnits='userSpaceOnUse'%3e%3cstop%20stop-color='%23CD9F28'/%3e%3cstop%20offset='1'%20stop-color='%23ECD80B'/%3e%3c/linearGradient%3e%3cclipPath%20id='a'%3e%3cpath%20fill='%23fff'%20d='M51.47%2045.728h186.104V80.14H51.47z'/%3e%3c/clipPath%3e%3c/defs%3e%3c/svg%3e)


More from Trane


Explore Other Assets


© 2026 MaintainX. All rights reserved.