


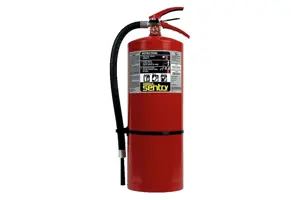
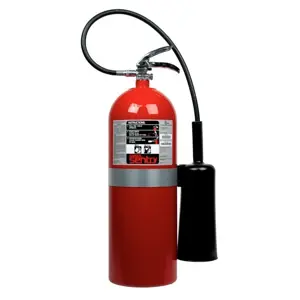
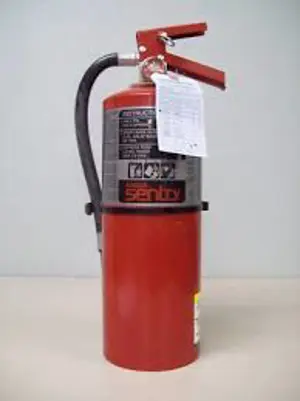
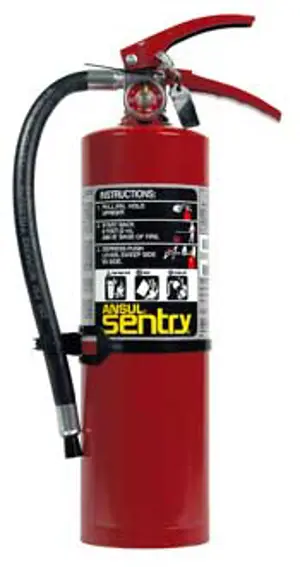
Sentry Fire Extinguisher A10H
Need answers fast?
Explore the manual using AI.

The Sentry Fire Extinguisher A10H is a reliable fire suppression device designed for industrial applications. This model ensures safety with its robust construction and effective extinguishing agent, making it essential for fire prevention in various environments. Regular maintenance and inspections are crucial for optimal performance.
Turn manuals into instant answers
with your AI-powered assistantTurn manuals into instant answers
with your AI-powered assistant
Manual for Sentry Fire Extinguisher A10H
Complete asset maintenance, one click away
Get instant access to all the maintenance information you need. Empower technicians to perform preventive maintenance with asset packages, ready to use right out of the box.

Documents & Manuals
Find all the essential guides in one place.
 Tensioning Guide
- Belt-diagram
- C-120 pulleys
+ 13 more

Work Order Templates
Pre-built workflows to keep your asset running smoothly.
- Daily Electrical System Inspection
- Replace Roller and Pulley
- Install Engine B-120
+ 29 more

Procedures
Integrate maintenance plans directly into your work orders.
- Motion Industries
- Applied Industrial Technologies
- Electrical Brothers
+ 5 more

Parts
Access the parts list for your equipment in MaintainX.
- Drive Motor
- B2 Rollers
- Tensioning System
+ 40 more
Sentry Fire Extinguisher A10H
Create an account to install this asset package.
Maintenance Plans for Sentry Fire Extinguisher Model A10H
Integrate maintenance plans directly into your work orders in MaintainX.
Bracket Inspection
Check for looseness between the extinguisher and the bracket
The band clamp should shut tightly, compressing the band grommet
Inspect the extinguisher and bracket for wear caused by movement of the extinguisher within the bracket
Examine the entire bracket closely for loose or worn hinges or hingepins, bent or cracked bands and worn or missing grommets
Are there any components that are missing, worn or damaged?
List all components that are missing, worn or damaged
Sign off on the bracket inspection

5 Year Hydrostatic Test
Warning: This test should be performed by trained personnel only!
Select the type of extinguisher
Extinguisher shows evidence of corrosion or mechanical injury?
Enter the test pressure as determined by the manufacturer
Did the extinguisher pass the pressure test?
Sign off on the hydrostatic test
Bracket Maintenance
Clean any dirt or other foreign material from the extinguisher and bracket
Remove the extinguisher from the bracket and clean extinguisher surfaces which were in contact with the bracket
Inspect the bracket. If it is bent or cracked, replace it
Check to see that the bracket is firmly mounted. Tighten or replace mounting fasteners
Avoid possible rust damage by cleaning and painting whenever bare metal is exposed
Following extinguisher maintenance, secure the extinguisher in the bracket. If the bracket does not hold the extinguisher securely or the bracket is difficult to close, replace the affected part and/or the entire bracket
Sign off on the bracket maintenance
Gauge Replacement
Warning: This procedure requires trained personnel with PPE!
Invert the extinguisher and press the lever to release all pressure
Remove valve assembly
Disassemble the valve assembly, removing the pick-up tube, valve stem, and spring
Remove damaged/defective gauge. If gauge is difficult to remove, immerse in hot water to loosen sealant
Clean the gauge port threads
Apply epoxy sealant to the threads of the new gauge. Be careful not to get any sealant into the hole in the face of the gauge socket. Tyco Fire Protection Products does not recommend the use of pipe tape
Screw the new gauge into the valve body making certain that the operating range on the gauge face is pointed to the top of the valve
Clean valve body, lubricate, and reassemble
12 Year Hydrostatic Test
Warning: This test should be performed by trained personnel only
Extinguisher cylinder shows evidence of corrosion
Extinguisher cylinder shows evidence of mechanical injury
Enter the test pressure as determined by manufacturer
Select the type of extinguisher
Extinguisher passed the hydrostatic test
Sign off on the hydrostatic test
Parts for Sentry Fire Extinguisher A10H
Access the parts list for your equipment in MaintainX.
Swivel Adaptor Union
32632
Cylinder
432588
Universal Adaptor
440623
Bottle
436049
Recharge Adaptor
429951
Swivel Adaptor Union
32632
Cylinder
432588
Universal Adaptor
440623
Bottle
436049
Recharge Adaptor
429951
Swivel Adaptor Union
32632
Cylinder
432588
Universal Adaptor
440623
Bottle
436049
Recharge Adaptor
429951
Unlock efficiency
with MaintainX CoPilot
MaintainX CoPilot is your expert colleague, on call 24/7, helping your team find the answers they need to keep equipment running.
Reduce Unplanned Downtime
Ensure your team follows consistent procedures to minimize equipment failures and costly delays.
Maximize Asset Availability
Keep your assets running longer and more reliably, with standardized maintenance workflows from OEM manuals.
Lower Maintenance Costs
Turn any technician into an expert to streamline operations, maintain more assets, and reduce overall costs.
Thousands of companies manage their assets with MaintainX

'%3e%3cpath%20fill='url(%23b)'%20d='M66.008%2080.068c-5.084-.786-9.763-3.834-12.442-8.68a16.942%2016.942%200%200%201-1.87-5.18c1.096.19%202.203.476%203.298.87%206.525%202.333%2010.836%207.68%2011.014%2012.99ZM51.47%2061.576c.488-5.524%203.62-10.716%208.847-13.597a17.132%2017.132%200%200%201%2011.335-1.882c-.798%208.145-7.43%2014.848-16.038%2015.599-1.417.119-2.799.07-4.144-.12Zm28.564-11.478a17.513%2017.513%200%200%201%203.727%204.62c4.608%208.335%201.584%2018.813-6.75%2023.409a16.988%2016.988%200%200%201-4.359%201.679%2019.624%2019.624%200%200%201-3.977-12.776c.346-7.561%204.942-13.931%2011.36-16.932Z'/%3e%3cpath%20fill='%23110F0D'%20fill-rule='evenodd'%20d='M142.831%2048.324h4.977V77.03h-4.977V48.324Zm27.278%2013.002c.322%201.048.453%202.263.453%203.62v12.073h-4.787V66.208c0-.75-.047-1.572-.154-2.143-.453-2.382-1.822-3.572-4.215-3.572-2.31%200-3.882%201.274-4.43%203.476-.143.596-.226%201.405-.226%202.25v10.8h-4.787V56.623h4.477v2.989c1.536-2.5%203.906-3.43%206.371-3.43%203.488%200%206.263%201.68%207.298%205.144Zm24.636%207.323c0%203.882-2.358%206.525-5.763%207.727-1.298.453-2.632.643-4.62.643h-10.169V48.324h9.085c1.691%200%203.156.143%204.049.38%203.465.93%205.727%203.68%205.727%207.335%200%202.441-.81%204.156-2.762%205.644%202.905%201.417%204.453%203.727%204.453%206.966Zm-15.634-8.656h4.584c1.024%200%201.917-.143%202.536-.417%201.215-.548%201.905-1.608%201.905-3.167%200-1.548-.643-2.572-1.845-3.132-.691-.31-1.762-.452-2.763-.452h-4.417v7.168Zm10.716%208.465c0-1.536-.893-3.37-3.227-3.893-.428-.095-1.036-.143-1.571-.143h-5.918v8.085h5.501c.56%200%201.429-.048%201.953-.167%201.94-.453%203.262-1.846%203.262-3.882Zm47.747-11.847-8.097%2020.408h-4.429l-8.109-20.408h5.191l5.192%2014.574%205.108-14.574h5.144Zm-20.218%2010.002c0%20.69-.036%201.262-.155%201.94h-15.943c.631%202.87%202.714%204.728%205.882%204.728%202.131%200%203.607-.882%204.703-2.525h4.87c-1.762%204.144-5.204%206.692-9.657%206.692-6.084%200-10.537-4.858-10.537-10.49%200-6.108%204.524-10.776%2010.335-10.776%206.239%200%2010.442%204.954%2010.502%2010.43Zm-4.763-1.405c-.333-2.846-2.643-4.858-5.691-4.858-2.894%200-5.287%201.929-5.621%204.858h11.312Zm-72.667%203.44c0%204.787-3.287%208.371-9.419%208.371H119.363V64.66c-1.917.274-3.87.69-5.811%201.238l4.537%2011.121h-5.418l-3.596-9.585c-5.144%202.084-10.085%205.216-14.217%209.585h-4.786L101.8%2048.312h4.56l5.68%2013.883a44.112%2044.112%200%200%201%207.323-1.774V48.312h9.084c1.703%200%203.156.143%204.061.393%203.453.929%205.727%203.667%205.727%207.323%200%201.917-.738%204.179-2.81%205.691%203.06%201.56%204.501%204.025%204.501%206.93Zm-15.634-8.667a62.664%2062.664%200%200%201%202.06-.036c1.703.012%203.239.131%204.608.37%201.441-.549%202.357-1.727%202.357-3.537%200-1.941-.881-3.144-2.488-3.667-.548-.18-1.358-.286-2.322-.286h-4.215v7.156Zm-16.55%203.905-3.715-9.894-6.394%2016.502c2.833-2.595%206.263-4.858%2010.109-6.608Zm27.254%204.74c0-2.775-3.131-4.347-8.513-4.418-.715%200-1.441.011-2.191.047v8.252h5.918c2.548%200%204.786-1.37%204.786-3.882Z'%20clip-rule='evenodd'/%3e%3c/g%3e%3cdefs%3e%3clinearGradient%20id='b'%20x1='51.47'%20x2='85.916'%20y1='62.946'%20y2='62.946'%20gradientUnits='userSpaceOnUse'%3e%3cstop%20stop-color='%23CD9F28'/%3e%3cstop%20offset='1'%20stop-color='%23ECD80B'/%3e%3c/linearGradient%3e%3cclipPath%20id='a'%3e%3cpath%20fill='%23fff'%20d='M51.47%2045.728h186.104V80.14H51.47z'/%3e%3c/clipPath%3e%3c/defs%3e%3c/svg%3e)


More from Sentry


Explore Other Assets


© 2026 MaintainX. All rights reserved.