


'%3e%3cpath%20d='M10%2010.5V17h12.5v5.5l-21%20.038V15l8.5-4.5ZM1%206h11M6.5%202H12M5.5%2022.5V19'/%3e%3cpath%20d='M21.21%2017.012%2020.14%201.5h-4.28l-1.07%2015.512M15.516%206.49h4.967'/%3e%3c/g%3e%3cdefs%3e%3cclipPath%20id='a'%3e%3cpath%20fill='%23fff'%20d='M0%200h24v24H0z'/%3e%3c/clipPath%3e%3c/defs%3e%3c/svg%3e)











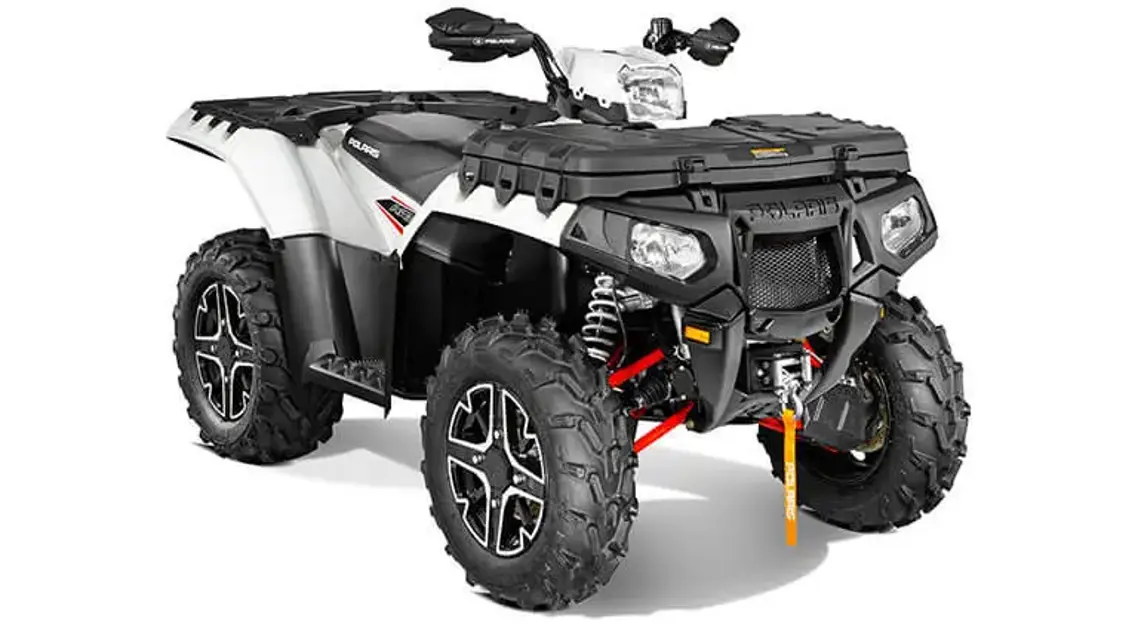
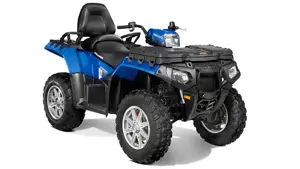
Polaris Vehicle Sportsman 850 XP EPS
Need answers fast?
Explore the manual using AI.
Turn manuals into instant answers
with your AI-powered assistantTurn manuals into instant answers
with your AI-powered assistant
Manual for Polaris Vehicle Sportsman 850 XP EPS
Complete asset maintenance, one click away
Get instant access to all the maintenance information you need. Empower technicians to perform preventive maintenance with asset packages, ready to use right out of the box.

Documents & Manuals
Find all the essential guides in one place.
 Tensioning Guide
- Belt-diagram
- C-120 pulleys
+ 13 more

Work Order Templates
Pre-built workflows to keep your asset running smoothly.
- Daily Electrical System Inspection
- Replace Roller and Pulley
- Install Engine B-120
+ 29 more

Procedures
Integrate maintenance plans directly into your work orders.
- Motion Industries
- Applied Industrial Technologies
- Electrical Brothers
+ 5 more

Parts
Access the parts list for your equipment in MaintainX.
- Drive Motor
- B2 Rollers
- Tensioning System
+ 40 more
Polaris Vehicle Sportsman 850 XP EPS
Create an account to install this asset package.
Maintenance Plans for Polaris Vehicle Model Sportsman 850 XP EPS
Integrate maintenance plans directly into your work orders in MaintainX.
100 Hourly / 1 Yearly / 1600 km / 1000 mi Vehicle Maintenance
Demand drive fluid (normal use) - Change fluid (Perform these procedures more often for vehicles subjected to severe use.)
1. Position the vehicle on a level surface. Remove the fill plug.
2. Place a drain pan under the demand drive unit. Remove the drain plug. Allow the fluid to drain completely.
3. Clean and reinstall the drain plug. Torque to specification.
4. Add the proper amount of the recommended fluid.
5. Reinstall the fill plug. Torque to specification.
6. Check for leaks. Dispose of used fluid properly.
Rear gearcase oil - Change fluid (Perform these procedures more often for vehicles subjected to severe use.)
1. Position the vehicle on a level surface.

100 Hourly / 6 Monthly / 1600 km / 1000 mi Engine Oil Replacement
Warning: Hot oil can cause burns to skin. Do not allow hot oil to contact skin.
Vehicle positioned on a level surface
Engine warmed up at idle for two to three minutes
Area around the drain plug cleaned
Drain pan placed under the crankcase
Drain plug removed and oil drained completely
New sealing washer installed on the drain plug
Drain plug reinstalled and torqued to specification
Oil filter removed using an oil filter wrench
1 Daile Vehicle Maintenance
Air filter, pre-filter - Inspect; clean often; replace as needed - Perform these operations more often for vehicles subjected to severe use. Emission-related service (Failure to conduct this maintenance will not void the emissions warranty but may affect emissions.)
1. Remove the seat.
2. Remove the air box cover screws, and remove the air box cover.
3. Remove the filter.
4. Remove the fabric type prefilter from the main filter.
Wash the pre-filter in soapy water, then rinse and let dry.
5. Reinstall the pre-filter over the main filter. Install a new main filter if needed.
6. Reinstall the filter into the air box.
7. Reinstall the air box cover and the seat.
200 Hourly / 2 Yearly / 3200 km / 2000 mi Fluid Replacement
Warning: This procedure requires trained personnel with PPE!
Position the vehicle on a level surface. Allow the vehicle to sit for at least 30 minutes before performing the fluid change.
Areas around and on the ADC reservoir and bleeder valves thoroughly cleaned
Reservoir cap and diaphragm assembly removed
Debris removed from the fluid and reservoir using a shop towel or suction tool
Enter the amount of fresh fluid added to the reservoir
Protective caps from the bleeder valves removed
One of the bleeder valve screws slowly loosened (turn counter-clockwise) and allowed fluid and trapped air to flow from the fitting
Screw tightened when clean fluid begins to flow. Repeat this step for the remaining valve.
20 Hourly / 1 Monthly / 320 km / 200 mi Battery Maintenance
Warning: Improperly connecting or disconnecting battery cables can result in an explosion and cause serious injury or death.
When removing the battery, always disconnect the negative (black) cable first. When reinstalling the battery, always connect the negative (black) cable last.
Your ATV is equipped with a sealed battery, which requires little maintenance.
Always keep battery terminals and connections free of corrosion.
Battery Removal
Remove the front rack.
Disconnect the black (negative) battery cable first.
Disconnect the red (positive) battery cable last.
Disconnect the battery hold-down strap.
Unlock efficiency
with MaintainX CoPilot
MaintainX CoPilot is your expert colleague, on call 24/7, helping your team find the answers they need to keep equipment running.
'%20stroke-width='2.05034'/%3e%3cpath%20d='M43.601%2020.8897C43.2688%2019.252%2042.7312%2017.6627%2042.001%2016.1597'%20stroke='url(%23paint1_linear_4912_14668)'%20stroke-width='2.05034'/%3e%3cpath%20d='M40.001%2012.8882C38.8627%2011.3731%2037.516%2010.0265%2036.001%208.88818'%20stroke='url(%23paint2_linear_4912_14668)'%20stroke-width='2.05034'/%3e%3cpath%20d='M32.729%206.89053C31.2266%206.1604%2029.638%205.62282%2028.001%205.29053'%20stroke='url(%23paint3_linear_4912_14668)'%20stroke-width='2.05034'/%3e%3cpath%20d='M24.001%2014.8901V24.8901L32.001%2032.8901'%20stroke='url(%23paint4_linear_4912_14668)'%20stroke-width='2.05034'/%3e%3cdefs%3e%3clinearGradient%20id='paint0_linear_4912_14668'%20x1='4'%20y1='25'%20x2='44'%20y2='25'%20gradientUnits='userSpaceOnUse'%3e%3cstop%20stop-color='%23246CFF'/%3e%3cstop%20offset='1'%20stop-color='%232ED888'/%3e%3c/linearGradient%3e%3clinearGradient%20id='paint1_linear_4912_14668'%20x1='3.5'%20y1='20.8897'%20x2='44'%20y2='20.8897'%20gradientUnits='userSpaceOnUse'%3e%3cstop%20stop-color='%23246CFF'/%3e%3cstop%20offset='1'%20stop-color='%232ED888'/%3e%3c/linearGradient%3e%3clinearGradient%20id='paint2_linear_4912_14668'%20x1='3.5'%20y1='12.8882'%20x2='44.5'%20y2='12.8882'%20gradientUnits='userSpaceOnUse'%3e%3cstop%20stop-color='%23246CFF'/%3e%3cstop%20offset='1'%20stop-color='%232ED888'/%3e%3c/linearGradient%3e%3clinearGradient%20id='paint3_linear_4912_14668'%20x1='6.5'%20y1='6.89053'%20x2='43.5'%20y2='6.89053'%20gradientUnits='userSpaceOnUse'%3e%3cstop%20stop-color='%23246CFF'/%3e%3cstop%20offset='1'%20stop-color='%232ED888'/%3e%3c/linearGradient%3e%3clinearGradient%20id='paint4_linear_4912_14668'%20x1='5'%20y1='32.8901'%20x2='44'%20y2='32.8901'%20gradientUnits='userSpaceOnUse'%3e%3cstop%20stop-color='%23246CFF'/%3e%3cstop%20offset='1'%20stop-color='%232ED888'/%3e%3c/linearGradient%3e%3c/defs%3e%3c/svg%3e)
Reduce Unplanned Downtime
Ensure your team follows consistent procedures to minimize equipment failures and costly delays.
'%20stroke-width='2.05034'/%3e%3cpath%20d='M46.667%2041.7231C46.667%2044.5079%2045.5607%2047.1786%2043.5916%2049.1478C41.6225%2051.1169%2038.9518%2052.2231%2036.167%2052.2231C33.3822%2052.2231%2030.7115%2051.1169%2028.7424%2049.1478C26.7732%2047.1786%2025.667%2044.5079%2025.667%2041.7231C25.667%2038.9384%2026.7732%2036.2677%2028.7424%2034.2985C30.7115%2032.3294%2033.3822%2031.2231%2036.167%2031.2231C38.9518%2031.2231%2041.6225%2032.3294%2043.5916%2034.2985C45.5607%2036.2677%2046.667%2038.9384%2046.667%2041.7231Z'%20stroke='url(%23paint1_linear_4912_14680)'%20stroke-width='2.05034'/%3e%3cpath%20d='M37.334%2035.8896V40.5563H42.0007'%20stroke='url(%23paint2_linear_4912_14680)'%20stroke-width='2.05034'/%3e%3cdefs%3e%3clinearGradient%20id='paint0_linear_4912_14680'%20x1='5'%20y1='52.2231'%20x2='51'%20y2='52.2231'%20gradientUnits='userSpaceOnUse'%3e%3cstop%20stop-color='%23246CFF'/%3e%3cstop%20offset='1'%20stop-color='%232ED888'/%3e%3c/linearGradient%3e%3clinearGradient%20id='paint1_linear_4912_14680'%20x1='5'%20y1='52.2231'%20x2='47'%20y2='52.2231'%20gradientUnits='userSpaceOnUse'%3e%3cstop%20stop-color='%23246CFF'/%3e%3cstop%20offset='1'%20stop-color='%232ED888'/%3e%3c/linearGradient%3e%3clinearGradient%20id='paint2_linear_4912_14680'%20x1='5'%20y1='40.5563'%20x2='52.5'%20y2='40.5563'%20gradientUnits='userSpaceOnUse'%3e%3cstop%20stop-color='%23246CFF'/%3e%3cstop%20offset='1'%20stop-color='%232ED888'/%3e%3c/linearGradient%3e%3c/defs%3e%3c/svg%3e)
Maximize Asset Availability
Keep your assets running longer and more reliably, with standardized maintenance workflows from OEM manuals.
'%20stroke-width='2.05034'/%3e%3cpath%20d='M13.9995%2024.2231C13.9995%2029.1738%2015.9662%2033.9217%2019.4669%2037.4224C22.9675%2040.9231%2027.7155%2042.8897%2032.6662%2042.8897C37.6169%2042.8897%2042.3648%2040.9231%2045.8655%2037.4224C49.3662%2033.9217%2051.3328%2029.1738%2051.3328%2024.2231C51.3328%2019.2724%2049.3662%2014.5244%2045.8655%2011.0237C42.3648%207.52306%2037.6169%205.5564%2032.6662%205.5564C27.7155%205.5564%2022.9675%207.52306%2019.4669%2011.0237C15.9662%2014.5244%2013.9995%2019.2724%2013.9995%2024.2231Z'%20stroke='url(%23paint1_linear_4912_14674)'%20stroke-width='2.05034'/%3e%3cpath%20d='M32.6665%2017.2231V12.5564'%20stroke='url(%23paint2_linear_4912_14674)'%20stroke-width='2.05034'/%3e%3cpath%20d='M32.6665%2035.8898V31.2231'%20stroke='url(%23paint3_linear_4912_14674)'%20stroke-width='2.05034'/%3e%3cpath%20d='M37.9165%2020.7231V19.5565C37.9165%2018.9376%2037.6707%2018.3441%2037.2331%2017.9066C36.7955%2017.469%2036.202%2017.2231%2035.5832%2017.2231H29.7498C29.131%2017.2231%2028.5375%2017.469%2028.0999%2017.9066C27.6623%2018.3441%2027.4165%2018.9376%2027.4165%2019.5565V20.6018C27.4166%2021.1326%2027.5977%2021.6475%2027.9298%2022.0615C28.262%2022.4756%2028.7254%2022.764%2029.2435%2022.8791L36.0895%2024.4005C36.6077%2024.5157%2037.071%2024.8041%2037.4032%2025.2181C37.7353%2025.6321%2037.9164%2026.147%2037.9165%2026.6778V28.8898C37.9165%2029.5086%2037.6707%2030.1021%2037.2331%2030.5397C36.7955%2030.9773%2036.202%2031.2231%2035.5832%2031.2231H29.7498C29.131%2031.2231%2028.5375%2030.9773%2028.0999%2030.5397C27.6623%2030.1021%2027.4165%2029.5086%2027.4165%2028.8898V27.7231'%20stroke='url(%23paint4_linear_4912_14674)'%20stroke-width='2.05034'/%3e%3cdefs%3e%3clinearGradient%20id='paint0_linear_4912_14674'%20x1='5'%20y1='33.5'%20x2='50'%20y2='33.5'%20gradientUnits='userSpaceOnUse'%3e%3cstop%20stop-color='%23246CFF'/%3e%3cstop%20offset='1'%20stop-color='%232ED888'/%3e%3c/linearGradient%3e%3clinearGradient%20id='paint1_linear_4912_14674'%20x1='5'%20y1='42.8897'%20x2='48.5'%20y2='42.8897'%20gradientUnits='userSpaceOnUse'%3e%3cstop%20stop-color='%23246CFF'/%3e%3cstop%20offset='1'%20stop-color='%232ED888'/%3e%3c/linearGradient%3e%3clinearGradient%20id='paint2_linear_4912_14674'%20x1='5'%20y1='17.2231'%20x2='52.5'%20y2='17.2231'%20gradientUnits='userSpaceOnUse'%3e%3cstop%20stop-color='%23246CFF'/%3e%3cstop%20offset='1'%20stop-color='%232ED888'/%3e%3c/linearGradient%3e%3clinearGradient%20id='paint3_linear_4912_14674'%20x1='3.5'%20y1='35.8898'%20x2='50.5'%20y2='35.8898'%20gradientUnits='userSpaceOnUse'%3e%3cstop%20stop-color='%23246CFF'/%3e%3cstop%20offset='1'%20stop-color='%232ED888'/%3e%3c/linearGradient%3e%3clinearGradient%20id='paint4_linear_4912_14674'%20x1='3'%20y1='31.2231'%20x2='52'%20y2='31.2231'%20gradientUnits='userSpaceOnUse'%3e%3cstop%20stop-color='%23246CFF'/%3e%3cstop%20offset='1'%20stop-color='%232ED888'/%3e%3c/linearGradient%3e%3c/defs%3e%3c/svg%3e)
Lower Maintenance Costs
Turn any technician into an expert to streamline operations, maintain more assets, and reduce overall costs.
Thousands of companies manage their assets with MaintainX

'%3e%3cpath%20fill='url(%23b)'%20d='M66.008%2080.068c-5.084-.786-9.763-3.834-12.442-8.68a16.942%2016.942%200%200%201-1.87-5.18c1.096.19%202.203.476%203.298.87%206.525%202.333%2010.836%207.68%2011.014%2012.99ZM51.47%2061.576c.488-5.524%203.62-10.716%208.847-13.597a17.132%2017.132%200%200%201%2011.335-1.882c-.798%208.145-7.43%2014.848-16.038%2015.599-1.417.119-2.799.07-4.144-.12Zm28.564-11.478a17.513%2017.513%200%200%201%203.727%204.62c4.608%208.335%201.584%2018.813-6.75%2023.409a16.988%2016.988%200%200%201-4.359%201.679%2019.624%2019.624%200%200%201-3.977-12.776c.346-7.561%204.942-13.931%2011.36-16.932Z'/%3e%3cpath%20fill='%23110F0D'%20fill-rule='evenodd'%20d='M142.831%2048.324h4.977V77.03h-4.977V48.324Zm27.278%2013.002c.322%201.048.453%202.263.453%203.62v12.073h-4.787V66.208c0-.75-.047-1.572-.154-2.143-.453-2.382-1.822-3.572-4.215-3.572-2.31%200-3.882%201.274-4.43%203.476-.143.596-.226%201.405-.226%202.25v10.8h-4.787V56.623h4.477v2.989c1.536-2.5%203.906-3.43%206.371-3.43%203.488%200%206.263%201.68%207.298%205.144Zm24.636%207.323c0%203.882-2.358%206.525-5.763%207.727-1.298.453-2.632.643-4.62.643h-10.169V48.324h9.085c1.691%200%203.156.143%204.049.38%203.465.93%205.727%203.68%205.727%207.335%200%202.441-.81%204.156-2.762%205.644%202.905%201.417%204.453%203.727%204.453%206.966Zm-15.634-8.656h4.584c1.024%200%201.917-.143%202.536-.417%201.215-.548%201.905-1.608%201.905-3.167%200-1.548-.643-2.572-1.845-3.132-.691-.31-1.762-.452-2.763-.452h-4.417v7.168Zm10.716%208.465c0-1.536-.893-3.37-3.227-3.893-.428-.095-1.036-.143-1.571-.143h-5.918v8.085h5.501c.56%200%201.429-.048%201.953-.167%201.94-.453%203.262-1.846%203.262-3.882Zm47.747-11.847-8.097%2020.408h-4.429l-8.109-20.408h5.191l5.192%2014.574%205.108-14.574h5.144Zm-20.218%2010.002c0%20.69-.036%201.262-.155%201.94h-15.943c.631%202.87%202.714%204.728%205.882%204.728%202.131%200%203.607-.882%204.703-2.525h4.87c-1.762%204.144-5.204%206.692-9.657%206.692-6.084%200-10.537-4.858-10.537-10.49%200-6.108%204.524-10.776%2010.335-10.776%206.239%200%2010.442%204.954%2010.502%2010.43Zm-4.763-1.405c-.333-2.846-2.643-4.858-5.691-4.858-2.894%200-5.287%201.929-5.621%204.858h11.312Zm-72.667%203.44c0%204.787-3.287%208.371-9.419%208.371H119.363V64.66c-1.917.274-3.87.69-5.811%201.238l4.537%2011.121h-5.418l-3.596-9.585c-5.144%202.084-10.085%205.216-14.217%209.585h-4.786L101.8%2048.312h4.56l5.68%2013.883a44.112%2044.112%200%200%201%207.323-1.774V48.312h9.084c1.703%200%203.156.143%204.061.393%203.453.929%205.727%203.667%205.727%207.323%200%201.917-.738%204.179-2.81%205.691%203.06%201.56%204.501%204.025%204.501%206.93Zm-15.634-8.667a62.664%2062.664%200%200%201%202.06-.036c1.703.012%203.239.131%204.608.37%201.441-.549%202.357-1.727%202.357-3.537%200-1.941-.881-3.144-2.488-3.667-.548-.18-1.358-.286-2.322-.286h-4.215v7.156Zm-16.55%203.905-3.715-9.894-6.394%2016.502c2.833-2.595%206.263-4.858%2010.109-6.608Zm27.254%204.74c0-2.775-3.131-4.347-8.513-4.418-.715%200-1.441.011-2.191.047v8.252h5.918c2.548%200%204.786-1.37%204.786-3.882Z'%20clip-rule='evenodd'/%3e%3c/g%3e%3cdefs%3e%3clinearGradient%20id='b'%20x1='51.47'%20x2='85.916'%20y1='62.946'%20y2='62.946'%20gradientUnits='userSpaceOnUse'%3e%3cstop%20stop-color='%23CD9F28'/%3e%3cstop%20offset='1'%20stop-color='%23ECD80B'/%3e%3c/linearGradient%3e%3cclipPath%20id='a'%3e%3cpath%20fill='%23fff'%20d='M51.47%2045.728h186.104V80.14H51.47z'/%3e%3c/clipPath%3e%3c/defs%3e%3c/svg%3e)











More from Polaris
Explore Other Assets





© 2026 MaintainX. All rights reserved.