


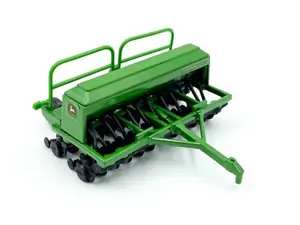
John Deere Planter Tube-Conveyor 1790
Need answers fast?
Explore the manual using AI.

Turn manuals into instant answers
with your AI-powered assistantTurn manuals into instant answers
with your AI-powered assistant
Manual for John Deere Planter Tube-Conveyor 1790
Complete asset maintenance, one click away
Get instant access to all the maintenance information you need. Empower technicians to perform preventive maintenance with asset packages, ready to use right out of the box.

Documents & Manuals
Find all the essential guides in one place.
 Tensioning Guide
- Belt-diagram
- C-120 pulleys
+ 13 more

Work Order Templates
Pre-built workflows to keep your asset running smoothly.
- Daily Electrical System Inspection
- Replace Roller and Pulley
- Install Engine B-120
+ 29 more

Procedures
Integrate maintenance plans directly into your work orders.
- Motion Industries
- Applied Industrial Technologies
- Electrical Brothers
+ 5 more

Parts
Access the parts list for your equipment in MaintainX.
- Drive Motor
- B2 Rollers
- Tensioning System
+ 40 more
John Deere Planter Tube-Conveyor 1790
Create an account to install this asset package.
Maintenance Plans for John Deere Planter Tube-Conveyor Model 1790
Integrate maintenance plans directly into your work orders in MaintainX.
Hoses/Fittings/Cylinders Replacement
WARNING: RELIEVE THE HYDRAULIC SYSTEM OF ALL PRESSURE BEFORE ADJUSTING OR SERVICING. SEE THE HYDRAULIC POWER UNIT OPERATOR'S MANUAL FOR PROPER PROCEDURES. HIGH-PRESSURE FLUIDS CAN PENETRATE THE SKIN AND CAUSE SERIOUS INJURY OR DEATH. USE CARDBOARD OR WOOD TO DETECT LEAKS IN THE HYDRAULIC SYSTEM. SEEK MEDICAL TREATMENT IMMEDIATELY IF INJURED BY HIGH-PRESSURE FLUIDS.
Refer to parts section for hydraulic component detail listing.
Replacement hoses, fittings, and cylinders from your Unverferth Manufacturing dealer which are rated for 3000 psi used?
Hoses, fittings and cylinders that have pipe threads not used?
Teflon tape or thread sealant on JIC or O-ring fittings not used?
Fittings tightened per 'Torque Chart'?
Sufficient slack allowed for hoses to move through the full range of motion of the cylinders when replacing hoses?
Hydraulic system purged after servicing?
Sign off on the Hoses/Fittings/Cylinders Replacement

Belt Tension Checking
WARNING: AVOID PERSONAL ATTIRE SUCH AS LOOSE FITTING CLOTHING, SHOESTRINGS, DRAWSTRINGS, PANTS CUFFS, LONG HAIR, ETC., THAT MAY BECOME ENTANGLED IN MOVING PARTS. MOVING OR ROTATING COMPONENTS CAN CAUSE SERIOUS INJURY OR DEATH. USE EXTREME CARE WHEN INSPECTING AND ADJUSTING BELT TRACKING.
Lower intake panel/guard from conveyor removed
Measure the slack at the center of the conveyor belt
Discharge end of the conveyor loosened
Two adjusting bolts used to adjust the belt to the proper tension
Both sides moved the same distance
Belt slipping on drive pulley checked
Bottom cover panel replaced
Belt tracking checked before re-tightening the four bolts on each side of the conveyor
Conveyor Belt Change
Remove the access panel from the underside near the center of the conveyor housing.
Run the conveyor belt until the splice is positioned in the access opening.
Reduce tension from the belt by turning the tensioning bolts on the end of the conveyor.
Attach the belt stretcher to the belt to remove tension on the belt splice. Remove connecting wire from the splice.
Attach the new belt to the original belt splice using a length of small diameter wire.
Pull the original belt out of the conveyor. When finished, the new belt should be routed through the conveyor, remove the temporary splice wire and discard.
Reinstall the belt stretcher to the new belt to draw the splice together. Insert the vinyl coated cable through the splice, attach the small bent washers on each end of the cable by crimping tight with a pliers. Remove the belt stretcher from the new belt.
Increase tension on the new belt by adjusting the tensioning bolts on the end of the conveyor housing, making sure the belt tracking is centered.
Install access panel door removed in step 1.
Planter Tube-Conveyor After Use Maintenance
DO THE FOLLOWING AFTER USE:
Clean out conveyor/hopper. Use pressurized water to wash out conveyor and hopper after use.
Wipe off the following
Check the following
Sign off on the maintenance
8 Hourly Belt Tracking Checking
Conveyor belt must always run at the center of the pulley on both the intake and discharge end. Improper tracking of the belt will result in excessive wear to the edge of the belt, and will greatly reduce belt life. Check belt tracking every 8 hours of use, and every time belt tension is adjusted.
Inspect tracking of belt at discharge end by removing lower spout, pivoting deflector up, and looking up at the belt and pulley. Belt should be in center of pulley.
Adjust by loosening, DO NOT REMOVE, the four bolts on the side of the conveyor. Operate conveyor at slow speed, and tighten or loosen the adjustment bolt until belt is running in the center of the pulley Tighten all bolts on side of conveyor, and lock adjustment bolts into place. Inspect tracking of belt at intake end by opening bottom inspection door on conveyor. Belt should be in the center of the pulley. Adjust by loosening (Do Not Remove) the four solts (two on each side) on the adjusting plate.
Operate conveyor at slow speed, and tighten or loosen adjustment bolt until belt is running in the center of the pulley.
Tighten the two bolts on the adjustment plate, and lock the adjustment bolt into place.;
Parts for John Deere Planter Tube-Conveyor 1790
Access the parts list for your equipment in MaintainX.
Bolt, Hex 5/8NC x 1/2" Grade 5
TA0-907235-0
Bearing, Ball Thrust, 5/8" I.D.
TA0-903118-0
Bottom Bar, 6" & 12" Belt Stretcher
TA1-114401-0
Plain Top Bar Weldment, 6" & 12" Belt Stretcher
TA2-114404-0
Threaded Top Bar Weldment, 6" & 12" Belt Stretcher
TA2-114406-0
Bolt, Hex 5/8NC x 1/2" Grade 5
TA0-907235-0
Bearing, Ball Thrust, 5/8" I.D.
TA0-903118-0
Bottom Bar, 6" & 12" Belt Stretcher
TA1-114401-0
Plain Top Bar Weldment, 6" & 12" Belt Stretcher
TA2-114404-0
Threaded Top Bar Weldment, 6" & 12" Belt Stretcher
TA2-114406-0
Bolt, Hex 5/8NC x 1/2" Grade 5
TA0-907235-0
Bearing, Ball Thrust, 5/8" I.D.
TA0-903118-0
Bottom Bar, 6" & 12" Belt Stretcher
TA1-114401-0
Plain Top Bar Weldment, 6" & 12" Belt Stretcher
TA2-114404-0
Threaded Top Bar Weldment, 6" & 12" Belt Stretcher
TA2-114406-0
Unlock efficiency
with MaintainX CoPilot
MaintainX CoPilot is your expert colleague, on call 24/7, helping your team find the answers they need to keep equipment running.
Reduce Unplanned Downtime
Ensure your team follows consistent procedures to minimize equipment failures and costly delays.
Maximize Asset Availability
Keep your assets running longer and more reliably, with standardized maintenance workflows from OEM manuals.
Lower Maintenance Costs
Turn any technician into an expert to streamline operations, maintain more assets, and reduce overall costs.
Thousands of companies manage their assets with MaintainX

'%3e%3cpath%20fill='url(%23b)'%20d='M66.008%2080.068c-5.084-.786-9.763-3.834-12.442-8.68a16.942%2016.942%200%200%201-1.87-5.18c1.096.19%202.203.476%203.298.87%206.525%202.333%2010.836%207.68%2011.014%2012.99ZM51.47%2061.576c.488-5.524%203.62-10.716%208.847-13.597a17.132%2017.132%200%200%201%2011.335-1.882c-.798%208.145-7.43%2014.848-16.038%2015.599-1.417.119-2.799.07-4.144-.12Zm28.564-11.478a17.513%2017.513%200%200%201%203.727%204.62c4.608%208.335%201.584%2018.813-6.75%2023.409a16.988%2016.988%200%200%201-4.359%201.679%2019.624%2019.624%200%200%201-3.977-12.776c.346-7.561%204.942-13.931%2011.36-16.932Z'/%3e%3cpath%20fill='%23110F0D'%20fill-rule='evenodd'%20d='M142.831%2048.324h4.977V77.03h-4.977V48.324Zm27.278%2013.002c.322%201.048.453%202.263.453%203.62v12.073h-4.787V66.208c0-.75-.047-1.572-.154-2.143-.453-2.382-1.822-3.572-4.215-3.572-2.31%200-3.882%201.274-4.43%203.476-.143.596-.226%201.405-.226%202.25v10.8h-4.787V56.623h4.477v2.989c1.536-2.5%203.906-3.43%206.371-3.43%203.488%200%206.263%201.68%207.298%205.144Zm24.636%207.323c0%203.882-2.358%206.525-5.763%207.727-1.298.453-2.632.643-4.62.643h-10.169V48.324h9.085c1.691%200%203.156.143%204.049.38%203.465.93%205.727%203.68%205.727%207.335%200%202.441-.81%204.156-2.762%205.644%202.905%201.417%204.453%203.727%204.453%206.966Zm-15.634-8.656h4.584c1.024%200%201.917-.143%202.536-.417%201.215-.548%201.905-1.608%201.905-3.167%200-1.548-.643-2.572-1.845-3.132-.691-.31-1.762-.452-2.763-.452h-4.417v7.168Zm10.716%208.465c0-1.536-.893-3.37-3.227-3.893-.428-.095-1.036-.143-1.571-.143h-5.918v8.085h5.501c.56%200%201.429-.048%201.953-.167%201.94-.453%203.262-1.846%203.262-3.882Zm47.747-11.847-8.097%2020.408h-4.429l-8.109-20.408h5.191l5.192%2014.574%205.108-14.574h5.144Zm-20.218%2010.002c0%20.69-.036%201.262-.155%201.94h-15.943c.631%202.87%202.714%204.728%205.882%204.728%202.131%200%203.607-.882%204.703-2.525h4.87c-1.762%204.144-5.204%206.692-9.657%206.692-6.084%200-10.537-4.858-10.537-10.49%200-6.108%204.524-10.776%2010.335-10.776%206.239%200%2010.442%204.954%2010.502%2010.43Zm-4.763-1.405c-.333-2.846-2.643-4.858-5.691-4.858-2.894%200-5.287%201.929-5.621%204.858h11.312Zm-72.667%203.44c0%204.787-3.287%208.371-9.419%208.371H119.363V64.66c-1.917.274-3.87.69-5.811%201.238l4.537%2011.121h-5.418l-3.596-9.585c-5.144%202.084-10.085%205.216-14.217%209.585h-4.786L101.8%2048.312h4.56l5.68%2013.883a44.112%2044.112%200%200%201%207.323-1.774V48.312h9.084c1.703%200%203.156.143%204.061.393%203.453.929%205.727%203.667%205.727%207.323%200%201.917-.738%204.179-2.81%205.691%203.06%201.56%204.501%204.025%204.501%206.93Zm-15.634-8.667a62.664%2062.664%200%200%201%202.06-.036c1.703.012%203.239.131%204.608.37%201.441-.549%202.357-1.727%202.357-3.537%200-1.941-.881-3.144-2.488-3.667-.548-.18-1.358-.286-2.322-.286h-4.215v7.156Zm-16.55%203.905-3.715-9.894-6.394%2016.502c2.833-2.595%206.263-4.858%2010.109-6.608Zm27.254%204.74c0-2.775-3.131-4.347-8.513-4.418-.715%200-1.441.011-2.191.047v8.252h5.918c2.548%200%204.786-1.37%204.786-3.882Z'%20clip-rule='evenodd'/%3e%3c/g%3e%3cdefs%3e%3clinearGradient%20id='b'%20x1='51.47'%20x2='85.916'%20y1='62.946'%20y2='62.946'%20gradientUnits='userSpaceOnUse'%3e%3cstop%20stop-color='%23CD9F28'/%3e%3cstop%20offset='1'%20stop-color='%23ECD80B'/%3e%3c/linearGradient%3e%3cclipPath%20id='a'%3e%3cpath%20fill='%23fff'%20d='M51.47%2045.728h186.104V80.14H51.47z'/%3e%3c/clipPath%3e%3c/defs%3e%3c/svg%3e)


More from John Deere


Explore Other Assets


© 2026 MaintainX. All rights reserved.