


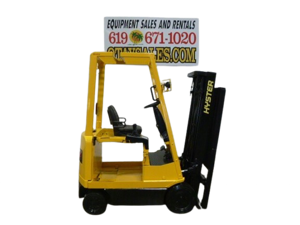
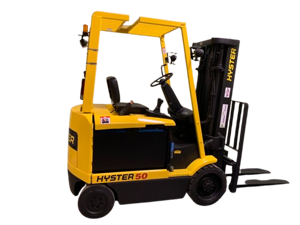
Hyster-Yale Electric Reach Truck R30XM2
Need answers fast?
Explore the manual using AI.
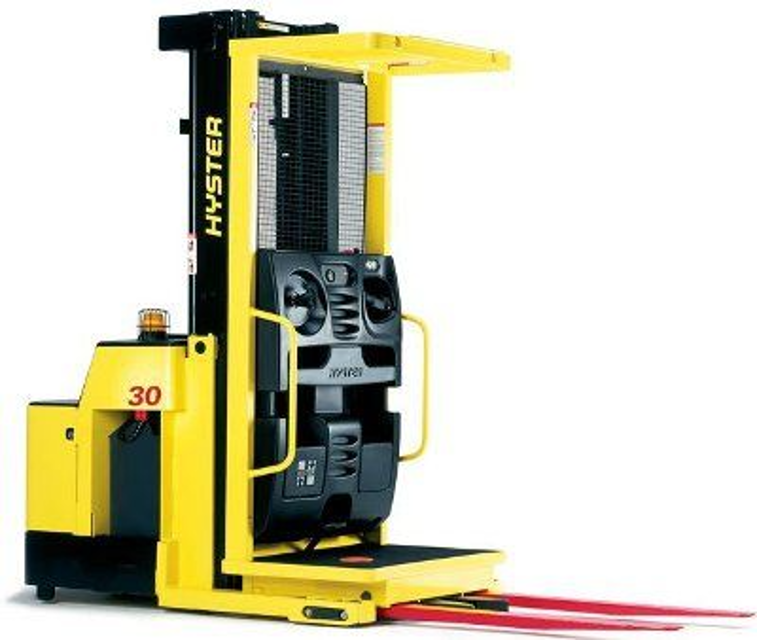
The Hyster-Yale Electric Reach Truck R30XM2 is a robust and efficient material handling solution designed for narrow aisle operations. With its advanced electric drive system and ergonomic design, this reach truck enhances productivity and safety in warehouse environments. Ideal for various applications, it ensures reliable performance and low maintenance costs.
Turn manuals into instant answers
with your AI-powered assistantTurn manuals into instant answers
with your AI-powered assistant
Manual for Hyster-Yale Electric Reach Truck R30XM2
Complete asset maintenance, one click away
Get instant access to all the maintenance information you need. Empower technicians to perform preventive maintenance with asset packages, ready to use right out of the box.

Documents & Manuals
Find all the essential guides in one place.
 Tensioning Guide
- Belt-diagram
- C-120 pulleys
+ 13 more

Work Order Templates
Pre-built workflows to keep your asset running smoothly.
- Daily Electrical System Inspection
- Replace Roller and Pulley
- Install Engine B-120
+ 29 more

Procedures
Integrate maintenance plans directly into your work orders.
- Motion Industries
- Applied Industrial Technologies
- Electrical Brothers
+ 5 more

Parts
Access the parts list for your equipment in MaintainX.
- Drive Motor
- B2 Rollers
- Tensioning System
+ 40 more
Hyster-Yale Electric Reach Truck R30XM2
Create an account to install this asset package.
Maintenance Plans for Hyster-Yale Electric Reach Truck Model R30XM2
Integrate maintenance plans directly into your work orders in MaintainX.
8 Hourly / 1 Daily Tire, Wheels, and Caster Inspection
Inspect the drive tire and load wheels for damage
Inspect the tread and remove any objects that will cause damage. Smooth any cuts or tears to prevent further damage
Inspect the wheels and caster for loose or missing parts. Remove any wire, strapping, or other material wound around the axles or caster
CAUTION! If the wheels have been removed and installed, check all wheel nuts after 2 to 5 hours of operation.
Tighten the nuts (in a cross pattern) to the correct torque value shown in the Maintenance Schedule table.
When the nuts stay tight after 8 hours, the interval for checking the torque can be extended to 350 hours
Sign off on the tire, wheels, and caster inspection

8 Hourly / 1 Daily Tether Line and Belt Inspection
WARNING! To help avoid personal injury, the tether line is specially made to lessen the shock of a fall. Do not substitute other types of rope
Inspect the tether line for wear, cuts, or damage
Inspect the clips for cracks and proper operation
Inspect the belt for cracks, cuts, or wear
The operator has fastened the belt snugly with the 'D' ring in the center of the back
Sign off on the tether line and belt inspection
8 Hourly / 1 Daily Forks Maintenance
WARNING! Never repair damaged forks. Do not heat, weld, or bend forks. Replace damaged forks
Check the attachment points of the forks with a penetrant or magnetic particle inspection
CAUTION! Do not try to correct alignment of the fork tips by bending the forks. Use shims to align the fork tips. Replace damaged forks. Never repair damaged forks by heating or welding
Forks are made of special steel using special procedures. Replace damaged forks. Always replace forks in pairs
Check that the fork tips are aligned within 13 mm (0.5 in.) of each other. Add or remove shims for alignment
Sign off on the forks maintenance
8 Hourly / 1 Daily Battery Maintenance
WARNING! Do not put tools on the battery. Tools on the battery can cause a short circuit and possible damage or injury. The acid in the electrolyte can cause injury. If the electrolyte leaks, use water to flush the area. Make the acid neutral with a solution of sodium bicarbonate (baking soda). Acid in the eyes must be immediately flushed with water
WARNING! Do NOT put hands, arms, feet, or legs between the battery and a solid object. Batteries are very heavy and can cause an injury. The lift truck and battery stand MUST be on a level surface to remove the battery
Check the level of the electrolyte daily on a minimum of one cell. Add only distilled water if the cell is low. The correct level is halfway between the top of the plates and the bottom of the fill hole. To check and add water to the cells, the battery must be out of the battery compartment
Remove the battery as described in How to Change the Battery. Check the battery case, connector, and cables for damage, cracks, or breaks. See the battery dealer in your area to repair any damage. Keep the battery case and the battery compartment clean and painted. Leaks and corrosion from the battery can cause a malfunction in the electric controls of the lift truck
Use a water and soda solution to clean the battery and the battery compartment. Keep the top of the battery clean, dry, and free of corrosion
Check that the correct spacer is installed across the mast side of the battery compartment. The spacer must allow the battery to move not more than 13 mm (0.5 in.) toward the front or rear of the compartment
Check that the battery cannot move more than 13 mm (0.5 in.) across the width of the lift truck. If the battery can move more than the maximum amount, make sure the battery is the correct weight and the correct spacers are installed for that battery
See your Hyster lift truck dealer for the correct spacers. The correct battery is in Table 4 of Battery Maintenance at the end of this section
Check that each battery compartment panel fits correctly and is not bent
8 Hourly / 1 Daily Gauges, Lights, Horn, and Fuses Check
WARNING! Make sure the area around the lift truck is clear before moving the lift truck or checking for correct operation. Be careful to avoid injury or damage when making the checks.
NOTE: None of the electrical controls will operate until the power disconnect circuit is energized by the key switch.
Check that all the instruments and controls operate as described in the Operating Manual.
Check the operation of the gauges and horn. The key switch must be in the ON position to operate the horn.
The key switch must be ON and the foot switch must be depressed for the hourmeter to operate.
The battery meter operates whenever a charged battery is connected.
The battery meter correctly indicates the condition of the battery. If the battery meter LED is illuminated red, charge the battery.
There must be a current flow from the battery before the 'lift interrupt' indicator will be reset. Normal operation, after connecting a charged battery, will reset the indicator.
Check that the fuses are the correct sizes and are not burned. Some types of fuses must be checked with an ohmmeter.
Parts for Hyster-Yale Electric Reach Truck R30XM2
Access the parts list for your equipment in MaintainX.
Silicon Spray
328388
Silicon Spray
328388
Silicon Spray
328388
Unlock efficiency
with MaintainX CoPilot
MaintainX CoPilot is your expert colleague, on call 24/7, helping your team find the answers they need to keep equipment running.
Reduce Unplanned Downtime
Ensure your team follows consistent procedures to minimize equipment failures and costly delays.
Maximize Asset Availability
Keep your assets running longer and more reliably, with standardized maintenance workflows from OEM manuals.
Lower Maintenance Costs
Turn any technician into an expert to streamline operations, maintain more assets, and reduce overall costs.
Thousands of companies manage their assets with MaintainX

'%3e%3cpath%20fill='url(%23b)'%20d='M66.008%2080.068c-5.084-.786-9.763-3.834-12.442-8.68a16.942%2016.942%200%200%201-1.87-5.18c1.096.19%202.203.476%203.298.87%206.525%202.333%2010.836%207.68%2011.014%2012.99ZM51.47%2061.576c.488-5.524%203.62-10.716%208.847-13.597a17.132%2017.132%200%200%201%2011.335-1.882c-.798%208.145-7.43%2014.848-16.038%2015.599-1.417.119-2.799.07-4.144-.12Zm28.564-11.478a17.513%2017.513%200%200%201%203.727%204.62c4.608%208.335%201.584%2018.813-6.75%2023.409a16.988%2016.988%200%200%201-4.359%201.679%2019.624%2019.624%200%200%201-3.977-12.776c.346-7.561%204.942-13.931%2011.36-16.932Z'/%3e%3cpath%20fill='%23110F0D'%20fill-rule='evenodd'%20d='M142.831%2048.324h4.977V77.03h-4.977V48.324Zm27.278%2013.002c.322%201.048.453%202.263.453%203.62v12.073h-4.787V66.208c0-.75-.047-1.572-.154-2.143-.453-2.382-1.822-3.572-4.215-3.572-2.31%200-3.882%201.274-4.43%203.476-.143.596-.226%201.405-.226%202.25v10.8h-4.787V56.623h4.477v2.989c1.536-2.5%203.906-3.43%206.371-3.43%203.488%200%206.263%201.68%207.298%205.144Zm24.636%207.323c0%203.882-2.358%206.525-5.763%207.727-1.298.453-2.632.643-4.62.643h-10.169V48.324h9.085c1.691%200%203.156.143%204.049.38%203.465.93%205.727%203.68%205.727%207.335%200%202.441-.81%204.156-2.762%205.644%202.905%201.417%204.453%203.727%204.453%206.966Zm-15.634-8.656h4.584c1.024%200%201.917-.143%202.536-.417%201.215-.548%201.905-1.608%201.905-3.167%200-1.548-.643-2.572-1.845-3.132-.691-.31-1.762-.452-2.763-.452h-4.417v7.168Zm10.716%208.465c0-1.536-.893-3.37-3.227-3.893-.428-.095-1.036-.143-1.571-.143h-5.918v8.085h5.501c.56%200%201.429-.048%201.953-.167%201.94-.453%203.262-1.846%203.262-3.882Zm47.747-11.847-8.097%2020.408h-4.429l-8.109-20.408h5.191l5.192%2014.574%205.108-14.574h5.144Zm-20.218%2010.002c0%20.69-.036%201.262-.155%201.94h-15.943c.631%202.87%202.714%204.728%205.882%204.728%202.131%200%203.607-.882%204.703-2.525h4.87c-1.762%204.144-5.204%206.692-9.657%206.692-6.084%200-10.537-4.858-10.537-10.49%200-6.108%204.524-10.776%2010.335-10.776%206.239%200%2010.442%204.954%2010.502%2010.43Zm-4.763-1.405c-.333-2.846-2.643-4.858-5.691-4.858-2.894%200-5.287%201.929-5.621%204.858h11.312Zm-72.667%203.44c0%204.787-3.287%208.371-9.419%208.371H119.363V64.66c-1.917.274-3.87.69-5.811%201.238l4.537%2011.121h-5.418l-3.596-9.585c-5.144%202.084-10.085%205.216-14.217%209.585h-4.786L101.8%2048.312h4.56l5.68%2013.883a44.112%2044.112%200%200%201%207.323-1.774V48.312h9.084c1.703%200%203.156.143%204.061.393%203.453.929%205.727%203.667%205.727%207.323%200%201.917-.738%204.179-2.81%205.691%203.06%201.56%204.501%204.025%204.501%206.93Zm-15.634-8.667a62.664%2062.664%200%200%201%202.06-.036c1.703.012%203.239.131%204.608.37%201.441-.549%202.357-1.727%202.357-3.537%200-1.941-.881-3.144-2.488-3.667-.548-.18-1.358-.286-2.322-.286h-4.215v7.156Zm-16.55%203.905-3.715-9.894-6.394%2016.502c2.833-2.595%206.263-4.858%2010.109-6.608Zm27.254%204.74c0-2.775-3.131-4.347-8.513-4.418-.715%200-1.441.011-2.191.047v8.252h5.918c2.548%200%204.786-1.37%204.786-3.882Z'%20clip-rule='evenodd'/%3e%3c/g%3e%3cdefs%3e%3clinearGradient%20id='b'%20x1='51.47'%20x2='85.916'%20y1='62.946'%20y2='62.946'%20gradientUnits='userSpaceOnUse'%3e%3cstop%20stop-color='%23CD9F28'/%3e%3cstop%20offset='1'%20stop-color='%23ECD80B'/%3e%3c/linearGradient%3e%3cclipPath%20id='a'%3e%3cpath%20fill='%23fff'%20d='M51.47%2045.728h186.104V80.14H51.47z'/%3e%3c/clipPath%3e%3c/defs%3e%3c/svg%3e)


More from Hyster-Yale


Explore Other Assets


© 2026 MaintainX. All rights reserved.