


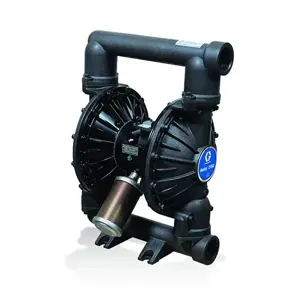
Graco Electrostatic Air Spray Gun L40M10
Need answers fast?
Explore the manual using AI.
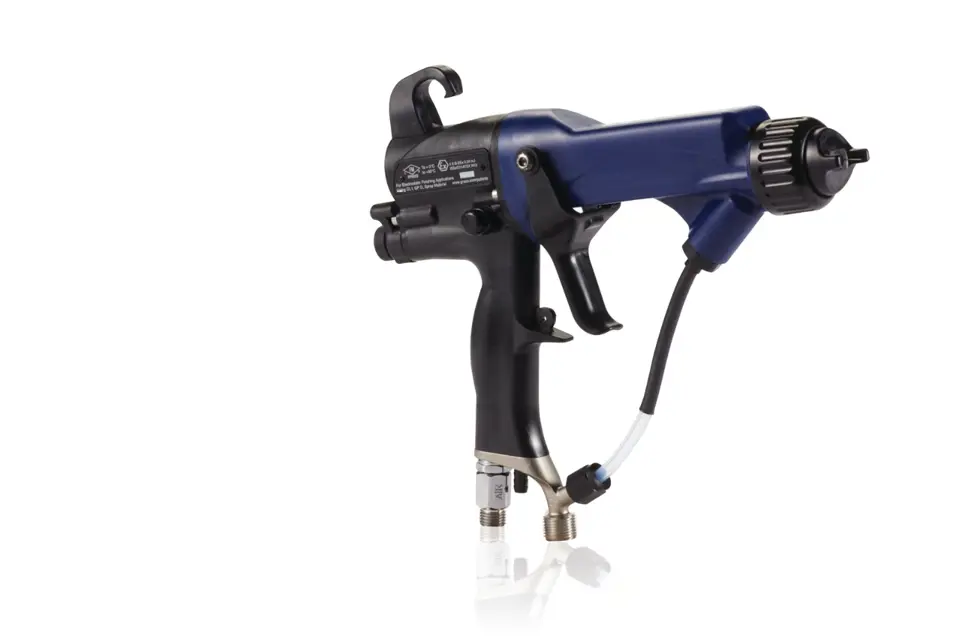
The Graco Electrostatic Air Spray Gun L40M10 is a high-performance spray gun designed for efficient electrostatic painting applications. Known for its precision and reliability, this model enhances coating quality while reducing overspray, making it ideal for industrial use. Optimize your painting processes with this advanced equipment from Graco.
Turn manuals into instant answers
with your AI-powered assistantTurn manuals into instant answers
with your AI-powered assistant
Manual for Graco Electrostatic Air Spray Gun L40M10
Complete asset maintenance, one click away
Get instant access to all the maintenance information you need. Empower technicians to perform preventive maintenance with asset packages, ready to use right out of the box.

Documents & Manuals
Find all the essential guides in one place.
 Tensioning Guide
- Belt-diagram
- C-120 pulleys
+ 13 more

Work Order Templates
Pre-built workflows to keep your asset running smoothly.
- Daily Electrical System Inspection
- Replace Roller and Pulley
- Install Engine B-120
+ 29 more

Procedures
Integrate maintenance plans directly into your work orders.
- Motion Industries
- Applied Industrial Technologies
- Electrical Brothers
+ 5 more

Parts
Access the parts list for your equipment in MaintainX.
- Drive Motor
- B2 Rollers
- Tensioning System
+ 40 more
Graco Electrostatic Air Spray Gun L40M10
Create an account to install this asset package.
Maintenance Plans for Graco Electrostatic Air Spray Gun Model L40M10
Integrate maintenance plans directly into your work orders in MaintainX.
1 Daily Air Spray Gun Maintenance
Warning: To reduce the risk of an injury, follow the Pressure Relief Procedure, page 37, whenever you are instructed to relieve the pressure.
Check gun resistance
Check hose resistance
Check electrical grounding
Check hoses, tubes, and couplings
Check equipment
Daily Care and Cleaning Checklist
Flush the gun
Clean the fluid and air line filters

2000 Hourly Alternator Bearing Replacement
Prepare the Gun for Service
Power supply/alternator assembly removed and alternator disconnected
Resistance between the two outer terminals of the 3-wire connector
Clip removed from the housing
Cap removed from the housing
Fan and coil assembly pushed out the front of the housing
Do not scratch or damage the magnet or shaft. Do not pinch or damage the 3-wire connector when disassembling and reassembling the bearings.
Fan pried off the shaft
Top bearing removed
Electrical Testing
Electrical components inside the gun affect performance and safety. Use the following procedures to test the condition of the power supply and gun body, and electrical continuity between components.
Use megohmmeter Part No. 241079 (AA) and an applied voltage of 500 V. Connect the leads as shown.
⚠️⚠️⚡️ Megohmmeter Part No. 241079 (AA – see Fig. 17) is not approved for use in a hazardous location. To reduce the risk of sparking, do not use the megohmmeter to check electrical grounding unless:
• The gun has been removed from the hazardous location;
• Or all spraying devices in the hazardous location are turned off, ventilation fans in the hazardous location are operating, and there are no flammable vapors in the area (such as open solvent containers or fumes from spraying).
Failure to follow this warning could cause fire, explosion, and electric shock and result in serious injury and property damage.
Test Gun Resistance 1. Flush and dry the fluid passage.
2. For Model L40M14, L40T14, L40M15, and L40T15 guns only: Test the barrel continuity to verify that the metal pin in the barrel is properly grounded. Measure resistance between the metal pin (GP) and the air swivel (21). The resistance should be less than 100 ohms. If the resistance is 100 ohms or more, replace the gun body.
3. For all guns: Trigger the gun and measure resistance between the electrode needle tip (3) and the air swivel (21). The resistance should be:
Parts for Graco Electrostatic Air Spray Gun L40M10
Access the parts list for your equipment in MaintainX.
Probe
722860
Bearing Kit
24N706
Non-Silicone Grease
111265
Resistance Meter
722886
Megohmmeter
241079
Probe
722860
Bearing Kit
24N706
Non-Silicone Grease
111265
Resistance Meter
722886
Megohmmeter
241079
Probe
722860
Bearing Kit
24N706
Non-Silicone Grease
111265
Resistance Meter
722886
Megohmmeter
241079
Unlock efficiency
with MaintainX CoPilot
MaintainX CoPilot is your expert colleague, on call 24/7, helping your team find the answers they need to keep equipment running.
Reduce Unplanned Downtime
Ensure your team follows consistent procedures to minimize equipment failures and costly delays.
Maximize Asset Availability
Keep your assets running longer and more reliably, with standardized maintenance workflows from OEM manuals.
Lower Maintenance Costs
Turn any technician into an expert to streamline operations, maintain more assets, and reduce overall costs.
Thousands of companies manage their assets with MaintainX

'%3e%3cpath%20fill='url(%23b)'%20d='M66.008%2080.068c-5.084-.786-9.763-3.834-12.442-8.68a16.942%2016.942%200%200%201-1.87-5.18c1.096.19%202.203.476%203.298.87%206.525%202.333%2010.836%207.68%2011.014%2012.99ZM51.47%2061.576c.488-5.524%203.62-10.716%208.847-13.597a17.132%2017.132%200%200%201%2011.335-1.882c-.798%208.145-7.43%2014.848-16.038%2015.599-1.417.119-2.799.07-4.144-.12Zm28.564-11.478a17.513%2017.513%200%200%201%203.727%204.62c4.608%208.335%201.584%2018.813-6.75%2023.409a16.988%2016.988%200%200%201-4.359%201.679%2019.624%2019.624%200%200%201-3.977-12.776c.346-7.561%204.942-13.931%2011.36-16.932Z'/%3e%3cpath%20fill='%23110F0D'%20fill-rule='evenodd'%20d='M142.831%2048.324h4.977V77.03h-4.977V48.324Zm27.278%2013.002c.322%201.048.453%202.263.453%203.62v12.073h-4.787V66.208c0-.75-.047-1.572-.154-2.143-.453-2.382-1.822-3.572-4.215-3.572-2.31%200-3.882%201.274-4.43%203.476-.143.596-.226%201.405-.226%202.25v10.8h-4.787V56.623h4.477v2.989c1.536-2.5%203.906-3.43%206.371-3.43%203.488%200%206.263%201.68%207.298%205.144Zm24.636%207.323c0%203.882-2.358%206.525-5.763%207.727-1.298.453-2.632.643-4.62.643h-10.169V48.324h9.085c1.691%200%203.156.143%204.049.38%203.465.93%205.727%203.68%205.727%207.335%200%202.441-.81%204.156-2.762%205.644%202.905%201.417%204.453%203.727%204.453%206.966Zm-15.634-8.656h4.584c1.024%200%201.917-.143%202.536-.417%201.215-.548%201.905-1.608%201.905-3.167%200-1.548-.643-2.572-1.845-3.132-.691-.31-1.762-.452-2.763-.452h-4.417v7.168Zm10.716%208.465c0-1.536-.893-3.37-3.227-3.893-.428-.095-1.036-.143-1.571-.143h-5.918v8.085h5.501c.56%200%201.429-.048%201.953-.167%201.94-.453%203.262-1.846%203.262-3.882Zm47.747-11.847-8.097%2020.408h-4.429l-8.109-20.408h5.191l5.192%2014.574%205.108-14.574h5.144Zm-20.218%2010.002c0%20.69-.036%201.262-.155%201.94h-15.943c.631%202.87%202.714%204.728%205.882%204.728%202.131%200%203.607-.882%204.703-2.525h4.87c-1.762%204.144-5.204%206.692-9.657%206.692-6.084%200-10.537-4.858-10.537-10.49%200-6.108%204.524-10.776%2010.335-10.776%206.239%200%2010.442%204.954%2010.502%2010.43Zm-4.763-1.405c-.333-2.846-2.643-4.858-5.691-4.858-2.894%200-5.287%201.929-5.621%204.858h11.312Zm-72.667%203.44c0%204.787-3.287%208.371-9.419%208.371H119.363V64.66c-1.917.274-3.87.69-5.811%201.238l4.537%2011.121h-5.418l-3.596-9.585c-5.144%202.084-10.085%205.216-14.217%209.585h-4.786L101.8%2048.312h4.56l5.68%2013.883a44.112%2044.112%200%200%201%207.323-1.774V48.312h9.084c1.703%200%203.156.143%204.061.393%203.453.929%205.727%203.667%205.727%207.323%200%201.917-.738%204.179-2.81%205.691%203.06%201.56%204.501%204.025%204.501%206.93Zm-15.634-8.667a62.664%2062.664%200%200%201%202.06-.036c1.703.012%203.239.131%204.608.37%201.441-.549%202.357-1.727%202.357-3.537%200-1.941-.881-3.144-2.488-3.667-.548-.18-1.358-.286-2.322-.286h-4.215v7.156Zm-16.55%203.905-3.715-9.894-6.394%2016.502c2.833-2.595%206.263-4.858%2010.109-6.608Zm27.254%204.74c0-2.775-3.131-4.347-8.513-4.418-.715%200-1.441.011-2.191.047v8.252h5.918c2.548%200%204.786-1.37%204.786-3.882Z'%20clip-rule='evenodd'/%3e%3c/g%3e%3cdefs%3e%3clinearGradient%20id='b'%20x1='51.47'%20x2='85.916'%20y1='62.946'%20y2='62.946'%20gradientUnits='userSpaceOnUse'%3e%3cstop%20stop-color='%23CD9F28'/%3e%3cstop%20offset='1'%20stop-color='%23ECD80B'/%3e%3c/linearGradient%3e%3cclipPath%20id='a'%3e%3cpath%20fill='%23fff'%20d='M51.47%2045.728h186.104V80.14H51.47z'/%3e%3c/clipPath%3e%3c/defs%3e%3c/svg%3e)


More from Graco


Explore Other Assets


© 2026 MaintainX. All rights reserved.