


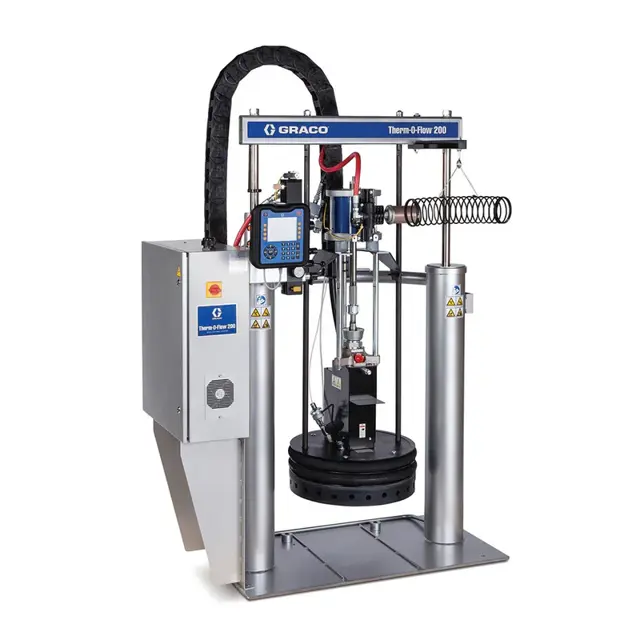
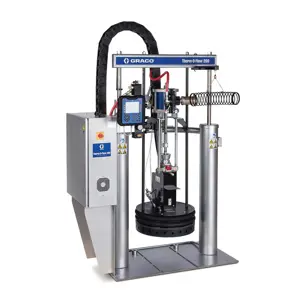
Graco Drum Unloader TOF200A-2-A-1-P-6-2-B-E-1-Y-1
Need answers fast?
Explore the manual using AI.
Turn manuals into instant answers
with your AI-powered assistantTurn manuals into instant answers
with your AI-powered assistant
Manual for Graco Drum Unloader TOF200A-2-A-1-P-6-2-B-E-1-Y-1
Complete asset maintenance, one click away
Get instant access to all the maintenance information you need. Empower technicians to perform preventive maintenance with asset packages, ready to use right out of the box.

Documents & Manuals
Find all the essential guides in one place.
 Tensioning Guide
- Belt-diagram
- C-120 pulleys
+ 13 more

Work Order Templates
Pre-built workflows to keep your asset running smoothly.
- Daily Electrical System Inspection
- Replace Roller and Pulley
- Install Engine B-120
+ 29 more

Procedures
Integrate maintenance plans directly into your work orders.
- Motion Industries
- Applied Industrial Technologies
- Electrical Brothers
+ 5 more

Parts
Access the parts list for your equipment in MaintainX.
- Drive Motor
- B2 Rollers
- Tensioning System
+ 40 more
Graco Drum Unloader TOF200A-2-A-1-P-6-2-B-E-1-Y-1
Create an account to install this asset package.
Maintenance Plans for Graco Drum Unloader Model TOF200A-2-A-1-P-6-2-B-E-1-Y-1
Integrate maintenance plans directly into your work orders in MaintainX.
Heat Sensors Replacement
Material drum removed from the supply unit
Ram plate is down and the ram hand valve is in the OFF position
Main electrical disconnect switch turned OFF
Front and right side pump cover removed
Sensor removed from the ram plate
Two sensor wires disconnected from the J1 or J2 of PCB201
Leads from the new sensor attached to the leads of the old sensor and pulled into the main control panel
New sensor installed into the follower/tire plate after coating with non-silicone heat sink compound
Two wires from the new sensor connected to the J1 or J2 of PCB201

Pump Removal and Replacement
Warning: Follow all safety procedures and lockout rules during this procedure.
Material drum removed from the supply unit?
Is the ram plate down and the ram hand valve in the neutral position?
Excess material and pressure in the system bled off?
System heat turned off on the electrical control panel?
Main electrical power supply to the unit turned OFF?
Main electrical disconnect turned OFF?
All material hoses disconnected?
Pump sheet metal enclosure removed?
Heater Bands and Sensors Replacement
Module heaters and sensor can be serviced without removing the pump module from the supply unit. Remove the front shrouds. When finished servicing the pump module re-attach shrouds.
This procedure can be done when the Therm-O-Flow 200 is cool.
Removing/Replacing Heater Band
1. Remove the screws that hold the front shroud in place and remove the front shroud.
2. Disconnect the electrical wires from heater band (3). See FIG. 25.
3. Remove the screw that holds the heater band in place.
4. Remove the heater band from pump.
5. Coat the inside of the heater with non silicone heat sink compound before mounting. Maximum thickness is 0.005”. Coat only to within 3/4” of vertical ends.
6. Install a new heater band in the same location as the old heater band:
Parts for Graco Drum Unloader TOF200A-2-A-1-P-6-2-B-E-1-Y-1
Access the parts list for your equipment in MaintainX.
Clamps, see parts starting on page 76 (Ref 6)
C32463
Vent Hood Kit, see page 79 (Ref 7)
233559
Pneumatic Controls (Ref 8)
253137
Kit, Light Tower (Ref 10)
253547
Cable, Way (Ref 11)
253288
Clamps, see parts starting on page 76 (Ref 6)
C32463
Vent Hood Kit, see page 79 (Ref 7)
233559
Pneumatic Controls (Ref 8)
253137
Kit, Light Tower (Ref 10)
253547
Cable, Way (Ref 11)
253288
Clamps, see parts starting on page 76 (Ref 6)
C32463
Vent Hood Kit, see page 79 (Ref 7)
233559
Pneumatic Controls (Ref 8)
253137
Kit, Light Tower (Ref 10)
253547
Cable, Way (Ref 11)
253288
Unlock efficiency
with MaintainX CoPilot
MaintainX CoPilot is your expert colleague, on call 24/7, helping your team find the answers they need to keep equipment running.
Reduce Unplanned Downtime
Ensure your team follows consistent procedures to minimize equipment failures and costly delays.
Maximize Asset Availability
Keep your assets running longer and more reliably, with standardized maintenance workflows from OEM manuals.
Lower Maintenance Costs
Turn any technician into an expert to streamline operations, maintain more assets, and reduce overall costs.
Thousands of companies manage their assets with MaintainX

'%3e%3cpath%20fill='url(%23b)'%20d='M66.008%2080.068c-5.084-.786-9.763-3.834-12.442-8.68a16.942%2016.942%200%200%201-1.87-5.18c1.096.19%202.203.476%203.298.87%206.525%202.333%2010.836%207.68%2011.014%2012.99ZM51.47%2061.576c.488-5.524%203.62-10.716%208.847-13.597a17.132%2017.132%200%200%201%2011.335-1.882c-.798%208.145-7.43%2014.848-16.038%2015.599-1.417.119-2.799.07-4.144-.12Zm28.564-11.478a17.513%2017.513%200%200%201%203.727%204.62c4.608%208.335%201.584%2018.813-6.75%2023.409a16.988%2016.988%200%200%201-4.359%201.679%2019.624%2019.624%200%200%201-3.977-12.776c.346-7.561%204.942-13.931%2011.36-16.932Z'/%3e%3cpath%20fill='%23110F0D'%20fill-rule='evenodd'%20d='M142.831%2048.324h4.977V77.03h-4.977V48.324Zm27.278%2013.002c.322%201.048.453%202.263.453%203.62v12.073h-4.787V66.208c0-.75-.047-1.572-.154-2.143-.453-2.382-1.822-3.572-4.215-3.572-2.31%200-3.882%201.274-4.43%203.476-.143.596-.226%201.405-.226%202.25v10.8h-4.787V56.623h4.477v2.989c1.536-2.5%203.906-3.43%206.371-3.43%203.488%200%206.263%201.68%207.298%205.144Zm24.636%207.323c0%203.882-2.358%206.525-5.763%207.727-1.298.453-2.632.643-4.62.643h-10.169V48.324h9.085c1.691%200%203.156.143%204.049.38%203.465.93%205.727%203.68%205.727%207.335%200%202.441-.81%204.156-2.762%205.644%202.905%201.417%204.453%203.727%204.453%206.966Zm-15.634-8.656h4.584c1.024%200%201.917-.143%202.536-.417%201.215-.548%201.905-1.608%201.905-3.167%200-1.548-.643-2.572-1.845-3.132-.691-.31-1.762-.452-2.763-.452h-4.417v7.168Zm10.716%208.465c0-1.536-.893-3.37-3.227-3.893-.428-.095-1.036-.143-1.571-.143h-5.918v8.085h5.501c.56%200%201.429-.048%201.953-.167%201.94-.453%203.262-1.846%203.262-3.882Zm47.747-11.847-8.097%2020.408h-4.429l-8.109-20.408h5.191l5.192%2014.574%205.108-14.574h5.144Zm-20.218%2010.002c0%20.69-.036%201.262-.155%201.94h-15.943c.631%202.87%202.714%204.728%205.882%204.728%202.131%200%203.607-.882%204.703-2.525h4.87c-1.762%204.144-5.204%206.692-9.657%206.692-6.084%200-10.537-4.858-10.537-10.49%200-6.108%204.524-10.776%2010.335-10.776%206.239%200%2010.442%204.954%2010.502%2010.43Zm-4.763-1.405c-.333-2.846-2.643-4.858-5.691-4.858-2.894%200-5.287%201.929-5.621%204.858h11.312Zm-72.667%203.44c0%204.787-3.287%208.371-9.419%208.371H119.363V64.66c-1.917.274-3.87.69-5.811%201.238l4.537%2011.121h-5.418l-3.596-9.585c-5.144%202.084-10.085%205.216-14.217%209.585h-4.786L101.8%2048.312h4.56l5.68%2013.883a44.112%2044.112%200%200%201%207.323-1.774V48.312h9.084c1.703%200%203.156.143%204.061.393%203.453.929%205.727%203.667%205.727%207.323%200%201.917-.738%204.179-2.81%205.691%203.06%201.56%204.501%204.025%204.501%206.93Zm-15.634-8.667a62.664%2062.664%200%200%201%202.06-.036c1.703.012%203.239.131%204.608.37%201.441-.549%202.357-1.727%202.357-3.537%200-1.941-.881-3.144-2.488-3.667-.548-.18-1.358-.286-2.322-.286h-4.215v7.156Zm-16.55%203.905-3.715-9.894-6.394%2016.502c2.833-2.595%206.263-4.858%2010.109-6.608Zm27.254%204.74c0-2.775-3.131-4.347-8.513-4.418-.715%200-1.441.011-2.191.047v8.252h5.918c2.548%200%204.786-1.37%204.786-3.882Z'%20clip-rule='evenodd'/%3e%3c/g%3e%3cdefs%3e%3clinearGradient%20id='b'%20x1='51.47'%20x2='85.916'%20y1='62.946'%20y2='62.946'%20gradientUnits='userSpaceOnUse'%3e%3cstop%20stop-color='%23CD9F28'/%3e%3cstop%20offset='1'%20stop-color='%23ECD80B'/%3e%3c/linearGradient%3e%3cclipPath%20id='a'%3e%3cpath%20fill='%23fff'%20d='M51.47%2045.728h186.104V80.14H51.47z'/%3e%3c/clipPath%3e%3c/defs%3e%3c/svg%3e)


More from Graco


Explore Other Assets


© 2026 MaintainX. All rights reserved.