


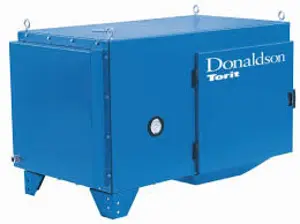
Donaldson Torit Mist Collector DMC-MMA
Need answers fast?
Explore the manual using AI.

Turn manuals into instant answers
with your AI-powered assistantTurn manuals into instant answers
with your AI-powered assistant
Manual for Donaldson Torit Mist Collector DMC-MMA
Complete asset maintenance, one click away
Get instant access to all the maintenance information you need. Empower technicians to perform preventive maintenance with asset packages, ready to use right out of the box.

Documents & Manuals
Find all the essential guides in one place.
 Tensioning Guide
- Belt-diagram
- C-120 pulleys
+ 13 more

Work Order Templates
Pre-built workflows to keep your asset running smoothly.
- Daily Electrical System Inspection
- Replace Roller and Pulley
- Install Engine B-120
+ 29 more

Procedures
Integrate maintenance plans directly into your work orders.
- Motion Industries
- Applied Industrial Technologies
- Electrical Brothers
+ 5 more

Parts
Access the parts list for your equipment in MaintainX.
- Drive Motor
- B2 Rollers
- Tensioning System
+ 40 more
Donaldson Torit Mist Collector DMC-MMA
Create an account to install this asset package.
Maintenance Plans for Donaldson Torit Mist Collector Model DMC-MMA
Integrate maintenance plans directly into your work orders in MaintainX.
Mist Collector Check
⚠️ WARNING: Use proper equipment and adopt all safety precautions needed for servicing equipment. Electrical service or maintenance work must be performed by a qualified electrician and comply with all applicable national and local codes. Turn power off and lock out electrical power sources before performing service or maintenance work. Do not install in classified hazardous atmospheres without an enclosure rated for the application.
Monitor the physical condition of the collector and repair or replace any damaged components. Routine inspections will minimize downtime and maintain optimum system performance. This is particularly important on continuous-duty applications.
Monitor pressure drop across filters. Abnormal changes in pressure drop indicate a change in operating conditions and possibly a fault to be corrected.
If the pressure gauge is in the red zone, the second-stage filter wrap or third-stage filter cartridge may need replacement. In some applications, it may be necessary to replace the second-stage filter wrap two to three times during the life of a single, third-stage filter cartridge.
To determine if the second-stage filter wrap needs replacing, install a clean wrap, restart the unit, and check the pressure gauge reading. If the gauge is now in the green zone, continue to operate the unit with the new wrap. If the gauge still reads in the red zone, the filter cartridge needs replacement.
Monitor exhaust. Exhaust should remain visually clean throughout filter life. If leaks are visible, check the filter cartridge and optional HEPA filter for positive gasket seals.
Monitor hopper drainings. If slow or stopped, check hopper for obstructions and clean as necessary. Check first-stage filter and clean as required.
Monitor second-stage filter wrap.
Sign off on the Mist Collector Check

Mist Collector Start-Up Check
⚠️ WARNING: Electrical work during installation must be performed by a qualified electrician and comply with all applicable national and local codes.
⚠️ WARNING: Turn power off and lock out electrical power sources before performing service or maintenance work.
Check that the collector is clear and free of all debris before starting.
⚠️ WARNING: Do not install in classified hazardous atmospheres without an enclosure rated for the application.
⚠️ WARNING: Optional fans over 600 lbs must be independently supported.
Check all electrical connections for tightness and contact.
Motor and fan should be wired for clockwise rotation when viewed from the back of the motor.
⚠️ WARNING: Do not interchange a power lead with the ground wire. Severe damage or personal injury may result.
All access panels should be sealed and secure.
Drain Collection Container Maintenance
Turn unit OFF
Remove the container by unscrewing the container from the cap
Clean the container
Clean the faucet
Reinstall the container
Note: Close the faucet before turning the collector back ON
The optional drain collection container is available for use with an impact separator ONLY. A semi-clear one-gallon plastic container attached to the bottom of the impact separator collects small particles and coolant
To install, simply thread the container onto the bottom of the impact separator. The container’s faucet must be closed when the unit is in operation
Sign off on the drain collection container maintenance
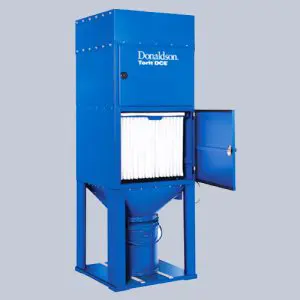
Third-Stage Filter Cartridge Replacement
Warning: Replace the second-stage filter wrap and third-stage filter cartridge at the same time for easy maintenance.
Filter retention lever pulled out and down to a horizontal position
Upload a photo of the removed cartridge
Note: A large plastic garbage bag placed over the top of the used filter allows cleaner filter change out. The filter can be tipped forward and out of the unit while the bag is pulled up over the bottom of the cartridge.
New filter and wrap placed on the filter retention platform, gasket side up
Filter slid back as far as it will go and centered side-to-side
Filter retention lever lifted up and access door closed
Sign off on the filter cartridge replacement
Upon-Arrival Mist Collector Inspection
Inspect unit on delivery
Report any damage to the delivery carrier
Request a written inspection report from the Claims Inspector to substantiate claim
File claims with the delivery carrier
Compare unit received with description of product ordered
Report incomplete shipments to the delivery carrier and your Donaldson representative
Remove crates and shipping straps. Remove loose components and accessory packages before lifting unit from truck
Check for hardware that may have loosened during shipping
Use caution removing temporary covers
Unlock efficiency
with MaintainX CoPilot
MaintainX CoPilot is your expert colleague, on call 24/7, helping your team find the answers they need to keep equipment running.
Reduce Unplanned Downtime
Ensure your team follows consistent procedures to minimize equipment failures and costly delays.
Maximize Asset Availability
Keep your assets running longer and more reliably, with standardized maintenance workflows from OEM manuals.
Lower Maintenance Costs
Turn any technician into an expert to streamline operations, maintain more assets, and reduce overall costs.
Thousands of companies manage their assets with MaintainX

'%3e%3cpath%20fill='url(%23b)'%20d='M66.008%2080.068c-5.084-.786-9.763-3.834-12.442-8.68a16.942%2016.942%200%200%201-1.87-5.18c1.096.19%202.203.476%203.298.87%206.525%202.333%2010.836%207.68%2011.014%2012.99ZM51.47%2061.576c.488-5.524%203.62-10.716%208.847-13.597a17.132%2017.132%200%200%201%2011.335-1.882c-.798%208.145-7.43%2014.848-16.038%2015.599-1.417.119-2.799.07-4.144-.12Zm28.564-11.478a17.513%2017.513%200%200%201%203.727%204.62c4.608%208.335%201.584%2018.813-6.75%2023.409a16.988%2016.988%200%200%201-4.359%201.679%2019.624%2019.624%200%200%201-3.977-12.776c.346-7.561%204.942-13.931%2011.36-16.932Z'/%3e%3cpath%20fill='%23110F0D'%20fill-rule='evenodd'%20d='M142.831%2048.324h4.977V77.03h-4.977V48.324Zm27.278%2013.002c.322%201.048.453%202.263.453%203.62v12.073h-4.787V66.208c0-.75-.047-1.572-.154-2.143-.453-2.382-1.822-3.572-4.215-3.572-2.31%200-3.882%201.274-4.43%203.476-.143.596-.226%201.405-.226%202.25v10.8h-4.787V56.623h4.477v2.989c1.536-2.5%203.906-3.43%206.371-3.43%203.488%200%206.263%201.68%207.298%205.144Zm24.636%207.323c0%203.882-2.358%206.525-5.763%207.727-1.298.453-2.632.643-4.62.643h-10.169V48.324h9.085c1.691%200%203.156.143%204.049.38%203.465.93%205.727%203.68%205.727%207.335%200%202.441-.81%204.156-2.762%205.644%202.905%201.417%204.453%203.727%204.453%206.966Zm-15.634-8.656h4.584c1.024%200%201.917-.143%202.536-.417%201.215-.548%201.905-1.608%201.905-3.167%200-1.548-.643-2.572-1.845-3.132-.691-.31-1.762-.452-2.763-.452h-4.417v7.168Zm10.716%208.465c0-1.536-.893-3.37-3.227-3.893-.428-.095-1.036-.143-1.571-.143h-5.918v8.085h5.501c.56%200%201.429-.048%201.953-.167%201.94-.453%203.262-1.846%203.262-3.882Zm47.747-11.847-8.097%2020.408h-4.429l-8.109-20.408h5.191l5.192%2014.574%205.108-14.574h5.144Zm-20.218%2010.002c0%20.69-.036%201.262-.155%201.94h-15.943c.631%202.87%202.714%204.728%205.882%204.728%202.131%200%203.607-.882%204.703-2.525h4.87c-1.762%204.144-5.204%206.692-9.657%206.692-6.084%200-10.537-4.858-10.537-10.49%200-6.108%204.524-10.776%2010.335-10.776%206.239%200%2010.442%204.954%2010.502%2010.43Zm-4.763-1.405c-.333-2.846-2.643-4.858-5.691-4.858-2.894%200-5.287%201.929-5.621%204.858h11.312Zm-72.667%203.44c0%204.787-3.287%208.371-9.419%208.371H119.363V64.66c-1.917.274-3.87.69-5.811%201.238l4.537%2011.121h-5.418l-3.596-9.585c-5.144%202.084-10.085%205.216-14.217%209.585h-4.786L101.8%2048.312h4.56l5.68%2013.883a44.112%2044.112%200%200%201%207.323-1.774V48.312h9.084c1.703%200%203.156.143%204.061.393%203.453.929%205.727%203.667%205.727%207.323%200%201.917-.738%204.179-2.81%205.691%203.06%201.56%204.501%204.025%204.501%206.93Zm-15.634-8.667a62.664%2062.664%200%200%201%202.06-.036c1.703.012%203.239.131%204.608.37%201.441-.549%202.357-1.727%202.357-3.537%200-1.941-.881-3.144-2.488-3.667-.548-.18-1.358-.286-2.322-.286h-4.215v7.156Zm-16.55%203.905-3.715-9.894-6.394%2016.502c2.833-2.595%206.263-4.858%2010.109-6.608Zm27.254%204.74c0-2.775-3.131-4.347-8.513-4.418-.715%200-1.441.011-2.191.047v8.252h5.918c2.548%200%204.786-1.37%204.786-3.882Z'%20clip-rule='evenodd'/%3e%3c/g%3e%3cdefs%3e%3clinearGradient%20id='b'%20x1='51.47'%20x2='85.916'%20y1='62.946'%20y2='62.946'%20gradientUnits='userSpaceOnUse'%3e%3cstop%20stop-color='%23CD9F28'/%3e%3cstop%20offset='1'%20stop-color='%23ECD80B'/%3e%3c/linearGradient%3e%3cclipPath%20id='a'%3e%3cpath%20fill='%23fff'%20d='M51.47%2045.728h186.104V80.14H51.47z'/%3e%3c/clipPath%3e%3c/defs%3e%3c/svg%3e)


More from Donaldson Torit


Explore Other Assets


© 2026 MaintainX. All rights reserved.