


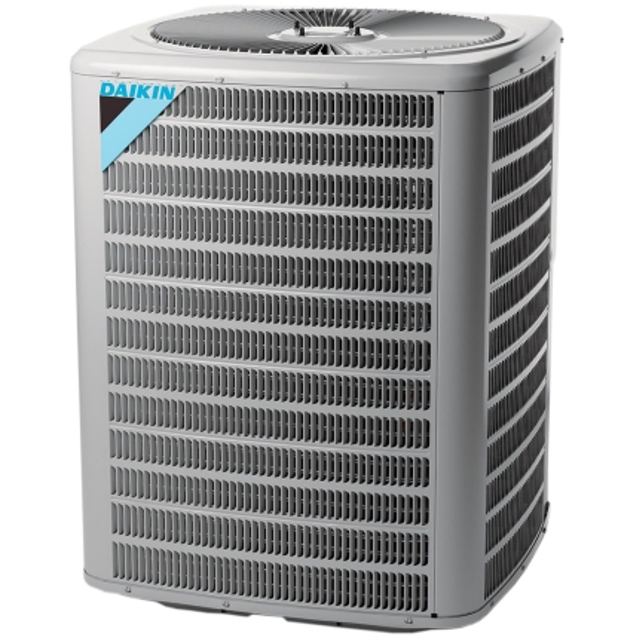
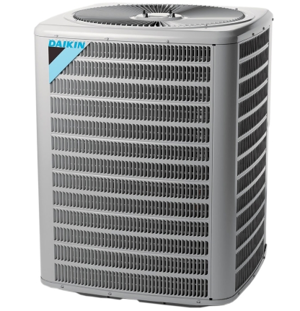
Daikin Condensing Unit DX13SSA0363AD
Need answers fast?
Explore the manual using AI.
Turn manuals into instant answers
with your AI-powered assistantTurn manuals into instant answers
with your AI-powered assistant
Manual for Daikin Condensing Unit DX13SSA0363AD
Complete asset maintenance, one click away
Get instant access to all the maintenance information you need. Empower technicians to perform preventive maintenance with asset packages, ready to use right out of the box.

Documents & Manuals
Find all the essential guides in one place.
 Tensioning Guide
- Belt-diagram
- C-120 pulleys
+ 13 more

Work Order Templates
Pre-built workflows to keep your asset running smoothly.
- Daily Electrical System Inspection
- Replace Roller and Pulley
- Install Engine B-120
+ 29 more

Procedures
Integrate maintenance plans directly into your work orders.
- Motion Industries
- Applied Industrial Technologies
- Electrical Brothers
+ 5 more

Parts
Access the parts list for your equipment in MaintainX.
- Drive Motor
- B2 Rollers
- Tensioning System
+ 40 more
Daikin Condensing Unit DX13SSA0363AD
Create an account to install this asset package.
Maintenance Plans for Daikin Condensing Unit Model DX13SSA0363AD
Integrate maintenance plans directly into your work orders in MaintainX.
High Efficiency Motor Check
Warning: This procedure requires trained personnel with PPE!
Enter the voltage reading between motor connections L and N
If voltage is not 230 volts, check the line voltage circuit to the motor
Enter the voltage reading from terminal C to either terminal 1, 2, 3, 4, or 5
If no voltage, check 24 volt circuit to motor
Motor passed the voltage test?
If voltage was present in steps 1 and 2, the motor has failed and will need to be replaced
Note: When replacing motor, ensure the belly band is between the vents on the motor and the wiring has the proper drip loop to prevent condensate from entering the motor
Sign off on the motor check

Contactor And/Or Relays Check
WARNING: HIGH VOLTAGE! Disconnect ALL power before servicing or installing. Multiple power sources may be present. Failure to do so may cause property damage, personal injury or death.
The compressor contactor and other relay holding coils are wired into the low or line voltage circuits. When the control circuit is energized, the coil pulls in the normally open contacts or opens the normally closed contacts. When the coil is de-energized, springs return the contacts to their normal position.
NOTE: Most single phase contactors break only one side of the line (L1), leaving 115 volts to ground present at most internal components.
Power disconnected?
Leads removed from the holding coil?
Ohmmeter reading across the coil terminals
Coil tests continuous?
Relay or contactor replaced if coil does not test continuous?
Sign off on the contactor and/or relays check
Fan / Blower Motor Winding Check
WARNING: HIGH VOLTAGE! Disconnect ALL power before servicing or installing. Multiple power sources may be present. Failure to do so may cause property damage, personal injury or death.
The auto reset fan motor overload is designed to protect the motor against high temperature and high amperage conditions by breaking the common circuit within the motor, similar to the compressor internal overload. However, heat generated within the motor is faster to dissipate than the compressor, allow at least 45 minutes for the overload to reset, then retest.
Motor leads removed from its respective connection points and capacitor (if applicable)?
Continuity checked between each of the motor leads?
One probe of the ohmmeter touched to the motor frame (ground) and the other probe in turn to each lead?
Did the windings test continuous?
Was a reading obtained from lead to ground?
If the windings do not test continuous or a reading is obtained from lead to ground, replace the motor.
Sign off on the motor winding check
3-Phase Scroll Compressor Rotation Check
NOTE: The compressor may run backwards (noisy operation) for 1 or 2 seconds at shutdown. This is normal and does not harm the compressor.
Install gauges and verify that the suction pressure drops while the discharge pressure increases.
Listen for normal compressor sound levels. Reverse rotation results in elevated or unusual sound levels.
Reverse rotation will result in substantially reduced amp draw from tabulated values.
To correct improper rotation, switch any two power supply leads at the outdoor unit contactor.
The 3-phase scroll compressors are direction of rotation sensitive. They will rotate in either direction depending on the phasing of the power. There is no negative impact on durability caused by operating 3-phase compressors in reversed rotation.
The compressor’s internal protector will trip, de-energizing the compressor. Continued operation of 3-phase scroll compressors with the rotation reversed will contribute to compressor failure. All 3-phase scroll compressors should be checked for correct phase rotation.
Sign off on the compressor rotation check
Wiring Check
WARNING: HIGH VOLTAGE! Disconnect ALL power before servicing or installing. Multiple power sources may be present. Failure to do so may cause property damage, personal injury or death.
Check wiring visually for signs of overheating, damaged insulation and loose connections.
Use an ohmmeter to check continuity of any suspected open wires.
If any wires must be replaced, replace with comparable gauge and insulation thickness.
Sign off on the wiring check
Unlock efficiency
with MaintainX CoPilot
MaintainX CoPilot is your expert colleague, on call 24/7, helping your team find the answers they need to keep equipment running.
Reduce Unplanned Downtime
Ensure your team follows consistent procedures to minimize equipment failures and costly delays.
Maximize Asset Availability
Keep your assets running longer and more reliably, with standardized maintenance workflows from OEM manuals.
Lower Maintenance Costs
Turn any technician into an expert to streamline operations, maintain more assets, and reduce overall costs.
Thousands of companies manage their assets with MaintainX

'%3e%3cpath%20fill='url(%23b)'%20d='M66.008%2080.068c-5.084-.786-9.763-3.834-12.442-8.68a16.942%2016.942%200%200%201-1.87-5.18c1.096.19%202.203.476%203.298.87%206.525%202.333%2010.836%207.68%2011.014%2012.99ZM51.47%2061.576c.488-5.524%203.62-10.716%208.847-13.597a17.132%2017.132%200%200%201%2011.335-1.882c-.798%208.145-7.43%2014.848-16.038%2015.599-1.417.119-2.799.07-4.144-.12Zm28.564-11.478a17.513%2017.513%200%200%201%203.727%204.62c4.608%208.335%201.584%2018.813-6.75%2023.409a16.988%2016.988%200%200%201-4.359%201.679%2019.624%2019.624%200%200%201-3.977-12.776c.346-7.561%204.942-13.931%2011.36-16.932Z'/%3e%3cpath%20fill='%23110F0D'%20fill-rule='evenodd'%20d='M142.831%2048.324h4.977V77.03h-4.977V48.324Zm27.278%2013.002c.322%201.048.453%202.263.453%203.62v12.073h-4.787V66.208c0-.75-.047-1.572-.154-2.143-.453-2.382-1.822-3.572-4.215-3.572-2.31%200-3.882%201.274-4.43%203.476-.143.596-.226%201.405-.226%202.25v10.8h-4.787V56.623h4.477v2.989c1.536-2.5%203.906-3.43%206.371-3.43%203.488%200%206.263%201.68%207.298%205.144Zm24.636%207.323c0%203.882-2.358%206.525-5.763%207.727-1.298.453-2.632.643-4.62.643h-10.169V48.324h9.085c1.691%200%203.156.143%204.049.38%203.465.93%205.727%203.68%205.727%207.335%200%202.441-.81%204.156-2.762%205.644%202.905%201.417%204.453%203.727%204.453%206.966Zm-15.634-8.656h4.584c1.024%200%201.917-.143%202.536-.417%201.215-.548%201.905-1.608%201.905-3.167%200-1.548-.643-2.572-1.845-3.132-.691-.31-1.762-.452-2.763-.452h-4.417v7.168Zm10.716%208.465c0-1.536-.893-3.37-3.227-3.893-.428-.095-1.036-.143-1.571-.143h-5.918v8.085h5.501c.56%200%201.429-.048%201.953-.167%201.94-.453%203.262-1.846%203.262-3.882Zm47.747-11.847-8.097%2020.408h-4.429l-8.109-20.408h5.191l5.192%2014.574%205.108-14.574h5.144Zm-20.218%2010.002c0%20.69-.036%201.262-.155%201.94h-15.943c.631%202.87%202.714%204.728%205.882%204.728%202.131%200%203.607-.882%204.703-2.525h4.87c-1.762%204.144-5.204%206.692-9.657%206.692-6.084%200-10.537-4.858-10.537-10.49%200-6.108%204.524-10.776%2010.335-10.776%206.239%200%2010.442%204.954%2010.502%2010.43Zm-4.763-1.405c-.333-2.846-2.643-4.858-5.691-4.858-2.894%200-5.287%201.929-5.621%204.858h11.312Zm-72.667%203.44c0%204.787-3.287%208.371-9.419%208.371H119.363V64.66c-1.917.274-3.87.69-5.811%201.238l4.537%2011.121h-5.418l-3.596-9.585c-5.144%202.084-10.085%205.216-14.217%209.585h-4.786L101.8%2048.312h4.56l5.68%2013.883a44.112%2044.112%200%200%201%207.323-1.774V48.312h9.084c1.703%200%203.156.143%204.061.393%203.453.929%205.727%203.667%205.727%207.323%200%201.917-.738%204.179-2.81%205.691%203.06%201.56%204.501%204.025%204.501%206.93Zm-15.634-8.667a62.664%2062.664%200%200%201%202.06-.036c1.703.012%203.239.131%204.608.37%201.441-.549%202.357-1.727%202.357-3.537%200-1.941-.881-3.144-2.488-3.667-.548-.18-1.358-.286-2.322-.286h-4.215v7.156Zm-16.55%203.905-3.715-9.894-6.394%2016.502c2.833-2.595%206.263-4.858%2010.109-6.608Zm27.254%204.74c0-2.775-3.131-4.347-8.513-4.418-.715%200-1.441.011-2.191.047v8.252h5.918c2.548%200%204.786-1.37%204.786-3.882Z'%20clip-rule='evenodd'/%3e%3c/g%3e%3cdefs%3e%3clinearGradient%20id='b'%20x1='51.47'%20x2='85.916'%20y1='62.946'%20y2='62.946'%20gradientUnits='userSpaceOnUse'%3e%3cstop%20stop-color='%23CD9F28'/%3e%3cstop%20offset='1'%20stop-color='%23ECD80B'/%3e%3c/linearGradient%3e%3cclipPath%20id='a'%3e%3cpath%20fill='%23fff'%20d='M51.47%2045.728h186.104V80.14H51.47z'/%3e%3c/clipPath%3e%3c/defs%3e%3c/svg%3e)


More from Daikin


Explore Other Assets


© 2026 MaintainX. All rights reserved.