


Daikin Air Conditioner FTKN09NMVJU
Need answers fast?
Explore the manual using AI.
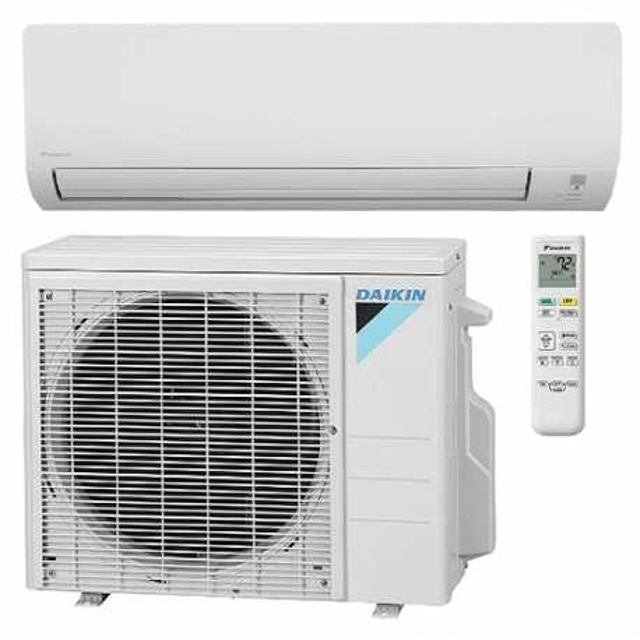
The Daikin Air Conditioner FTKN09NMVJU is a high-efficiency cooling solution designed for residential and commercial applications. Known for its reliability and advanced technology, this model ensures optimal indoor comfort while minimizing energy consumption. Experience superior climate control with Daikin's innovative features.
Turn manuals into instant answers
with your AI-powered assistantTurn manuals into instant answers
with your AI-powered assistant
Manual for Daikin Air Conditioner FTKN09NMVJU
Complete asset maintenance, one click away
Get instant access to all the maintenance information you need. Empower technicians to perform preventive maintenance with asset packages, ready to use right out of the box.

Documents & Manuals
Find all the essential guides in one place.
 Tensioning Guide
- Belt-diagram
- C-120 pulleys
+ 13 more

Work Order Templates
Pre-built workflows to keep your asset running smoothly.
- Daily Electrical System Inspection
- Replace Roller and Pulley
- Install Engine B-120
+ 29 more

Procedures
Integrate maintenance plans directly into your work orders.
- Motion Industries
- Applied Industrial Technologies
- Electrical Brothers
+ 5 more

Parts
Access the parts list for your equipment in MaintainX.
- Drive Motor
- B2 Rollers
- Tensioning System
+ 40 more
Daikin Air Conditioner FTKN09NMVJU
Create an account to install this asset package.
Maintenance Plans for Daikin Air Conditioner Model FTKN09NMVJU
Integrate maintenance plans directly into your work orders in MaintainX.
2 Weekly Air Filter Cleaning
CAUTION! Before cleaning, be sure to stop the operation and turn off the circuit breaker. Do not touch the aluminium fins of the indoor unit. If you touch those parts, this may cause an injury.
Did you stop the operation and turn off the circuit breaker?
Did you avoid touching the aluminium fins of the indoor unit?
Open the front panel. Hold the front panel by the sides and open it.
Did you successfully open the front panel?
Pull out the air filters. Push the filter tab at the center of each air filter a little upwards, then pull it down.
Did you successfully pull out the air filters?
Wash the air filters with water or clean them with vacuum cleaner.
Did you successfully clean the air filters?

6 Monthly Titanium Apatite Photocatalytic Air-Purifying Fillter Cleaning
CAUTION!
• Before cleaning, be sure to stop the operation and turn off the circuit breaker
• Do not touch the aluminium fins of the indoor unit. If you touch those parts, this may cause an injury
1. Open the front panel and pull out the air filters
2. Take off the titanium apatite photocatalytic air-purifying filters
• Remove the filters from the tabs
3. Clean or replace the titanium apatite photocatalytic air-purifying filters
3.1 Vacuum dust, and soak in lukewarm water or water for about 10 to 15 minutes if very dirty
3.2 After washing, shake off remaining water and let them dry in the shade
Indoor Unit, Outdoor Unit and Remote Controller Cleaning
CAUTION! Before cleaning, be sure to stop the operation and turn off the circuit breaker
Do not touch the aluminium fins of the indoor unit. If you touch those parts, this may cause an injury
Did you wipe them with a soft cloth?
NOTE! For cleaning, do not use any of the following
Confirm you did not use any of the following for cleaning
Sign off on the cleaning procedure
Front Panel Cleaning
CAUTION! Before cleaning, be sure to stop the operation and turn off the circuit breaker
Do not touch the aluminium fins of the indoor unit. If you touch those parts, this may cause an injury
Did you stop the operation and turn off the circuit breaker?
Did you avoid touching the aluminium fins of the indoor unit?
Wipe it with a soft damp cloth
Only neutral detergent may be used
NOTE! For cleaning, do not use any of the following
Avoid using the following for cleaning
Sign off on the front panel cleaning
3 Yearly Titanium Apatite Photocatalytic Air-Purifying Fillter Replacement
CAUTION! Before cleaning, be sure to stop the operation and turn off the circuit breaker. Do not touch the aluminium fins of the indoor unit. If you touch those parts, this may cause an injury.
Did you stop the operation and turn off the circuit breaker?
Did you avoid touching the aluminium fins of the indoor unit?
Open the front panel and pull out the air filters
Take off the titanium apatite photocatalytic air-purifying filters from the tabs
Clean or replace the titanium apatite photocatalytic air-purifying filters
Dispose of the old filter as non-flammable waste
Insert the new titanium apatite photocatalytic air-purifying filters as they were
Check that the filter is properly set in the tabs
Parts for Daikin Air Conditioner FTKN09NMVJU
Access the parts list for your equipment in MaintainX.
Titanium Apatite Photocatalytic Air-Purifying Filter with Frame
KAF970A45
Titanium Apatite Photocatalytic Air-Purifying Filter without Frame
KAF970A46
Titanium Apatite Photocatalytic Air-Purifying Filter with Frame
KAF970A45
Titanium Apatite Photocatalytic Air-Purifying Filter without Frame
KAF970A46
Titanium Apatite Photocatalytic Air-Purifying Filter with Frame
KAF970A45
Titanium Apatite Photocatalytic Air-Purifying Filter without Frame
KAF970A46
Unlock efficiency
with MaintainX CoPilot
MaintainX CoPilot is your expert colleague, on call 24/7, helping your team find the answers they need to keep equipment running.
Reduce Unplanned Downtime
Ensure your team follows consistent procedures to minimize equipment failures and costly delays.
Maximize Asset Availability
Keep your assets running longer and more reliably, with standardized maintenance workflows from OEM manuals.
Lower Maintenance Costs
Turn any technician into an expert to streamline operations, maintain more assets, and reduce overall costs.
Thousands of companies manage their assets with MaintainX

'%3e%3cpath%20fill='url(%23b)'%20d='M66.008%2080.068c-5.084-.786-9.763-3.834-12.442-8.68a16.942%2016.942%200%200%201-1.87-5.18c1.096.19%202.203.476%203.298.87%206.525%202.333%2010.836%207.68%2011.014%2012.99ZM51.47%2061.576c.488-5.524%203.62-10.716%208.847-13.597a17.132%2017.132%200%200%201%2011.335-1.882c-.798%208.145-7.43%2014.848-16.038%2015.599-1.417.119-2.799.07-4.144-.12Zm28.564-11.478a17.513%2017.513%200%200%201%203.727%204.62c4.608%208.335%201.584%2018.813-6.75%2023.409a16.988%2016.988%200%200%201-4.359%201.679%2019.624%2019.624%200%200%201-3.977-12.776c.346-7.561%204.942-13.931%2011.36-16.932Z'/%3e%3cpath%20fill='%23110F0D'%20fill-rule='evenodd'%20d='M142.831%2048.324h4.977V77.03h-4.977V48.324Zm27.278%2013.002c.322%201.048.453%202.263.453%203.62v12.073h-4.787V66.208c0-.75-.047-1.572-.154-2.143-.453-2.382-1.822-3.572-4.215-3.572-2.31%200-3.882%201.274-4.43%203.476-.143.596-.226%201.405-.226%202.25v10.8h-4.787V56.623h4.477v2.989c1.536-2.5%203.906-3.43%206.371-3.43%203.488%200%206.263%201.68%207.298%205.144Zm24.636%207.323c0%203.882-2.358%206.525-5.763%207.727-1.298.453-2.632.643-4.62.643h-10.169V48.324h9.085c1.691%200%203.156.143%204.049.38%203.465.93%205.727%203.68%205.727%207.335%200%202.441-.81%204.156-2.762%205.644%202.905%201.417%204.453%203.727%204.453%206.966Zm-15.634-8.656h4.584c1.024%200%201.917-.143%202.536-.417%201.215-.548%201.905-1.608%201.905-3.167%200-1.548-.643-2.572-1.845-3.132-.691-.31-1.762-.452-2.763-.452h-4.417v7.168Zm10.716%208.465c0-1.536-.893-3.37-3.227-3.893-.428-.095-1.036-.143-1.571-.143h-5.918v8.085h5.501c.56%200%201.429-.048%201.953-.167%201.94-.453%203.262-1.846%203.262-3.882Zm47.747-11.847-8.097%2020.408h-4.429l-8.109-20.408h5.191l5.192%2014.574%205.108-14.574h5.144Zm-20.218%2010.002c0%20.69-.036%201.262-.155%201.94h-15.943c.631%202.87%202.714%204.728%205.882%204.728%202.131%200%203.607-.882%204.703-2.525h4.87c-1.762%204.144-5.204%206.692-9.657%206.692-6.084%200-10.537-4.858-10.537-10.49%200-6.108%204.524-10.776%2010.335-10.776%206.239%200%2010.442%204.954%2010.502%2010.43Zm-4.763-1.405c-.333-2.846-2.643-4.858-5.691-4.858-2.894%200-5.287%201.929-5.621%204.858h11.312Zm-72.667%203.44c0%204.787-3.287%208.371-9.419%208.371H119.363V64.66c-1.917.274-3.87.69-5.811%201.238l4.537%2011.121h-5.418l-3.596-9.585c-5.144%202.084-10.085%205.216-14.217%209.585h-4.786L101.8%2048.312h4.56l5.68%2013.883a44.112%2044.112%200%200%201%207.323-1.774V48.312h9.084c1.703%200%203.156.143%204.061.393%203.453.929%205.727%203.667%205.727%207.323%200%201.917-.738%204.179-2.81%205.691%203.06%201.56%204.501%204.025%204.501%206.93Zm-15.634-8.667a62.664%2062.664%200%200%201%202.06-.036c1.703.012%203.239.131%204.608.37%201.441-.549%202.357-1.727%202.357-3.537%200-1.941-.881-3.144-2.488-3.667-.548-.18-1.358-.286-2.322-.286h-4.215v7.156Zm-16.55%203.905-3.715-9.894-6.394%2016.502c2.833-2.595%206.263-4.858%2010.109-6.608Zm27.254%204.74c0-2.775-3.131-4.347-8.513-4.418-.715%200-1.441.011-2.191.047v8.252h5.918c2.548%200%204.786-1.37%204.786-3.882Z'%20clip-rule='evenodd'/%3e%3c/g%3e%3cdefs%3e%3clinearGradient%20id='b'%20x1='51.47'%20x2='85.916'%20y1='62.946'%20y2='62.946'%20gradientUnits='userSpaceOnUse'%3e%3cstop%20stop-color='%23CD9F28'/%3e%3cstop%20offset='1'%20stop-color='%23ECD80B'/%3e%3c/linearGradient%3e%3cclipPath%20id='a'%3e%3cpath%20fill='%23fff'%20d='M51.47%2045.728h186.104V80.14H51.47z'/%3e%3c/clipPath%3e%3c/defs%3e%3c/svg%3e)


More from Daikin


Explore Other Assets


© 2026 MaintainX. All rights reserved.