


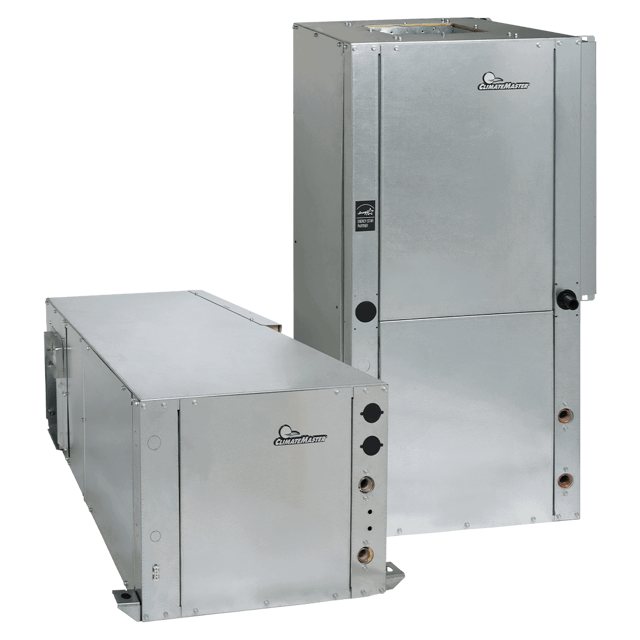
Climate Master Heat Pump GRV009AGC10CLTS
Need answers fast?
Explore the manual using AI.
Turn manuals into instant answers
with your AI-powered assistantTurn manuals into instant answers
with your AI-powered assistant
Manual for Climate Master Heat Pump GRV009AGC10CLTS
Complete asset maintenance, one click away
Get instant access to all the maintenance information you need. Empower technicians to perform preventive maintenance with asset packages, ready to use right out of the box.

Documents & Manuals
Find all the essential guides in one place.
 Tensioning Guide
- Belt-diagram
- C-120 pulleys
+ 13 more

Work Order Templates
Pre-built workflows to keep your asset running smoothly.
- Daily Electrical System Inspection
- Replace Roller and Pulley
- Install Engine B-120
+ 29 more

Procedures
Integrate maintenance plans directly into your work orders.
- Motion Industries
- Applied Industrial Technologies
- Electrical Brothers
+ 5 more

Parts
Access the parts list for your equipment in MaintainX.
- Drive Motor
- B2 Rollers
- Tensioning System
+ 40 more
Climate Master Heat Pump GRV009AGC10CLTS
Create an account to install this asset package.
Maintenance Plans for Climate Master Heat Pump Model GRV009AGC10CLTS
Integrate maintenance plans directly into your work orders in MaintainX.
Hot Water Generator Coils Inspection
Warning: This inspection requires trained personnel with PPE!
Is the potable water hard?
Is the potable water chemically softened?
Desuperheater scaled?
Select the frequency of inspections
Is the area with extremely hard water?
If the area has extremely hard water, a HWG is not recommended.
Sign off on the Hot Water Generator Coils Inspection

Water Coil Maintenance
Direct ground water applications only
If the system is installed in an area with a known high mineral content (125 P.P.M. or greater) in the water, it is best to establish a periodic maintenance schedule with the owner so the coil can be checked regularly.
Consult the well water applications section of this manual for a more detailed water coil material selection.
Should periodic coil cleaning be necessary, use standard coil cleaning procedures, which are compatible with the heat exchanger material and copper water lines.
All other water loop applications
Generally water coil maintenance is not needed for closed loop systems. However, if the piping is known to have high dirt or debris content, it is best to establish a periodic maintenance schedule with the owner so the water coil can be checked regularly.
Dirty installations are typically the result of deterioration of iron or galvanized piping or components in the system.
Open cooling towers requiring heavy chemical treatment and mineral buildup through water use can also contribute to higher maintenance.
Should periodic coil cleaning be necessary, use standard coil cleaning procedures, which are compatible with both the heat exchanger material and copper water lines.
Initial Equipment Inspection
Upon receipt of the equipment, carefully check the shipment against the bill of lading.
All units received?
Packaging of each unit inspected?
Each unit inspected for damage?
Ensure that the carrier makes proper notation of any shortages or damage on all copies of the freight bill and completes a common carrier inspection report.
Note any shortages or damages
Concealed damage not discovered during unloading must be reported to the carrier within 15 days of receipt of shipment. If not filed within 15 days, the freight company can deny the claim without recourse.
Date of reporting concealed damage
NOTE: It is the responsibility of the purchaser to file all necessary claims with the carrier. Notify your equipment supplier of all damage within fifteen (15) days of shipment.
Piping System Maintenance
Ensure that electrical power to the unit is disconnected.
Install the system with the supply hose connected directly to the return riser valve. Use a single length of flexible hose.
Open all air vents. Fill the system with water. DO NOT allow system to overflow. Bleed all air from the system. Pressurize and check the system for leaks and repair as appropriate.
Verify that all strainers are in place. Start the pumps, and systematically check each vent to ensure that all air is bled from the system.
Verify that make-up water is available. Adjust makeup water as required to replace the air which was bled from the system. Check and adjust the water/air level in the expansion tank.
Set the boiler to raise the loop temperature to approximately 85°F [29°C]. Open a drain at the lowest point in the system. Adjust the make-up water replacement rate to equal the rate of bleed.
Refill the system and add trisodium phosphate in a proportion of approximately one pound per 150 gallons (.8 kg per 1000 l ) of water. Reset the boiler to raise the loop temperature to 100°F [38°C]. Circulate the solution for a minimum of 8 to 24 hours. At the end of this period, shut off the circulating pump and drain the solution.
When the cleaning process is complete, remove the short-circuited hoses. Reconnect the hoses to the proper supply, and return the connections to each of the units. Refill the system and bleed off all air.
Test the system pH with litmus paper. The system water should be in the range of pH 6.0 - 8.5. Add chemicals, as appropriate to maintain neutral pH levels
1 Yearly Fan Motors Dry Operation and Amperage Check
Warning: Only trained personnel should perform this check
Dry operation suspected?
If dry operation is suspected, report to the maintenance team immediately
Enter the amp draw from the serial plate data
Is amp draw no more than 10% greater than indicated on serial plate data?
Sign off on the fan motors dry operation and amperage check
Parts for Climate Master Heat Pump GRV009AGC10CLTS
Access the parts list for your equipment in MaintainX.
Pressure Switch with 1/4” Internal Flare Connection
39B0005N02
Pressure Switch with 1/4” Internal Flare Connection
39B0005N02
Pressure Switch with 1/4” Internal Flare Connection
39B0005N02
Unlock efficiency
with MaintainX CoPilot
MaintainX CoPilot is your expert colleague, on call 24/7, helping your team find the answers they need to keep equipment running.
Reduce Unplanned Downtime
Ensure your team follows consistent procedures to minimize equipment failures and costly delays.
Maximize Asset Availability
Keep your assets running longer and more reliably, with standardized maintenance workflows from OEM manuals.
Lower Maintenance Costs
Turn any technician into an expert to streamline operations, maintain more assets, and reduce overall costs.
Thousands of companies manage their assets with MaintainX

'%3e%3cpath%20fill='url(%23b)'%20d='M66.008%2080.068c-5.084-.786-9.763-3.834-12.442-8.68a16.942%2016.942%200%200%201-1.87-5.18c1.096.19%202.203.476%203.298.87%206.525%202.333%2010.836%207.68%2011.014%2012.99ZM51.47%2061.576c.488-5.524%203.62-10.716%208.847-13.597a17.132%2017.132%200%200%201%2011.335-1.882c-.798%208.145-7.43%2014.848-16.038%2015.599-1.417.119-2.799.07-4.144-.12Zm28.564-11.478a17.513%2017.513%200%200%201%203.727%204.62c4.608%208.335%201.584%2018.813-6.75%2023.409a16.988%2016.988%200%200%201-4.359%201.679%2019.624%2019.624%200%200%201-3.977-12.776c.346-7.561%204.942-13.931%2011.36-16.932Z'/%3e%3cpath%20fill='%23110F0D'%20fill-rule='evenodd'%20d='M142.831%2048.324h4.977V77.03h-4.977V48.324Zm27.278%2013.002c.322%201.048.453%202.263.453%203.62v12.073h-4.787V66.208c0-.75-.047-1.572-.154-2.143-.453-2.382-1.822-3.572-4.215-3.572-2.31%200-3.882%201.274-4.43%203.476-.143.596-.226%201.405-.226%202.25v10.8h-4.787V56.623h4.477v2.989c1.536-2.5%203.906-3.43%206.371-3.43%203.488%200%206.263%201.68%207.298%205.144Zm24.636%207.323c0%203.882-2.358%206.525-5.763%207.727-1.298.453-2.632.643-4.62.643h-10.169V48.324h9.085c1.691%200%203.156.143%204.049.38%203.465.93%205.727%203.68%205.727%207.335%200%202.441-.81%204.156-2.762%205.644%202.905%201.417%204.453%203.727%204.453%206.966Zm-15.634-8.656h4.584c1.024%200%201.917-.143%202.536-.417%201.215-.548%201.905-1.608%201.905-3.167%200-1.548-.643-2.572-1.845-3.132-.691-.31-1.762-.452-2.763-.452h-4.417v7.168Zm10.716%208.465c0-1.536-.893-3.37-3.227-3.893-.428-.095-1.036-.143-1.571-.143h-5.918v8.085h5.501c.56%200%201.429-.048%201.953-.167%201.94-.453%203.262-1.846%203.262-3.882Zm47.747-11.847-8.097%2020.408h-4.429l-8.109-20.408h5.191l5.192%2014.574%205.108-14.574h5.144Zm-20.218%2010.002c0%20.69-.036%201.262-.155%201.94h-15.943c.631%202.87%202.714%204.728%205.882%204.728%202.131%200%203.607-.882%204.703-2.525h4.87c-1.762%204.144-5.204%206.692-9.657%206.692-6.084%200-10.537-4.858-10.537-10.49%200-6.108%204.524-10.776%2010.335-10.776%206.239%200%2010.442%204.954%2010.502%2010.43Zm-4.763-1.405c-.333-2.846-2.643-4.858-5.691-4.858-2.894%200-5.287%201.929-5.621%204.858h11.312Zm-72.667%203.44c0%204.787-3.287%208.371-9.419%208.371H119.363V64.66c-1.917.274-3.87.69-5.811%201.238l4.537%2011.121h-5.418l-3.596-9.585c-5.144%202.084-10.085%205.216-14.217%209.585h-4.786L101.8%2048.312h4.56l5.68%2013.883a44.112%2044.112%200%200%201%207.323-1.774V48.312h9.084c1.703%200%203.156.143%204.061.393%203.453.929%205.727%203.667%205.727%207.323%200%201.917-.738%204.179-2.81%205.691%203.06%201.56%204.501%204.025%204.501%206.93Zm-15.634-8.667a62.664%2062.664%200%200%201%202.06-.036c1.703.012%203.239.131%204.608.37%201.441-.549%202.357-1.727%202.357-3.537%200-1.941-.881-3.144-2.488-3.667-.548-.18-1.358-.286-2.322-.286h-4.215v7.156Zm-16.55%203.905-3.715-9.894-6.394%2016.502c2.833-2.595%206.263-4.858%2010.109-6.608Zm27.254%204.74c0-2.775-3.131-4.347-8.513-4.418-.715%200-1.441.011-2.191.047v8.252h5.918c2.548%200%204.786-1.37%204.786-3.882Z'%20clip-rule='evenodd'/%3e%3c/g%3e%3cdefs%3e%3clinearGradient%20id='b'%20x1='51.47'%20x2='85.916'%20y1='62.946'%20y2='62.946'%20gradientUnits='userSpaceOnUse'%3e%3cstop%20stop-color='%23CD9F28'/%3e%3cstop%20offset='1'%20stop-color='%23ECD80B'/%3e%3c/linearGradient%3e%3cclipPath%20id='a'%3e%3cpath%20fill='%23fff'%20d='M51.47%2045.728h186.104V80.14H51.47z'/%3e%3c/clipPath%3e%3c/defs%3e%3c/svg%3e)


More from Climate Master


Explore Other Assets


© 2026 MaintainX. All rights reserved.