


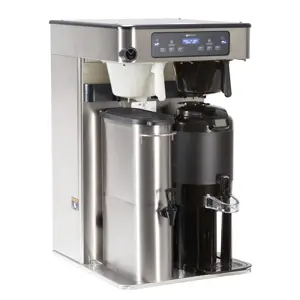
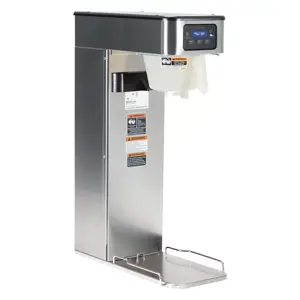
Bunn Liquid Coffee Chilled Dispenser LCC-2LP
Need answers fast?
Explore the manual using AI.
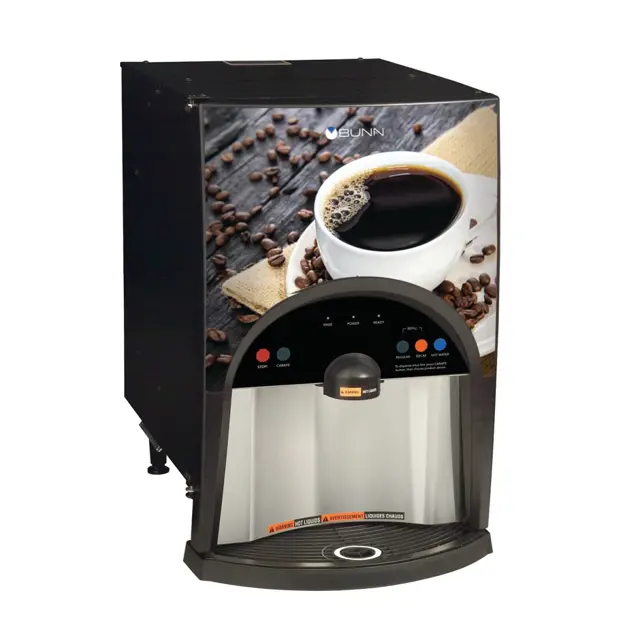
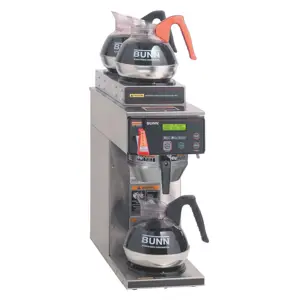
The Bunn Liquid Coffee Chilled Dispenser LCC-2LP is a high-performance beverage dispensing solution designed for commercial use. This model ensures optimal temperature control and efficient service, making it ideal for cafes and restaurants looking to serve chilled coffee beverages with consistency and quality.
Turn manuals into instant answers
with your AI-powered assistantTurn manuals into instant answers
with your AI-powered assistant
Manual for Bunn Liquid Coffee Chilled Dispenser LCC-2LP
Complete asset maintenance, one click away
Get instant access to all the maintenance information you need. Empower technicians to perform preventive maintenance with asset packages, ready to use right out of the box.

Documents & Manuals
Find all the essential guides in one place.
 Tensioning Guide
- Belt-diagram
- C-120 pulleys
+ 13 more

Work Order Templates
Pre-built workflows to keep your asset running smoothly.
- Daily Electrical System Inspection
- Replace Roller and Pulley
- Install Engine B-120
+ 29 more

Procedures
Integrate maintenance plans directly into your work orders.
- Motion Industries
- Applied Industrial Technologies
- Electrical Brothers
+ 5 more

Parts
Access the parts list for your equipment in MaintainX.
- Drive Motor
- B2 Rollers
- Tensioning System
+ 40 more
Bunn Liquid Coffee Chilled Dispenser LCC-2LP
Create an account to install this asset package.
Maintenance Plans for Bunn Liquid Coffee Chilled Dispenser Model LCC-2LP
Integrate maintenance plans directly into your work orders in MaintainX.
1 Daily Dispenser Maintenance
Rinse the dispenser
Open the dispenser door
Select Rinse on the Function Selector Switch and Run on the Mode Selector Switch
Close the dispenser door
Place a 1/2 gal (2 liter) container under the appropriate dispense nozzle or nozzles
Activate the Dispenser of the appropriate side or sides for approximately twenty seconds or until the hot water is clear or has no concentrate coloring in it
Open the dispenser door, select Normal on the Function Selector Switch, and then close door
Note: To clear the 'Rinse' alarm, activate each dispenser until the flow stops automatically (approx. 20 seconds for each tip). The 'Rinse' alarm LED will turn off when the Rinse Procedure has been satisfied for both sides
Wash the dispenser

Dispenser Empty BIB Threshold Calibration
Remove the lower splash guard assembly to access the digital programming module with LCD display
Open the cabinet door and set the Function Switch to the 'Rinse' position. Close the door
Place a large container under the Left dispenser tip, then activate and hold the left dispenser
Dispense long enough to rinse all the concentrate out of the mix chamber and for the Conductance reading to stabilize and stop dropping
Record the nominal Conductance value displayed. (NOTE: It is typical for this value fluctuate (+/- 25) points about the nominal value}. This is the conductance reading of the water in your area
Repeat steps 3, 4 & 5 for the Right dispenser
Add 100 points to the larger of the Left or Right side Conductance value. This is the new Empty BIB threshold value for your dispenser
Enter this new value into the Empty BIB Alarm threshold, see Programming the Dispenser
Sign off on the calibration
6 Monthly Dispenser Pump Tubing Replacement
NOTE: Replacement parts or service caused by failure to perform required maintenance is not covered by warranty
Replace pump hoses every 6-Months or as needed
The pumps and tubing used in the dispenser are designed to give maximum performance and long life. However, the tubes are a wear item and must be replaced periodically. How long the tubes last is dependent on usage and properties of the concentrate. Excessive wear will reduce the output of the pumps resulting in a weak mixed beverage
Rinse the pump tubing with warm tap water (Refer to steps 1 - 5 of the Weekly Sanitizing instructions) prior to removing the tubes to avoid concentrate spills
Loosen the thumbscrew securing the tubing retainer plate to the pump housing. Set it and the retainer plate aside
Depress the tension screw and remove it from the notch in the pump housing, releasing the spring tension on the pump band
Open the compression band and gently pull the pump tube from around the pump's rotor
Inspect the pump bands for signs of wear. Replace if necessary
Apply lubricant (BUNN-O-MATIC part number M2531.0001) to the new pump tubing's rotor side.
Dispenser Hot Water Flow Rate Calibration
Locate the programming module and use the Arrow Down key to scroll through the LCD screen until 'CAL HOT WTR FLO?' appears
Place a 64 Oz (2000 ml) graduated container under Hot Water Tip and press the hot water switch. The unit will dispense Hot Water for 20 seconds and then shut OFF automatically. Keep the graduated container under the dispense tip until all the water stops dripping
Measure the volume of water collected in the graduated container. The acceptable range for the volume collected is 32 - 38 Oz. (946 - 1124 ml)
If the amount collected is not within the acceptable range, empty the container and repeat steps 2 & 3
If the amount collected is still not within range, inspect the hot water valve, tubing and fittings for lime, kinks, or other obstructions
When satisfied with the volume of concentrate collected, press the Down Arrow Key
The 'CAL HOT WTR VOL' screen will be displayed. Use the (-) / (+) keys to adjust number displayed to the amount measured in step 3
Press Down Arrow Key again to exit this function
Sign off on the calibration
Dispenser Concentrate Pump/Flow Rates Calibration
Equipment Required: 50 to 100 ml graduated cylinder, with 1 ml graduations, 64 Oz (2000 ml) graduated container
Remove the lower splash guard assembly to access prior to starting this procedure
NOTE: You can calibrate either the Concentrate Pump or the Dispenser Flow Rate independently. Simply scroll through the menu screen to the desired section and perform only those steps
Calibrate the Left and Right Side Dispenser
Concentrate Pump Calibration
Select PRIME on the Function Selector Switch. (refer to Priming the Concentrate Lines)
Place a container under the Left Dispense Tip and prime the concentrate lines until a steady stream of concentrate comes out the tip (approximately 10 seconds)
Stop the Priming and allow the tip to stop dripping. Discard the concentrate collected
Select NORMAL on the Function Selector Switch
Parts for Bunn Liquid Coffee Chilled Dispenser LCC-2LP
Access the parts list for your equipment in MaintainX.
Lubricant
M2531.0001
Tube Kit
34728.1000
Tube Kit
34727.1000
Lubricant
M2531.0001
Tube Kit
34728.1000
Tube Kit
34727.1000
Lubricant
M2531.0001
Tube Kit
34728.1000
Tube Kit
34727.1000
Unlock efficiency
with MaintainX CoPilot
MaintainX CoPilot is your expert colleague, on call 24/7, helping your team find the answers they need to keep equipment running.
Reduce Unplanned Downtime
Ensure your team follows consistent procedures to minimize equipment failures and costly delays.
Maximize Asset Availability
Keep your assets running longer and more reliably, with standardized maintenance workflows from OEM manuals.
Lower Maintenance Costs
Turn any technician into an expert to streamline operations, maintain more assets, and reduce overall costs.
Thousands of companies manage their assets with MaintainX

'%3e%3cpath%20fill='url(%23b)'%20d='M66.008%2080.068c-5.084-.786-9.763-3.834-12.442-8.68a16.942%2016.942%200%200%201-1.87-5.18c1.096.19%202.203.476%203.298.87%206.525%202.333%2010.836%207.68%2011.014%2012.99ZM51.47%2061.576c.488-5.524%203.62-10.716%208.847-13.597a17.132%2017.132%200%200%201%2011.335-1.882c-.798%208.145-7.43%2014.848-16.038%2015.599-1.417.119-2.799.07-4.144-.12Zm28.564-11.478a17.513%2017.513%200%200%201%203.727%204.62c4.608%208.335%201.584%2018.813-6.75%2023.409a16.988%2016.988%200%200%201-4.359%201.679%2019.624%2019.624%200%200%201-3.977-12.776c.346-7.561%204.942-13.931%2011.36-16.932Z'/%3e%3cpath%20fill='%23110F0D'%20fill-rule='evenodd'%20d='M142.831%2048.324h4.977V77.03h-4.977V48.324Zm27.278%2013.002c.322%201.048.453%202.263.453%203.62v12.073h-4.787V66.208c0-.75-.047-1.572-.154-2.143-.453-2.382-1.822-3.572-4.215-3.572-2.31%200-3.882%201.274-4.43%203.476-.143.596-.226%201.405-.226%202.25v10.8h-4.787V56.623h4.477v2.989c1.536-2.5%203.906-3.43%206.371-3.43%203.488%200%206.263%201.68%207.298%205.144Zm24.636%207.323c0%203.882-2.358%206.525-5.763%207.727-1.298.453-2.632.643-4.62.643h-10.169V48.324h9.085c1.691%200%203.156.143%204.049.38%203.465.93%205.727%203.68%205.727%207.335%200%202.441-.81%204.156-2.762%205.644%202.905%201.417%204.453%203.727%204.453%206.966Zm-15.634-8.656h4.584c1.024%200%201.917-.143%202.536-.417%201.215-.548%201.905-1.608%201.905-3.167%200-1.548-.643-2.572-1.845-3.132-.691-.31-1.762-.452-2.763-.452h-4.417v7.168Zm10.716%208.465c0-1.536-.893-3.37-3.227-3.893-.428-.095-1.036-.143-1.571-.143h-5.918v8.085h5.501c.56%200%201.429-.048%201.953-.167%201.94-.453%203.262-1.846%203.262-3.882Zm47.747-11.847-8.097%2020.408h-4.429l-8.109-20.408h5.191l5.192%2014.574%205.108-14.574h5.144Zm-20.218%2010.002c0%20.69-.036%201.262-.155%201.94h-15.943c.631%202.87%202.714%204.728%205.882%204.728%202.131%200%203.607-.882%204.703-2.525h4.87c-1.762%204.144-5.204%206.692-9.657%206.692-6.084%200-10.537-4.858-10.537-10.49%200-6.108%204.524-10.776%2010.335-10.776%206.239%200%2010.442%204.954%2010.502%2010.43Zm-4.763-1.405c-.333-2.846-2.643-4.858-5.691-4.858-2.894%200-5.287%201.929-5.621%204.858h11.312Zm-72.667%203.44c0%204.787-3.287%208.371-9.419%208.371H119.363V64.66c-1.917.274-3.87.69-5.811%201.238l4.537%2011.121h-5.418l-3.596-9.585c-5.144%202.084-10.085%205.216-14.217%209.585h-4.786L101.8%2048.312h4.56l5.68%2013.883a44.112%2044.112%200%200%201%207.323-1.774V48.312h9.084c1.703%200%203.156.143%204.061.393%203.453.929%205.727%203.667%205.727%207.323%200%201.917-.738%204.179-2.81%205.691%203.06%201.56%204.501%204.025%204.501%206.93Zm-15.634-8.667a62.664%2062.664%200%200%201%202.06-.036c1.703.012%203.239.131%204.608.37%201.441-.549%202.357-1.727%202.357-3.537%200-1.941-.881-3.144-2.488-3.667-.548-.18-1.358-.286-2.322-.286h-4.215v7.156Zm-16.55%203.905-3.715-9.894-6.394%2016.502c2.833-2.595%206.263-4.858%2010.109-6.608Zm27.254%204.74c0-2.775-3.131-4.347-8.513-4.418-.715%200-1.441.011-2.191.047v8.252h5.918c2.548%200%204.786-1.37%204.786-3.882Z'%20clip-rule='evenodd'/%3e%3c/g%3e%3cdefs%3e%3clinearGradient%20id='b'%20x1='51.47'%20x2='85.916'%20y1='62.946'%20y2='62.946'%20gradientUnits='userSpaceOnUse'%3e%3cstop%20stop-color='%23CD9F28'/%3e%3cstop%20offset='1'%20stop-color='%23ECD80B'/%3e%3c/linearGradient%3e%3cclipPath%20id='a'%3e%3cpath%20fill='%23fff'%20d='M51.47%2045.728h186.104V80.14H51.47z'/%3e%3c/clipPath%3e%3c/defs%3e%3c/svg%3e)


More from Bunn


Explore Other Assets


© 2026 MaintainX. All rights reserved.