


Bridgeport Milling Machine SERIES 1 CNC
Need answers fast?
Explore the manual using AI.
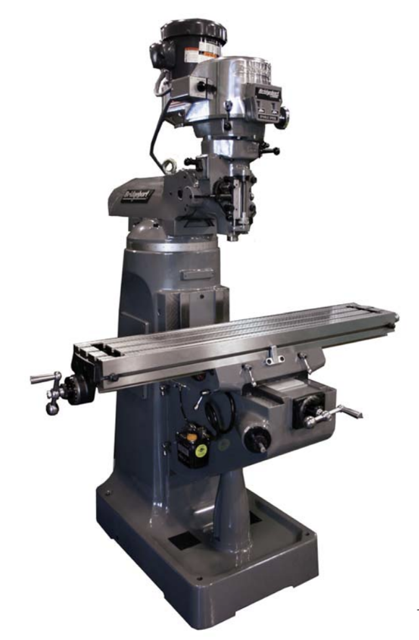
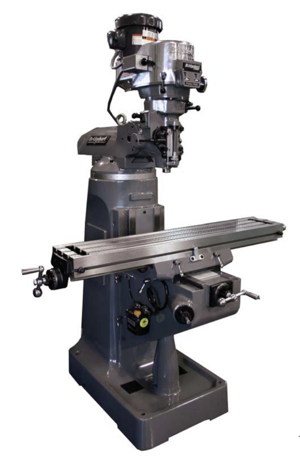
The Bridgeport Milling Machine Series 1 CNC is a versatile and reliable asset in precision machining. Known for its robust construction and advanced CNC capabilities, this milling machine is ideal for various industrial applications, ensuring high accuracy and efficiency in metalworking tasks.
Turn manuals into instant answers
with your AI-powered assistantTurn manuals into instant answers
with your AI-powered assistant
Manual for Bridgeport Milling Machine SERIES 1 CNC
Complete asset maintenance, one click away
Get instant access to all the maintenance information you need. Empower technicians to perform preventive maintenance with asset packages, ready to use right out of the box.

Documents & Manuals
Find all the essential guides in one place.
 Tensioning Guide
- Belt-diagram
- C-120 pulleys
+ 13 more

Work Order Templates
Pre-built workflows to keep your asset running smoothly.
- Daily Electrical System Inspection
- Replace Roller and Pulley
- Install Engine B-120
+ 29 more

Procedures
Integrate maintenance plans directly into your work orders.
- Motion Industries
- Applied Industrial Technologies
- Electrical Brothers
+ 5 more

Parts
Access the parts list for your equipment in MaintainX.
- Drive Motor
- B2 Rollers
- Tensioning System
+ 40 more
Bridgeport Milling Machine SERIES 1 CNC
Create an account to install this asset package.
Maintenance Plans for Bridgeport Milling Machine Model SERIES 1 CNC
Integrate maintenance plans directly into your work orders in MaintainX.
Feed Trip Maintenance
Adjust Feed Trip
Release locknut 'N'
Engage trip handle lever 'P'
Adjust micro nuts against quill stop 'O'
Slowly turn adjusting screw 'Q' until lever 'p' trips. If set to light will not be able to drill
At this point secure locknut 'N'
Check for quick action response
Sign off on the Feed Trip Maintenance

Drive Belt Replacement
Warning: Ensure the machine is powered off before starting the procedure
Motor removed
Three screws 'F' removed and bearing housing 'G' withdrawn
Two screws and bushings 'H' removed
Four screws '|' and one screw 'J' removed
Four screws securing speed changer 'K' removed
Top housing 'L' removed
Belt replaced
Sign off on the drive belt replacement
Saddle Feed Screw Backlash Maintenance
Adjust Table Saddle Screw Backlash
Move the saddle back (toward the column) 3/4 of the way through the range of travel
Remove four socket head cap screws securing bracket 'Q' to knee
Pull the saddle forward to expose lock nut 'R' and adjusting nut 'S', through the hole in the front of the knee
Use the larger end of the two-piece backlash adjustment tool, to loosen lock nut 'R'
Use the smaller end of the backlash adjustment tool to engage lead screw adjusting nut 'S'
While slowly turning handle 'T', tighten the adjusting nut until backlash is .003 to .005 inches [.08 to .13 millimeters]
Tighten the lock nut
Move the saddle back and replace the fourscrews securing bracket 'Q', to the knee
1 Daily Machine Lubrication
Lubricate with few drops twice daily:
Way Surfaces and Lead Screws lubricated with Sunoco Waylube #1180 or equivalent
Milling Heads (Spindle Bearings) lubricated with S.A.E. 10 or 10W Light Oil (None on grease-packed heads)
Motor - None required. Motor greased for life of bearings
Machine - Lubricated with grease every six months as described on lubrication plate
Power Feed lubricated to sight level with Mobilube No. 46 S.A.E. 140
Shaping Attachment lubricated with Mobil 600W Oil or equivalent
Sign off on the machine lubrication
Table Feed Screw Backlash Maintenance
Adjust Table Feed Screw Backlash
Move the table to the center of travel
Insert the larger end of the two-piece backlash adjustment tool, into the left side of the saddle
Loosen lock nut 'p', one full turn
Use the smaller end of the backlash adjustment tool to engage lead screw adjusting nut 'O'
Tighten the lead screw adjusting nut while slowly turning handle 'N' until the backlash is .003 to .005 inches [08 to .13 millimeters]
Use the larger end of the backlash adjustment tool to secure the lock nut
Sign off on the Table Feed Screw Backlash Maintenance
Parts for Bridgeport Milling Machine SERIES 1 CNC
Access the parts list for your equipment in MaintainX.
Nut, UNC Hex Jam, 375"-16
BP 11011745
Shield Assembly, Rear
BP 11191203
Washer, Plastic #10-32
BP 11010065
Quick Change Shield Assembly
BP 11060814
Ring, Guard Mounting
BP 12190330
Nut, UNC Hex Jam, 375"-16
BP 11011745
Shield Assembly, Rear
BP 11191203
Washer, Plastic #10-32
BP 11010065
Quick Change Shield Assembly
BP 11060814
Ring, Guard Mounting
BP 12190330
Nut, UNC Hex Jam, 375"-16
BP 11011745
Shield Assembly, Rear
BP 11191203
Washer, Plastic #10-32
BP 11010065
Quick Change Shield Assembly
BP 11060814
Ring, Guard Mounting
BP 12190330
Unlock efficiency
with MaintainX CoPilot
MaintainX CoPilot is your expert colleague, on call 24/7, helping your team find the answers they need to keep equipment running.
Reduce Unplanned Downtime
Ensure your team follows consistent procedures to minimize equipment failures and costly delays.
Maximize Asset Availability
Keep your assets running longer and more reliably, with standardized maintenance workflows from OEM manuals.
Lower Maintenance Costs
Turn any technician into an expert to streamline operations, maintain more assets, and reduce overall costs.
Thousands of companies manage their assets with MaintainX

'%3e%3cpath%20fill='url(%23b)'%20d='M66.008%2080.068c-5.084-.786-9.763-3.834-12.442-8.68a16.942%2016.942%200%200%201-1.87-5.18c1.096.19%202.203.476%203.298.87%206.525%202.333%2010.836%207.68%2011.014%2012.99ZM51.47%2061.576c.488-5.524%203.62-10.716%208.847-13.597a17.132%2017.132%200%200%201%2011.335-1.882c-.798%208.145-7.43%2014.848-16.038%2015.599-1.417.119-2.799.07-4.144-.12Zm28.564-11.478a17.513%2017.513%200%200%201%203.727%204.62c4.608%208.335%201.584%2018.813-6.75%2023.409a16.988%2016.988%200%200%201-4.359%201.679%2019.624%2019.624%200%200%201-3.977-12.776c.346-7.561%204.942-13.931%2011.36-16.932Z'/%3e%3cpath%20fill='%23110F0D'%20fill-rule='evenodd'%20d='M142.831%2048.324h4.977V77.03h-4.977V48.324Zm27.278%2013.002c.322%201.048.453%202.263.453%203.62v12.073h-4.787V66.208c0-.75-.047-1.572-.154-2.143-.453-2.382-1.822-3.572-4.215-3.572-2.31%200-3.882%201.274-4.43%203.476-.143.596-.226%201.405-.226%202.25v10.8h-4.787V56.623h4.477v2.989c1.536-2.5%203.906-3.43%206.371-3.43%203.488%200%206.263%201.68%207.298%205.144Zm24.636%207.323c0%203.882-2.358%206.525-5.763%207.727-1.298.453-2.632.643-4.62.643h-10.169V48.324h9.085c1.691%200%203.156.143%204.049.38%203.465.93%205.727%203.68%205.727%207.335%200%202.441-.81%204.156-2.762%205.644%202.905%201.417%204.453%203.727%204.453%206.966Zm-15.634-8.656h4.584c1.024%200%201.917-.143%202.536-.417%201.215-.548%201.905-1.608%201.905-3.167%200-1.548-.643-2.572-1.845-3.132-.691-.31-1.762-.452-2.763-.452h-4.417v7.168Zm10.716%208.465c0-1.536-.893-3.37-3.227-3.893-.428-.095-1.036-.143-1.571-.143h-5.918v8.085h5.501c.56%200%201.429-.048%201.953-.167%201.94-.453%203.262-1.846%203.262-3.882Zm47.747-11.847-8.097%2020.408h-4.429l-8.109-20.408h5.191l5.192%2014.574%205.108-14.574h5.144Zm-20.218%2010.002c0%20.69-.036%201.262-.155%201.94h-15.943c.631%202.87%202.714%204.728%205.882%204.728%202.131%200%203.607-.882%204.703-2.525h4.87c-1.762%204.144-5.204%206.692-9.657%206.692-6.084%200-10.537-4.858-10.537-10.49%200-6.108%204.524-10.776%2010.335-10.776%206.239%200%2010.442%204.954%2010.502%2010.43Zm-4.763-1.405c-.333-2.846-2.643-4.858-5.691-4.858-2.894%200-5.287%201.929-5.621%204.858h11.312Zm-72.667%203.44c0%204.787-3.287%208.371-9.419%208.371H119.363V64.66c-1.917.274-3.87.69-5.811%201.238l4.537%2011.121h-5.418l-3.596-9.585c-5.144%202.084-10.085%205.216-14.217%209.585h-4.786L101.8%2048.312h4.56l5.68%2013.883a44.112%2044.112%200%200%201%207.323-1.774V48.312h9.084c1.703%200%203.156.143%204.061.393%203.453.929%205.727%203.667%205.727%207.323%200%201.917-.738%204.179-2.81%205.691%203.06%201.56%204.501%204.025%204.501%206.93Zm-15.634-8.667a62.664%2062.664%200%200%201%202.06-.036c1.703.012%203.239.131%204.608.37%201.441-.549%202.357-1.727%202.357-3.537%200-1.941-.881-3.144-2.488-3.667-.548-.18-1.358-.286-2.322-.286h-4.215v7.156Zm-16.55%203.905-3.715-9.894-6.394%2016.502c2.833-2.595%206.263-4.858%2010.109-6.608Zm27.254%204.74c0-2.775-3.131-4.347-8.513-4.418-.715%200-1.441.011-2.191.047v8.252h5.918c2.548%200%204.786-1.37%204.786-3.882Z'%20clip-rule='evenodd'/%3e%3c/g%3e%3cdefs%3e%3clinearGradient%20id='b'%20x1='51.47'%20x2='85.916'%20y1='62.946'%20y2='62.946'%20gradientUnits='userSpaceOnUse'%3e%3cstop%20stop-color='%23CD9F28'/%3e%3cstop%20offset='1'%20stop-color='%23ECD80B'/%3e%3c/linearGradient%3e%3cclipPath%20id='a'%3e%3cpath%20fill='%23fff'%20d='M51.47%2045.728h186.104V80.14H51.47z'/%3e%3c/clipPath%3e%3c/defs%3e%3c/svg%3e)


More from Bridgeport
Explore Other Assets


© 2026 MaintainX. All rights reserved.