


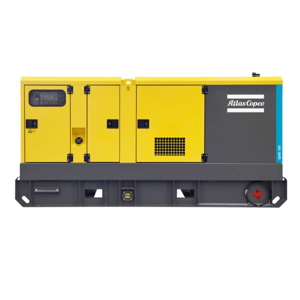
Atlas Copco Screw Compressor GA18+FF
Need answers fast?
Explore the manual using AI.
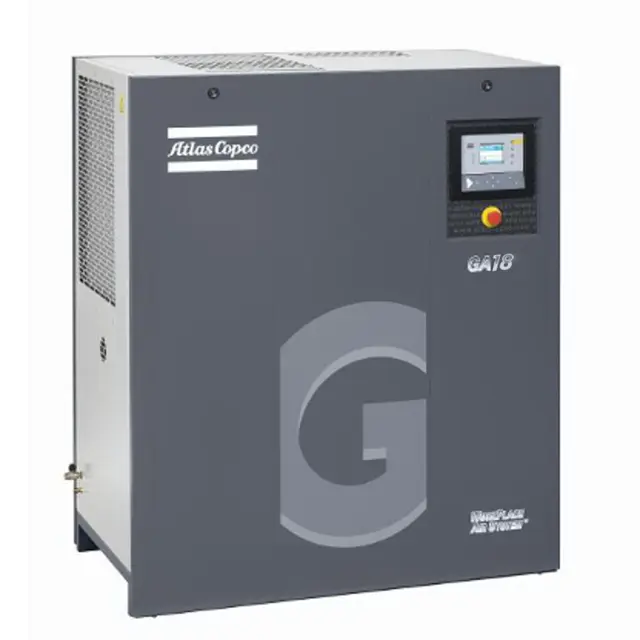
The Atlas Copco Screw Compressor GA18+FF is a high-performance industrial compressor designed for reliable air supply in various applications. Known for its efficiency and durability, this model ensures optimal operation and reduced downtime, making it an ideal choice for demanding environments.
Turn manuals into instant answers
with your AI-powered assistantTurn manuals into instant answers
with your AI-powered assistant
Complete asset maintenance, one click away
Get instant access to all the maintenance information you need. Empower technicians to perform preventive maintenance with asset packages, ready to use right out of the box.

Documents & Manuals
Find all the essential guides in one place.
 Tensioning Guide
- Belt-diagram
- C-120 pulleys
+ 13 more

Work Order Templates
Pre-built workflows to keep your asset running smoothly.
- Daily Electrical System Inspection
- Replace Roller and Pulley
- Install Engine B-120
+ 29 more

Procedures
Integrate maintenance plans directly into your work orders.
- Motion Industries
- Applied Industrial Technologies
- Electrical Brothers
+ 5 more

Parts
Access the parts list for your equipment in MaintainX.
- Drive Motor
- B2 Rollers
- Tensioning System
+ 40 more
Atlas Copco Screw Compressor GA18+FF
Create an account to install this asset package.
Maintenance Plans for Atlas Copco Screw Compressor Model GA18+FF
Integrate maintenance plans directly into your work orders in MaintainX.
1 Daily Screw Compressor Inspection
1. Check oil level.
2. Check readings on display.
3. Check that condensate is discharged during loading.
4. Check air filter service indicator.
5. Drain condensate.;

3 Monthly Screw Compressor Inspection
Attention: Apply all relevant safety precautions, including those mentioned in this book.
Before starting any maintenance or repairs:
1. For GA Workplace/Workplace FF, press stop button (1-Fig. 3.5); Wait until the compressor has stopped (approx. 30 seconds); Press emergency stop button (S3-Fig. 3.4) and switch off the voltage
For Pack/Pack FF, press stop button (1-Fig. 3.7); Wait until the compressor has stopped (approx. 30 seconds); Press emergency stop button (S3-Fig. 3.6) and switch off the voltage
2. Close air outlet valve (1-Figs. 3.4/3.6) and depressurize by opening plug (5-Fig. 3.3) one turn and by opening valve (1-Fig. 3.2) (not provided on GA Pack)
3. The air outlet valve (1-Figs. 3.4/3.6) can be locked during maintenance or repair as follows: - Close the valve
- Remove the bolt fixing the handle
- Lift the handle and turn it until the slot of the handle fits over the blocking edge on the valve body
- Lock the handle using the special bolt and wrench delivered loose with the compressor
4000 Hourly Screw Compressor Maintenance
Attention: Apply all relevant safety precautions, including those mentioned in this book.
Before starting any maintenance or repairs:
1. For GA Workplace/Workplace FF, press stop button (1-Fig. 3.5); Wait until the compressor has stopped (approx. 30 seconds); Press emergency stop button (S3-Fig. 3.4) and switch off the voltage
For Pack/Pack FF, press stop button (1-Fig. 3.7); Wait until the compressor has stopped (approx. 30 seconds); Press emergency stop button (S3-Fig. 3.6) and switch off the voltage
2. Close air outlet valve (1-Figs. 3.4/3.6) and depressurize by opening plug (5-Fig. 3.3) one turn and by opening valve (1-Fig. 3.2) (not provided on GA Pack)
3. The air outlet valve (1-Figs. 3.4/3.6) can be locked during maintenance or repair as follows: - Close the valve
- Remove the bolt fixing the handle
- Lift the handle and turn it until the slot of the handle fits over the blocking edge on the valve body
- Lock the handle using the special bolt and wrench delivered loose with the compressor
4000 Hourly Oil and Oil Filter Replacement
Attention: Apply all relevant safety precautions, including those mentioned in this book.
Before starting any maintenance or repairs:
1. For GA Workplace/Workplace FF, press stop button (1-Fig. 3.5); Wait until the compressor has stopped (approx. 30 seconds); Press emergency stop button (S3-Fig. 3.4) and switch off the voltage
For Pack/Pack FF, press stop button (1-Fig. 3.7); Wait until the compressor has stopped (approx. 30 seconds); Press emergency stop button (S3-Fig. 3.6) and switch off the voltage
2. Close air outlet valve (1-Figs. 3.4/3.6) and depressurize by opening plug (5-Fig. 3.3) one turn and by opening valve (1-Fig. 3.2) (not provided on GA Pack)
3. The air outlet valve (1-Figs. 3.4/3.6) can be locked during maintenance or repair as follows: - Close the valve
- Remove the bolt fixing the handle
- Lift the handle and turn it until the slot of the handle fits over the blocking edge on the valve body
- Lock the handle using the special bolt and wrench delivered loose with the compressor
8000 Hourly Oil Separator Replacement
Attention: Apply all relevant safety precautions, including those mentioned in this book.
Before starting any maintenance or repairs:
1. For GA Workplace/Workplace FF, press stop button (1-Fig. 3.5); Wait until the compressor has stopped (approx. 30 seconds); Press emergency stop button (S3-Fig. 3.4) and switch off the voltage
For Pack/Pack FF, press stop button (1-Fig. 3.7); Wait until the compressor has stopped (approx. 30 seconds); Press emergency stop button (S3-Fig. 3.6) and switch off the voltage
2. Close air outlet valve (1-Figs. 3.4/3.6) and depressurize by opening plug (5-Fig. 3.3) one turn and by opening valve (1-Fig. 3.2) (not provided on GA Pack)
3. The air outlet valve (1-Figs. 3.4/3.6) can be locked during maintenance or repair as follows: - Close the valve
- Remove the bolt fixing the handle
- Lift the handle and turn it until the slot of the handle fits over the blocking edge on the valve body
- Lock the handle using the special bolt and wrench delivered loose with the compressor
Parts for Atlas Copco Screw Compressor GA18+FF
Access the parts list for your equipment in MaintainX.
Lubricant 55 Gallon
2901 0045 01
Equivalent Compressor Oil - 5 Gallon
2901 0522 00
Lubricant 55 Gallon
2901 0045 01
Equivalent Compressor Oil - 5 Gallon
2901 0522 00
Lubricant 55 Gallon
2901 0045 01
Equivalent Compressor Oil - 5 Gallon
2901 0522 00
Unlock efficiency
with MaintainX CoPilot
MaintainX CoPilot is your expert colleague, on call 24/7, helping your team find the answers they need to keep equipment running.
Reduce Unplanned Downtime
Ensure your team follows consistent procedures to minimize equipment failures and costly delays.
Maximize Asset Availability
Keep your assets running longer and more reliably, with standardized maintenance workflows from OEM manuals.
Lower Maintenance Costs
Turn any technician into an expert to streamline operations, maintain more assets, and reduce overall costs.
Thousands of companies manage their assets with MaintainX

'%3e%3cpath%20fill='url(%23b)'%20d='M66.008%2080.068c-5.084-.786-9.763-3.834-12.442-8.68a16.942%2016.942%200%200%201-1.87-5.18c1.096.19%202.203.476%203.298.87%206.525%202.333%2010.836%207.68%2011.014%2012.99ZM51.47%2061.576c.488-5.524%203.62-10.716%208.847-13.597a17.132%2017.132%200%200%201%2011.335-1.882c-.798%208.145-7.43%2014.848-16.038%2015.599-1.417.119-2.799.07-4.144-.12Zm28.564-11.478a17.513%2017.513%200%200%201%203.727%204.62c4.608%208.335%201.584%2018.813-6.75%2023.409a16.988%2016.988%200%200%201-4.359%201.679%2019.624%2019.624%200%200%201-3.977-12.776c.346-7.561%204.942-13.931%2011.36-16.932Z'/%3e%3cpath%20fill='%23110F0D'%20fill-rule='evenodd'%20d='M142.831%2048.324h4.977V77.03h-4.977V48.324Zm27.278%2013.002c.322%201.048.453%202.263.453%203.62v12.073h-4.787V66.208c0-.75-.047-1.572-.154-2.143-.453-2.382-1.822-3.572-4.215-3.572-2.31%200-3.882%201.274-4.43%203.476-.143.596-.226%201.405-.226%202.25v10.8h-4.787V56.623h4.477v2.989c1.536-2.5%203.906-3.43%206.371-3.43%203.488%200%206.263%201.68%207.298%205.144Zm24.636%207.323c0%203.882-2.358%206.525-5.763%207.727-1.298.453-2.632.643-4.62.643h-10.169V48.324h9.085c1.691%200%203.156.143%204.049.38%203.465.93%205.727%203.68%205.727%207.335%200%202.441-.81%204.156-2.762%205.644%202.905%201.417%204.453%203.727%204.453%206.966Zm-15.634-8.656h4.584c1.024%200%201.917-.143%202.536-.417%201.215-.548%201.905-1.608%201.905-3.167%200-1.548-.643-2.572-1.845-3.132-.691-.31-1.762-.452-2.763-.452h-4.417v7.168Zm10.716%208.465c0-1.536-.893-3.37-3.227-3.893-.428-.095-1.036-.143-1.571-.143h-5.918v8.085h5.501c.56%200%201.429-.048%201.953-.167%201.94-.453%203.262-1.846%203.262-3.882Zm47.747-11.847-8.097%2020.408h-4.429l-8.109-20.408h5.191l5.192%2014.574%205.108-14.574h5.144Zm-20.218%2010.002c0%20.69-.036%201.262-.155%201.94h-15.943c.631%202.87%202.714%204.728%205.882%204.728%202.131%200%203.607-.882%204.703-2.525h4.87c-1.762%204.144-5.204%206.692-9.657%206.692-6.084%200-10.537-4.858-10.537-10.49%200-6.108%204.524-10.776%2010.335-10.776%206.239%200%2010.442%204.954%2010.502%2010.43Zm-4.763-1.405c-.333-2.846-2.643-4.858-5.691-4.858-2.894%200-5.287%201.929-5.621%204.858h11.312Zm-72.667%203.44c0%204.787-3.287%208.371-9.419%208.371H119.363V64.66c-1.917.274-3.87.69-5.811%201.238l4.537%2011.121h-5.418l-3.596-9.585c-5.144%202.084-10.085%205.216-14.217%209.585h-4.786L101.8%2048.312h4.56l5.68%2013.883a44.112%2044.112%200%200%201%207.323-1.774V48.312h9.084c1.703%200%203.156.143%204.061.393%203.453.929%205.727%203.667%205.727%207.323%200%201.917-.738%204.179-2.81%205.691%203.06%201.56%204.501%204.025%204.501%206.93Zm-15.634-8.667a62.664%2062.664%200%200%201%202.06-.036c1.703.012%203.239.131%204.608.37%201.441-.549%202.357-1.727%202.357-3.537%200-1.941-.881-3.144-2.488-3.667-.548-.18-1.358-.286-2.322-.286h-4.215v7.156Zm-16.55%203.905-3.715-9.894-6.394%2016.502c2.833-2.595%206.263-4.858%2010.109-6.608Zm27.254%204.74c0-2.775-3.131-4.347-8.513-4.418-.715%200-1.441.011-2.191.047v8.252h5.918c2.548%200%204.786-1.37%204.786-3.882Z'%20clip-rule='evenodd'/%3e%3c/g%3e%3cdefs%3e%3clinearGradient%20id='b'%20x1='51.47'%20x2='85.916'%20y1='62.946'%20y2='62.946'%20gradientUnits='userSpaceOnUse'%3e%3cstop%20stop-color='%23CD9F28'/%3e%3cstop%20offset='1'%20stop-color='%23ECD80B'/%3e%3c/linearGradient%3e%3cclipPath%20id='a'%3e%3cpath%20fill='%23fff'%20d='M51.47%2045.728h186.104V80.14H51.47z'/%3e%3c/clipPath%3e%3c/defs%3e%3c/svg%3e)


More from Atlas Copco


Explore Other Assets


© 2026 MaintainX. All rights reserved.