


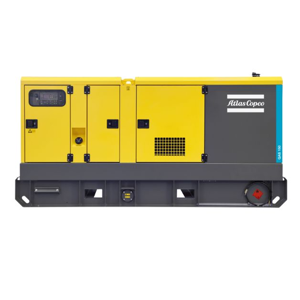
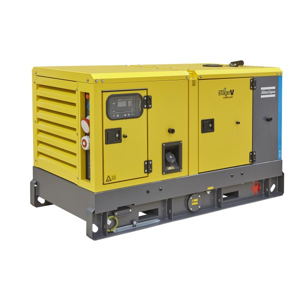
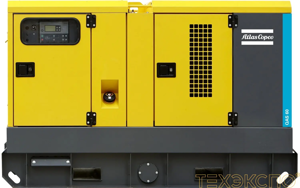
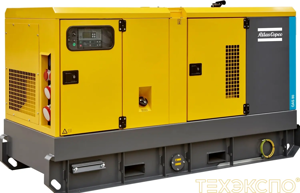
Atlas Copco Portable Light Tower Generator QLTM10
Need answers fast?
Explore the manual using AI.
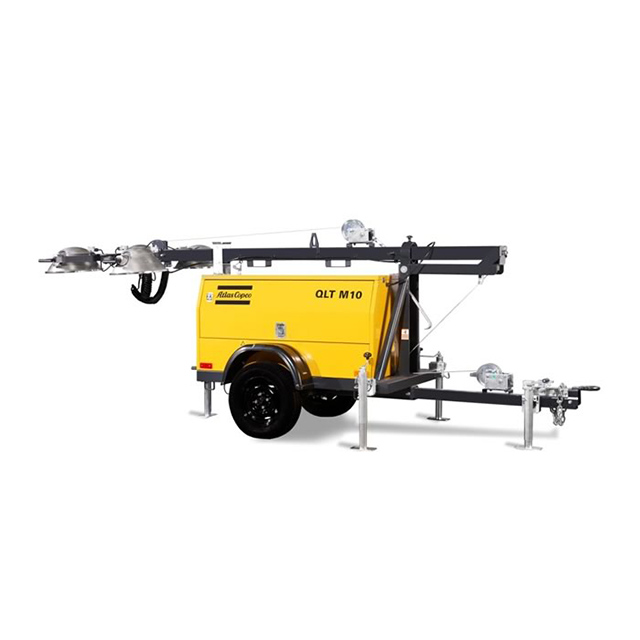
The Atlas Copco Portable Light Tower Generator QLTM10 is a versatile and efficient lighting solution designed for various applications. This generator provides reliable power and illumination, making it ideal for construction sites, events, and emergency situations. Its robust design ensures durability and ease of maintenance.
Turn manuals into instant answers
with your AI-powered assistantTurn manuals into instant answers
with your AI-powered assistant
Manual for Atlas Copco Portable Light Tower Generator QLTM10
Complete asset maintenance, one click away
Get instant access to all the maintenance information you need. Empower technicians to perform preventive maintenance with asset packages, ready to use right out of the box.

Documents & Manuals
Find all the essential guides in one place.
 Tensioning Guide
- Belt-diagram
- C-120 pulleys
+ 13 more

Work Order Templates
Pre-built workflows to keep your asset running smoothly.
- Daily Electrical System Inspection
- Replace Roller and Pulley
- Install Engine B-120
+ 29 more

Procedures
Integrate maintenance plans directly into your work orders.
- Motion Industries
- Applied Industrial Technologies
- Electrical Brothers
+ 5 more

Parts
Access the parts list for your equipment in MaintainX.
- Drive Motor
- B2 Rollers
- Tensioning System
+ 40 more
Atlas Copco Portable Light Tower Generator QLTM10
Create an account to install this asset package.
Maintenance Plans for Atlas Copco Portable Light Tower Generator Model QLTM10
Integrate maintenance plans directly into your work orders in MaintainX.
Portable Light Tower Generator Maintenance
Check the axle wheel bearing axial clearance
- Jacking trailer, check whether the wheels turn smoothly, without hindrance
- Axial flipping tires, whether we can feel the obvious gap
Re-adjust the axle hub bearing axial clearance
- Remove the wheels and wheel covers
- Remove the slotted nut cotter pin
- Tighten shaft nut, then back to loose 1/2 turn (180 °), then tighten 1/4 turn (90 °)
- Check the wheel functioning - is free to rotate, and the wheel can not be detected with axial clearance
- Plug cotter pin

1 Daily Portable Light Tower Generator Inspection
Warning: High voltage. Contact with live electrical circuits will cause severe injury or death. Turn off power before servicing any component on the light tower.
Check fluid levels and look for leaks
Inspect all exposed wiring for damage, worn insulation, and cuts
Inspect winch cables for wear and damage
If the light tower is vertical, verify the vertical-lock pin is engaged and secure
Check the wheel bearing axial clearance and adjust if necessary
Check the quality and quantity of grease and replace if necessary
Repairs Needed
Sign off on the light tower generator inspection
Lamp Replacement
Power to all lamps and the control panel receptacle turned off
Engine shut down and lamps allowed to cool for 15 minutes
Screws securing the flange rings removed and flange rings removed
Protective lamp cover with the gasket attached removed
Hardware securing one side of the lamp stabilizer removed, stabilizer swung to the side and lamp unscrewed
IMPORTANT! Lamps will last longer if they are free of contaminants. To protect a new lamp from the natural oils on the fingertips, handle the lamp with cotton gloves or a clean, soft cloth
Lamp inserted into the socket and secured with the lamp stabilizer
Gasket fastened properly around the lamp cover
Cover secured to the reflector with the flange ring and screws
Engine Maintenance
When shipped from the factory, the lifting chain is attached to the generator, next to the fuel tank inside the engine cabinet.
Connect the lifting chain to the mast and maintenance panel
Ensure the lifting chain is not twisted
Ensure the chain is well connected to both the mast and the maintenance panel
Release the two rubber draw-latches located inside the engine cabinet. A decal on the inside of each gull-wing door points to the latch on each side of the trailer
Close both side doors
CAUTION! Improperly raising the maintenance panel could damage equipment and cause personal injury
Do not raise the maintenance panel before releasing its two rubber draw-latches and closing both side doors
Keep all body parts clear of the path of the maintenance panel, both above and below it, while it is being raised
Unlock efficiency
with MaintainX CoPilot
MaintainX CoPilot is your expert colleague, on call 24/7, helping your team find the answers they need to keep equipment running.
Reduce Unplanned Downtime
Ensure your team follows consistent procedures to minimize equipment failures and costly delays.
Maximize Asset Availability
Keep your assets running longer and more reliably, with standardized maintenance workflows from OEM manuals.
Lower Maintenance Costs
Turn any technician into an expert to streamline operations, maintain more assets, and reduce overall costs.
Thousands of companies manage their assets with MaintainX

'%3e%3cpath%20fill='url(%23b)'%20d='M66.008%2080.068c-5.084-.786-9.763-3.834-12.442-8.68a16.942%2016.942%200%200%201-1.87-5.18c1.096.19%202.203.476%203.298.87%206.525%202.333%2010.836%207.68%2011.014%2012.99ZM51.47%2061.576c.488-5.524%203.62-10.716%208.847-13.597a17.132%2017.132%200%200%201%2011.335-1.882c-.798%208.145-7.43%2014.848-16.038%2015.599-1.417.119-2.799.07-4.144-.12Zm28.564-11.478a17.513%2017.513%200%200%201%203.727%204.62c4.608%208.335%201.584%2018.813-6.75%2023.409a16.988%2016.988%200%200%201-4.359%201.679%2019.624%2019.624%200%200%201-3.977-12.776c.346-7.561%204.942-13.931%2011.36-16.932Z'/%3e%3cpath%20fill='%23110F0D'%20fill-rule='evenodd'%20d='M142.831%2048.324h4.977V77.03h-4.977V48.324Zm27.278%2013.002c.322%201.048.453%202.263.453%203.62v12.073h-4.787V66.208c0-.75-.047-1.572-.154-2.143-.453-2.382-1.822-3.572-4.215-3.572-2.31%200-3.882%201.274-4.43%203.476-.143.596-.226%201.405-.226%202.25v10.8h-4.787V56.623h4.477v2.989c1.536-2.5%203.906-3.43%206.371-3.43%203.488%200%206.263%201.68%207.298%205.144Zm24.636%207.323c0%203.882-2.358%206.525-5.763%207.727-1.298.453-2.632.643-4.62.643h-10.169V48.324h9.085c1.691%200%203.156.143%204.049.38%203.465.93%205.727%203.68%205.727%207.335%200%202.441-.81%204.156-2.762%205.644%202.905%201.417%204.453%203.727%204.453%206.966Zm-15.634-8.656h4.584c1.024%200%201.917-.143%202.536-.417%201.215-.548%201.905-1.608%201.905-3.167%200-1.548-.643-2.572-1.845-3.132-.691-.31-1.762-.452-2.763-.452h-4.417v7.168Zm10.716%208.465c0-1.536-.893-3.37-3.227-3.893-.428-.095-1.036-.143-1.571-.143h-5.918v8.085h5.501c.56%200%201.429-.048%201.953-.167%201.94-.453%203.262-1.846%203.262-3.882Zm47.747-11.847-8.097%2020.408h-4.429l-8.109-20.408h5.191l5.192%2014.574%205.108-14.574h5.144Zm-20.218%2010.002c0%20.69-.036%201.262-.155%201.94h-15.943c.631%202.87%202.714%204.728%205.882%204.728%202.131%200%203.607-.882%204.703-2.525h4.87c-1.762%204.144-5.204%206.692-9.657%206.692-6.084%200-10.537-4.858-10.537-10.49%200-6.108%204.524-10.776%2010.335-10.776%206.239%200%2010.442%204.954%2010.502%2010.43Zm-4.763-1.405c-.333-2.846-2.643-4.858-5.691-4.858-2.894%200-5.287%201.929-5.621%204.858h11.312Zm-72.667%203.44c0%204.787-3.287%208.371-9.419%208.371H119.363V64.66c-1.917.274-3.87.69-5.811%201.238l4.537%2011.121h-5.418l-3.596-9.585c-5.144%202.084-10.085%205.216-14.217%209.585h-4.786L101.8%2048.312h4.56l5.68%2013.883a44.112%2044.112%200%200%201%207.323-1.774V48.312h9.084c1.703%200%203.156.143%204.061.393%203.453.929%205.727%203.667%205.727%207.323%200%201.917-.738%204.179-2.81%205.691%203.06%201.56%204.501%204.025%204.501%206.93Zm-15.634-8.667a62.664%2062.664%200%200%201%202.06-.036c1.703.012%203.239.131%204.608.37%201.441-.549%202.357-1.727%202.357-3.537%200-1.941-.881-3.144-2.488-3.667-.548-.18-1.358-.286-2.322-.286h-4.215v7.156Zm-16.55%203.905-3.715-9.894-6.394%2016.502c2.833-2.595%206.263-4.858%2010.109-6.608Zm27.254%204.74c0-2.775-3.131-4.347-8.513-4.418-.715%200-1.441.011-2.191.047v8.252h5.918c2.548%200%204.786-1.37%204.786-3.882Z'%20clip-rule='evenodd'/%3e%3c/g%3e%3cdefs%3e%3clinearGradient%20id='b'%20x1='51.47'%20x2='85.916'%20y1='62.946'%20y2='62.946'%20gradientUnits='userSpaceOnUse'%3e%3cstop%20stop-color='%23CD9F28'/%3e%3cstop%20offset='1'%20stop-color='%23ECD80B'/%3e%3c/linearGradient%3e%3cclipPath%20id='a'%3e%3cpath%20fill='%23fff'%20d='M51.47%2045.728h186.104V80.14H51.47z'/%3e%3c/clipPath%3e%3c/defs%3e%3c/svg%3e)


More from Atlas Copco


Explore Other Assets


© 2026 MaintainX. All rights reserved.