


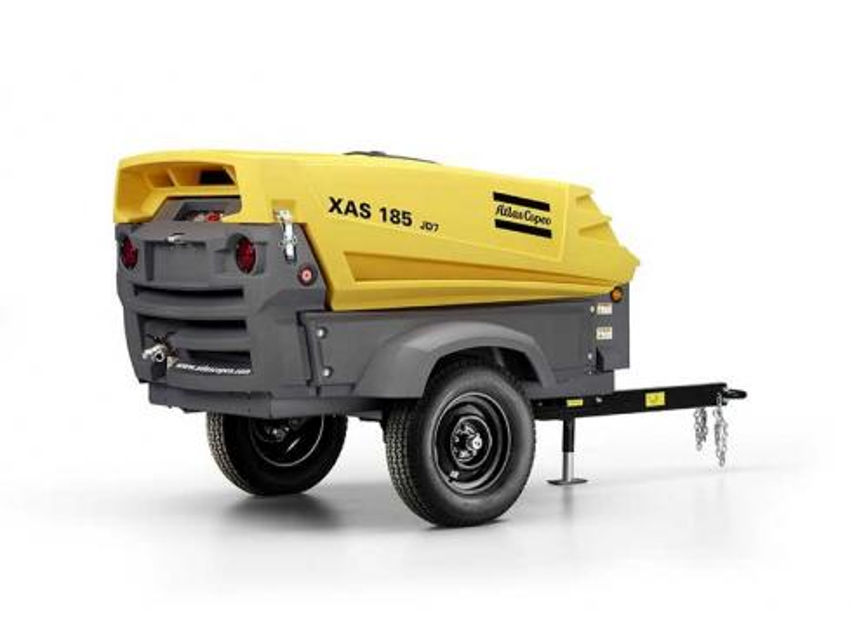
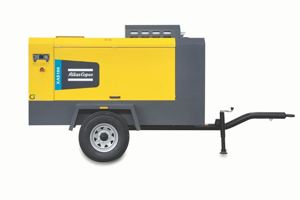
Atlas Copco Portable Compressor XAS185JD7TBV
Need answers fast?
Explore the manual using AI.
Turn manuals into instant answers
with your AI-powered assistantTurn manuals into instant answers
with your AI-powered assistant
Manual for Atlas Copco Portable Compressor XAS185JD7TBV
Complete asset maintenance, one click away
Get instant access to all the maintenance information you need. Empower technicians to perform preventive maintenance with asset packages, ready to use right out of the box.

Documents & Manuals
Find all the essential guides in one place.
 Tensioning Guide
- Belt-diagram
- C-120 pulleys
+ 13 more

Work Order Templates
Pre-built workflows to keep your asset running smoothly.
- Daily Electrical System Inspection
- Replace Roller and Pulley
- Install Engine B-120
+ 29 more

Procedures
Integrate maintenance plans directly into your work orders.
- Motion Industries
- Applied Industrial Technologies
- Electrical Brothers
+ 5 more

Parts
Access the parts list for your equipment in MaintainX.
- Drive Motor
- B2 Rollers
- Tensioning System
+ 40 more
Atlas Copco Portable Compressor XAS185JD7TBV
Create an account to install this asset package.
Maintenance Plans for Atlas Copco Portable Compressor Model XAS185JD7TBV
Integrate maintenance plans directly into your work orders in MaintainX.
250 Hourly Portable Compressor Maintenance
Check Electrolyte level and terminals of battery
Check Tire pressure
Check Leaks in air-, oil- or fuel system
Check Engine minimum and maximum speeds
Check Torque of wheel nuts
Check and Adjust Brake system (if installed)
Adjust Fan v-belt
Change Engine oil
Replace Engine oil filter

250 Hourly Fuel Filter Change
Unscrew the final filter element (1) from the adapter head
Clean the adapter head sealing surface. Lightly oil the gasket of the new element and screw the latter onto the header until the gasket is properly seated, then tighten with both hands
After replacing the final filter’s element, prime fuel system with manual prime button (FU) located below the fuel filter’s housing
Check for fuel leaks once the engine has been restarted
Sign off on the fuel filter change
1000 Hourly / 1 Yearly Compressor Oil Filter Change
NOTE! The quality and the temperature of the oil determine the oil change interval
NOTE! The prescribed interval (See section 4.2) is based on an oil temperature of up to 100oC (212oF) and normal operating conditions
NOTE! When operating in high ambient temperatures, in very dusty or high humidity conditions, it is recommended to change the oil more frequently
Run the compressor until warm. Close the outlet valve(s) and stop the compressor. Wait until the pressure is released through the automatic blow-down valve. Unscrew the oil filler plug (FP) one turn. This uncovers a vent hole, which permits any pressure in the system to escape
Drain the oil by removing all drain plugs. Drain plugs are located at the oil tank, discharge manifold, and oil injection manifold. Catch the oil in a drain pan. Screw out the filler plug to speed up draining. Tighten the plugs after draining
Remove the oil filter (OFc), e.g. by means of a special tool. Catch the oil in a drain pan
Clean the filter seat on the manifold, taking care that no dirt drops into the system. Oil the gasket of the new filter element. Screw it into place until the gasket contacts its seat, then tighten one half turn only
Fill the air receiver until the pointer of the oil level gauge (OLG) registers in the upper extremity of the green range. Take care that no dirt drops into the system. Reinstall and tighten the filler plug
Run the unit at no load for a few minutes to circulate the oil and to evacuate the air trapped in the oil system
Initial 50 Hours Portable Compressor Maintenance
Check Electrolyte level and terminals of battery
Check Tire pressure
Check Leaks in air-, oil- or fuel system
Check Engine minimum and maximum speeds
Check Torque of wheel nuts
Check and Adjust Brake system (if installed)
Adjust Fan v-belt
Replace Compressor oil filter
Change Engine oil
250 Hourly Battery Maintenance
Is the battery clean and dry?
Enter the electrolyte level
Is the electrolyte level at 10 to 15 mm above the plates or at the indicated level?
Did you top up with distilled water only?
Are the terminals and clamps tight and clean?
Are the terminals and clamps lightly covered with petroleum jelly?
Parts for Atlas Copco Portable Compressor XAS185JD7TBV
Access the parts list for your equipment in MaintainX.
5 Gallon Pail
1310 0334 30
Skid 5 Gallon Pails
1310 0334 32
Skid 5 Gallon Drums
1310 0334 33
250/750 hr. Service Pak
1310300374
500 hr. Service Pak
1310300375
5 Gallon Pail
1310 0334 30
Skid 5 Gallon Pails
1310 0334 32
Skid 5 Gallon Drums
1310 0334 33
250/750 hr. Service Pak
1310300374
500 hr. Service Pak
1310300375
5 Gallon Pail
1310 0334 30
Skid 5 Gallon Pails
1310 0334 32
Skid 5 Gallon Drums
1310 0334 33
250/750 hr. Service Pak
1310300374
500 hr. Service Pak
1310300375
Unlock efficiency
with MaintainX CoPilot
MaintainX CoPilot is your expert colleague, on call 24/7, helping your team find the answers they need to keep equipment running.
Reduce Unplanned Downtime
Ensure your team follows consistent procedures to minimize equipment failures and costly delays.
Maximize Asset Availability
Keep your assets running longer and more reliably, with standardized maintenance workflows from OEM manuals.
Lower Maintenance Costs
Turn any technician into an expert to streamline operations, maintain more assets, and reduce overall costs.
Thousands of companies manage their assets with MaintainX

'%3e%3cpath%20fill='url(%23b)'%20d='M66.008%2080.068c-5.084-.786-9.763-3.834-12.442-8.68a16.942%2016.942%200%200%201-1.87-5.18c1.096.19%202.203.476%203.298.87%206.525%202.333%2010.836%207.68%2011.014%2012.99ZM51.47%2061.576c.488-5.524%203.62-10.716%208.847-13.597a17.132%2017.132%200%200%201%2011.335-1.882c-.798%208.145-7.43%2014.848-16.038%2015.599-1.417.119-2.799.07-4.144-.12Zm28.564-11.478a17.513%2017.513%200%200%201%203.727%204.62c4.608%208.335%201.584%2018.813-6.75%2023.409a16.988%2016.988%200%200%201-4.359%201.679%2019.624%2019.624%200%200%201-3.977-12.776c.346-7.561%204.942-13.931%2011.36-16.932Z'/%3e%3cpath%20fill='%23110F0D'%20fill-rule='evenodd'%20d='M142.831%2048.324h4.977V77.03h-4.977V48.324Zm27.278%2013.002c.322%201.048.453%202.263.453%203.62v12.073h-4.787V66.208c0-.75-.047-1.572-.154-2.143-.453-2.382-1.822-3.572-4.215-3.572-2.31%200-3.882%201.274-4.43%203.476-.143.596-.226%201.405-.226%202.25v10.8h-4.787V56.623h4.477v2.989c1.536-2.5%203.906-3.43%206.371-3.43%203.488%200%206.263%201.68%207.298%205.144Zm24.636%207.323c0%203.882-2.358%206.525-5.763%207.727-1.298.453-2.632.643-4.62.643h-10.169V48.324h9.085c1.691%200%203.156.143%204.049.38%203.465.93%205.727%203.68%205.727%207.335%200%202.441-.81%204.156-2.762%205.644%202.905%201.417%204.453%203.727%204.453%206.966Zm-15.634-8.656h4.584c1.024%200%201.917-.143%202.536-.417%201.215-.548%201.905-1.608%201.905-3.167%200-1.548-.643-2.572-1.845-3.132-.691-.31-1.762-.452-2.763-.452h-4.417v7.168Zm10.716%208.465c0-1.536-.893-3.37-3.227-3.893-.428-.095-1.036-.143-1.571-.143h-5.918v8.085h5.501c.56%200%201.429-.048%201.953-.167%201.94-.453%203.262-1.846%203.262-3.882Zm47.747-11.847-8.097%2020.408h-4.429l-8.109-20.408h5.191l5.192%2014.574%205.108-14.574h5.144Zm-20.218%2010.002c0%20.69-.036%201.262-.155%201.94h-15.943c.631%202.87%202.714%204.728%205.882%204.728%202.131%200%203.607-.882%204.703-2.525h4.87c-1.762%204.144-5.204%206.692-9.657%206.692-6.084%200-10.537-4.858-10.537-10.49%200-6.108%204.524-10.776%2010.335-10.776%206.239%200%2010.442%204.954%2010.502%2010.43Zm-4.763-1.405c-.333-2.846-2.643-4.858-5.691-4.858-2.894%200-5.287%201.929-5.621%204.858h11.312Zm-72.667%203.44c0%204.787-3.287%208.371-9.419%208.371H119.363V64.66c-1.917.274-3.87.69-5.811%201.238l4.537%2011.121h-5.418l-3.596-9.585c-5.144%202.084-10.085%205.216-14.217%209.585h-4.786L101.8%2048.312h4.56l5.68%2013.883a44.112%2044.112%200%200%201%207.323-1.774V48.312h9.084c1.703%200%203.156.143%204.061.393%203.453.929%205.727%203.667%205.727%207.323%200%201.917-.738%204.179-2.81%205.691%203.06%201.56%204.501%204.025%204.501%206.93Zm-15.634-8.667a62.664%2062.664%200%200%201%202.06-.036c1.703.012%203.239.131%204.608.37%201.441-.549%202.357-1.727%202.357-3.537%200-1.941-.881-3.144-2.488-3.667-.548-.18-1.358-.286-2.322-.286h-4.215v7.156Zm-16.55%203.905-3.715-9.894-6.394%2016.502c2.833-2.595%206.263-4.858%2010.109-6.608Zm27.254%204.74c0-2.775-3.131-4.347-8.513-4.418-.715%200-1.441.011-2.191.047v8.252h5.918c2.548%200%204.786-1.37%204.786-3.882Z'%20clip-rule='evenodd'/%3e%3c/g%3e%3cdefs%3e%3clinearGradient%20id='b'%20x1='51.47'%20x2='85.916'%20y1='62.946'%20y2='62.946'%20gradientUnits='userSpaceOnUse'%3e%3cstop%20stop-color='%23CD9F28'/%3e%3cstop%20offset='1'%20stop-color='%23ECD80B'/%3e%3c/linearGradient%3e%3cclipPath%20id='a'%3e%3cpath%20fill='%23fff'%20d='M51.47%2045.728h186.104V80.14H51.47z'/%3e%3c/clipPath%3e%3c/defs%3e%3c/svg%3e)


More from Atlas Copco


Explore Other Assets


© 2026 MaintainX. All rights reserved.