


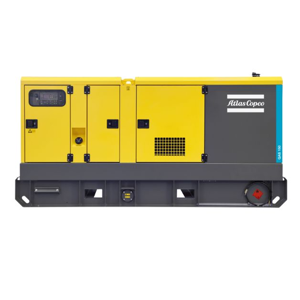
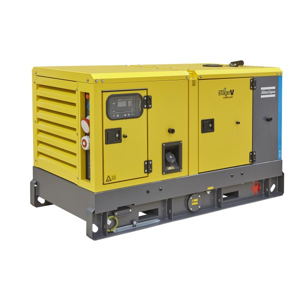
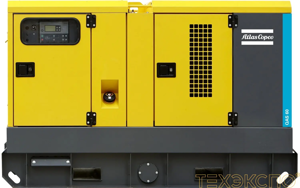
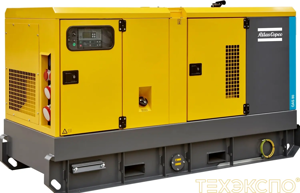
Atlas Copco Oil-Sealed Rotary Vane Vacuum Pump GVS 630A
Need answers fast?
Explore the manual using AI.
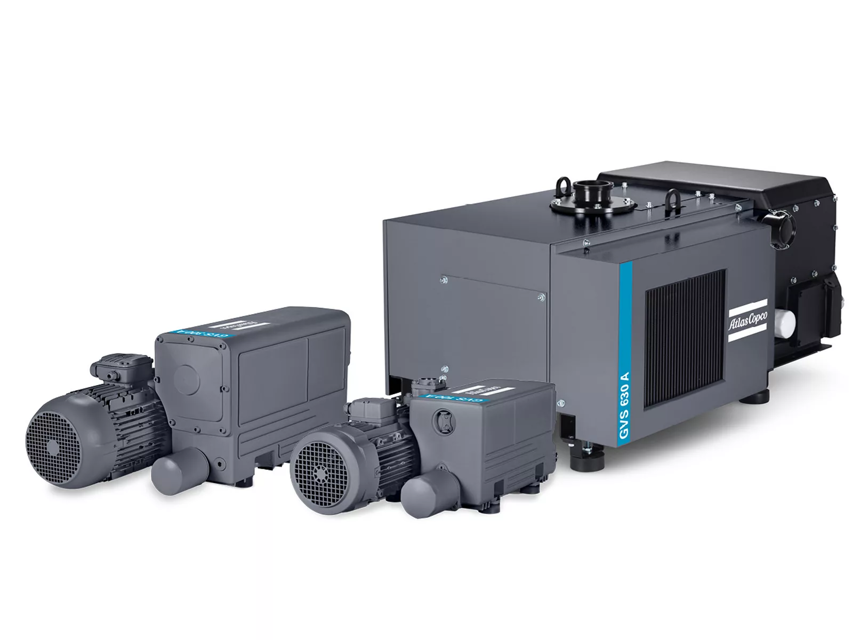
The Atlas Copco Oil-Sealed Rotary Vane Vacuum Pump GVS 630A is a reliable industrial vacuum solution designed for efficient operation and longevity. This model is ideal for various applications, ensuring optimal performance with proper maintenance and care.
Turn manuals into instant answers
with your AI-powered assistantTurn manuals into instant answers
with your AI-powered assistant
Complete asset maintenance, one click away
Get instant access to all the maintenance information you need. Empower technicians to perform preventive maintenance with asset packages, ready to use right out of the box.

Documents & Manuals
Find all the essential guides in one place.
 Tensioning Guide
- Belt-diagram
- C-120 pulleys
+ 13 more

Work Order Templates
Pre-built workflows to keep your asset running smoothly.
- Daily Electrical System Inspection
- Replace Roller and Pulley
- Install Engine B-120
+ 29 more

Procedures
Integrate maintenance plans directly into your work orders.
- Motion Industries
- Applied Industrial Technologies
- Electrical Brothers
+ 5 more

Parts
Access the parts list for your equipment in MaintainX.
- Drive Motor
- B2 Rollers
- Tensioning System
+ 40 more
Atlas Copco Oil-Sealed Rotary Vane Vacuum Pump GVS 630A
Create an account to install this asset package.
Maintenance Plans for Atlas Copco Oil-Sealed Rotary Vane Vacuum Pump Model GVS 630A
Integrate maintenance plans directly into your work orders in MaintainX.
30000 Hourly V-Belt Replacement
In normal operating conditions, the belt has a lifetime of 30000 hours. Wear characterizes by slip, abnormal wear or cracks. In case of wear, the correct alignment of the pulleys has to be checked. Tolerance ±1.3 mm
A dismounted belt has to be replaced with a new one
Take off the hood
Loosen the applicable nuts
Replace the belt
Reassemble in reverse sequence
Stretch the V-belts with the V-belt tension meter;

1000 Hourly Synthetic Oil Filter Change
Drain the used oil completely
Remove the oil filter
Apply a thin film of oil on the gasket of the new oil filter
Clean carefully the contact surface of the gasket on the tank
Install the new oil filter
Fill with new oil
Sign off on the oil filter change
Intake Filter Element Cleaning
Remove the intake filter element from the housing
Clean the intake filter element in one of the following ways
▪ Hand washing: Soak and agitate element in a warm water and mild detergent solution. Allow adequate time for the element to air dry (24 hours minimum). Do not install a damp element. This will cause higher initial pressure loss and rapid dirt loading
▪ Compressed air cleaning: Using approximately 7 bar(e) (100 psi(g) or 5.25 Torr(e)), direct air flow at inside of element towards pleats. Blow off the outside of the element directing the air flow down to avoid embedding dirt in the media. Blow off the inside again to remove any dirt that might be on the clean side of the element
▪ Vacuum cleaning: Point the vacuum cleaner to the dirty side (outside of element) only, using a vacuum of approximately 100 mbar(a) (75 Torr(a)). A crevice tool is recommended
▪ Hand cleaning: Hold element down with one hand and move other hand across the fins in a strumming motion. This action will dislodge most of the dirt
The element is ready to be reused;
20000 Hourly Motor Bearing Replacement
Warning: This procedure requires trained personnel with PPE!
Motor's hour meter reading
Motor bearings changed?
Check recommendations on the motor supplier’s website
Motor condensate drain plug removed?
Motor free from dust?
Sign off on the motor bearing replacement
2000 Hourly / 6 Monthly Belt Conditoin Check
Set the O-ring to 10 mm (0.39 inch) position
Place the tool on the centre of the longest V‐belt and mark the belt
Push the tool downward until you reach a 10 mm (0.39 inch) bending. The result of the measurement should be between 35 N and 58 N
Check the result of your measurement. Tighten the belt tightener to reach the table given value;
Unlock efficiency
with MaintainX CoPilot
MaintainX CoPilot is your expert colleague, on call 24/7, helping your team find the answers they need to keep equipment running.
Reduce Unplanned Downtime
Ensure your team follows consistent procedures to minimize equipment failures and costly delays.
Maximize Asset Availability
Keep your assets running longer and more reliably, with standardized maintenance workflows from OEM manuals.
Lower Maintenance Costs
Turn any technician into an expert to streamline operations, maintain more assets, and reduce overall costs.
Thousands of companies manage their assets with MaintainX

'%3e%3cpath%20fill='url(%23b)'%20d='M66.008%2080.068c-5.084-.786-9.763-3.834-12.442-8.68a16.942%2016.942%200%200%201-1.87-5.18c1.096.19%202.203.476%203.298.87%206.525%202.333%2010.836%207.68%2011.014%2012.99ZM51.47%2061.576c.488-5.524%203.62-10.716%208.847-13.597a17.132%2017.132%200%200%201%2011.335-1.882c-.798%208.145-7.43%2014.848-16.038%2015.599-1.417.119-2.799.07-4.144-.12Zm28.564-11.478a17.513%2017.513%200%200%201%203.727%204.62c4.608%208.335%201.584%2018.813-6.75%2023.409a16.988%2016.988%200%200%201-4.359%201.679%2019.624%2019.624%200%200%201-3.977-12.776c.346-7.561%204.942-13.931%2011.36-16.932Z'/%3e%3cpath%20fill='%23110F0D'%20fill-rule='evenodd'%20d='M142.831%2048.324h4.977V77.03h-4.977V48.324Zm27.278%2013.002c.322%201.048.453%202.263.453%203.62v12.073h-4.787V66.208c0-.75-.047-1.572-.154-2.143-.453-2.382-1.822-3.572-4.215-3.572-2.31%200-3.882%201.274-4.43%203.476-.143.596-.226%201.405-.226%202.25v10.8h-4.787V56.623h4.477v2.989c1.536-2.5%203.906-3.43%206.371-3.43%203.488%200%206.263%201.68%207.298%205.144Zm24.636%207.323c0%203.882-2.358%206.525-5.763%207.727-1.298.453-2.632.643-4.62.643h-10.169V48.324h9.085c1.691%200%203.156.143%204.049.38%203.465.93%205.727%203.68%205.727%207.335%200%202.441-.81%204.156-2.762%205.644%202.905%201.417%204.453%203.727%204.453%206.966Zm-15.634-8.656h4.584c1.024%200%201.917-.143%202.536-.417%201.215-.548%201.905-1.608%201.905-3.167%200-1.548-.643-2.572-1.845-3.132-.691-.31-1.762-.452-2.763-.452h-4.417v7.168Zm10.716%208.465c0-1.536-.893-3.37-3.227-3.893-.428-.095-1.036-.143-1.571-.143h-5.918v8.085h5.501c.56%200%201.429-.048%201.953-.167%201.94-.453%203.262-1.846%203.262-3.882Zm47.747-11.847-8.097%2020.408h-4.429l-8.109-20.408h5.191l5.192%2014.574%205.108-14.574h5.144Zm-20.218%2010.002c0%20.69-.036%201.262-.155%201.94h-15.943c.631%202.87%202.714%204.728%205.882%204.728%202.131%200%203.607-.882%204.703-2.525h4.87c-1.762%204.144-5.204%206.692-9.657%206.692-6.084%200-10.537-4.858-10.537-10.49%200-6.108%204.524-10.776%2010.335-10.776%206.239%200%2010.442%204.954%2010.502%2010.43Zm-4.763-1.405c-.333-2.846-2.643-4.858-5.691-4.858-2.894%200-5.287%201.929-5.621%204.858h11.312Zm-72.667%203.44c0%204.787-3.287%208.371-9.419%208.371H119.363V64.66c-1.917.274-3.87.69-5.811%201.238l4.537%2011.121h-5.418l-3.596-9.585c-5.144%202.084-10.085%205.216-14.217%209.585h-4.786L101.8%2048.312h4.56l5.68%2013.883a44.112%2044.112%200%200%201%207.323-1.774V48.312h9.084c1.703%200%203.156.143%204.061.393%203.453.929%205.727%203.667%205.727%207.323%200%201.917-.738%204.179-2.81%205.691%203.06%201.56%204.501%204.025%204.501%206.93Zm-15.634-8.667a62.664%2062.664%200%200%201%202.06-.036c1.703.012%203.239.131%204.608.37%201.441-.549%202.357-1.727%202.357-3.537%200-1.941-.881-3.144-2.488-3.667-.548-.18-1.358-.286-2.322-.286h-4.215v7.156Zm-16.55%203.905-3.715-9.894-6.394%2016.502c2.833-2.595%206.263-4.858%2010.109-6.608Zm27.254%204.74c0-2.775-3.131-4.347-8.513-4.418-.715%200-1.441.011-2.191.047v8.252h5.918c2.548%200%204.786-1.37%204.786-3.882Z'%20clip-rule='evenodd'/%3e%3c/g%3e%3cdefs%3e%3clinearGradient%20id='b'%20x1='51.47'%20x2='85.916'%20y1='62.946'%20y2='62.946'%20gradientUnits='userSpaceOnUse'%3e%3cstop%20stop-color='%23CD9F28'/%3e%3cstop%20offset='1'%20stop-color='%23ECD80B'/%3e%3c/linearGradient%3e%3cclipPath%20id='a'%3e%3cpath%20fill='%23fff'%20d='M51.47%2045.728h186.104V80.14H51.47z'/%3e%3c/clipPath%3e%3c/defs%3e%3c/svg%3e)


More from Atlas Copco


Explore Other Assets


© 2026 MaintainX. All rights reserved.