


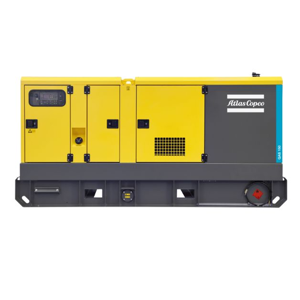
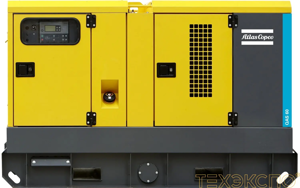
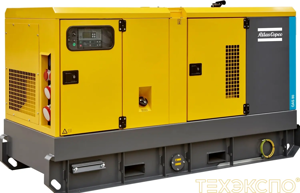
Atlas Copco Oil-Sealed Rotary Vane Vacuum Pump GVS 220A
Need answers fast?
Explore the manual using AI.

The Atlas Copco Oil-Sealed Rotary Vane Vacuum Pump GVS 220A is a reliable and efficient vacuum solution designed for industrial applications. Known for its robust performance and low maintenance requirements, this model ensures optimal vacuum levels while minimizing operational costs. Ideal for various processes, it combines durability with advanced technology for superior results.
Turn manuals into instant answers
with your AI-powered assistantTurn manuals into instant answers
with your AI-powered assistant
Complete asset maintenance, one click away
Get instant access to all the maintenance information you need. Empower technicians to perform preventive maintenance with asset packages, ready to use right out of the box.

Documents & Manuals
Find all the essential guides in one place.
 Tensioning Guide
- Belt-diagram
- C-120 pulleys
+ 13 more

Work Order Templates
Pre-built workflows to keep your asset running smoothly.
- Daily Electrical System Inspection
- Replace Roller and Pulley
- Install Engine B-120
+ 29 more

Procedures
Integrate maintenance plans directly into your work orders.
- Motion Industries
- Applied Industrial Technologies
- Electrical Brothers
+ 5 more

Parts
Access the parts list for your equipment in MaintainX.
- Drive Motor
- B2 Rollers
- Tensioning System
+ 40 more
Atlas Copco Oil-Sealed Rotary Vane Vacuum Pump GVS 220A
Create an account to install this asset package.
Maintenance Plans for Atlas Copco Oil-Sealed Rotary Vane Vacuum Pump Model GVS 220A
Integrate maintenance plans directly into your work orders in MaintainX.
1000 Hourly Synthetic Oil Change
Is the pump cold?
If the pump is cold, run the pump with closed suction intake for 10 minutes to warm up the oil
Stop the pump and disconnect it from the mains
Remove the oil filler plug
Open the oil drain valve and drain the oil completely into a container large enough to hold all the oil and tilt the pump slightly (if possible)
Close the oil drain valve and fill with new oil through the filler plug up to the middle of the oil sight glass. The oil level must not exceed the allowed maximum level
Close the oil filler plug
Wipe off eventual oil spills from the pump and/or the floor
Connect to mains again and verify correct rotation direction of the pump

1000 Hourly Synthetic Oil Exhaust Filter Replacement
Warning: Ensure you are wearing appropriate PPE
Remove the screws of the exhaust plate with a 16 mm wrench
Move the filter up and down, once it is unlocked, remove it from the oil casing
Check the filter hole, if deposit are visible clean it
Make sure that the new exhaust filter has the O‐ring (opposite side of the overpressure valve) and grease them using our vacuum grease
Apply the grease to the groove
Replace the O‐ring of the exhaust plate
Insert the new exhaust filter recovery lip down
Fix the exhaust plate on the oil casing with a 16 mm wrench
20000 Hourly Motor Bearing Replacement
Warning: This procedure requires trained personnel with PPE!
Motor's hour meter reading
Motor bearings replaced?
Upload a photo of the new bearings installed
Check recommendations on the motor supplier’s website
Motor condensate drain plug removed?
Motor free from dust for optimal cooling?
Sign off on the motor bearing replacement
1000 Hourly Synthetic Oil Filter Change
Drain the used oil completely
Remove the oil filter
Apply a thin film of oil on the gasket of the new oil filter
Clean carefully the contact surface of the gasket on the tank
Install the new oil filter
Fill with new oil following above mentioned instructions
Sign off on the oil filter change
1000 Hourly Mineral Oil Filter Change
Drain the used oil completely
Remove the oil filter
Apply a thin film of oil on the gasket of the new oil filter
Clean carefully the contact surface of the gasket on the tank
Install the new oil filter
Fill with new oil
Sign off on the oil filter change
Unlock efficiency
with MaintainX CoPilot
MaintainX CoPilot is your expert colleague, on call 24/7, helping your team find the answers they need to keep equipment running.
Reduce Unplanned Downtime
Ensure your team follows consistent procedures to minimize equipment failures and costly delays.
Maximize Asset Availability
Keep your assets running longer and more reliably, with standardized maintenance workflows from OEM manuals.
Lower Maintenance Costs
Turn any technician into an expert to streamline operations, maintain more assets, and reduce overall costs.
Thousands of companies manage their assets with MaintainX

'%3e%3cpath%20fill='url(%23b)'%20d='M66.008%2080.068c-5.084-.786-9.763-3.834-12.442-8.68a16.942%2016.942%200%200%201-1.87-5.18c1.096.19%202.203.476%203.298.87%206.525%202.333%2010.836%207.68%2011.014%2012.99ZM51.47%2061.576c.488-5.524%203.62-10.716%208.847-13.597a17.132%2017.132%200%200%201%2011.335-1.882c-.798%208.145-7.43%2014.848-16.038%2015.599-1.417.119-2.799.07-4.144-.12Zm28.564-11.478a17.513%2017.513%200%200%201%203.727%204.62c4.608%208.335%201.584%2018.813-6.75%2023.409a16.988%2016.988%200%200%201-4.359%201.679%2019.624%2019.624%200%200%201-3.977-12.776c.346-7.561%204.942-13.931%2011.36-16.932Z'/%3e%3cpath%20fill='%23110F0D'%20fill-rule='evenodd'%20d='M142.831%2048.324h4.977V77.03h-4.977V48.324Zm27.278%2013.002c.322%201.048.453%202.263.453%203.62v12.073h-4.787V66.208c0-.75-.047-1.572-.154-2.143-.453-2.382-1.822-3.572-4.215-3.572-2.31%200-3.882%201.274-4.43%203.476-.143.596-.226%201.405-.226%202.25v10.8h-4.787V56.623h4.477v2.989c1.536-2.5%203.906-3.43%206.371-3.43%203.488%200%206.263%201.68%207.298%205.144Zm24.636%207.323c0%203.882-2.358%206.525-5.763%207.727-1.298.453-2.632.643-4.62.643h-10.169V48.324h9.085c1.691%200%203.156.143%204.049.38%203.465.93%205.727%203.68%205.727%207.335%200%202.441-.81%204.156-2.762%205.644%202.905%201.417%204.453%203.727%204.453%206.966Zm-15.634-8.656h4.584c1.024%200%201.917-.143%202.536-.417%201.215-.548%201.905-1.608%201.905-3.167%200-1.548-.643-2.572-1.845-3.132-.691-.31-1.762-.452-2.763-.452h-4.417v7.168Zm10.716%208.465c0-1.536-.893-3.37-3.227-3.893-.428-.095-1.036-.143-1.571-.143h-5.918v8.085h5.501c.56%200%201.429-.048%201.953-.167%201.94-.453%203.262-1.846%203.262-3.882Zm47.747-11.847-8.097%2020.408h-4.429l-8.109-20.408h5.191l5.192%2014.574%205.108-14.574h5.144Zm-20.218%2010.002c0%20.69-.036%201.262-.155%201.94h-15.943c.631%202.87%202.714%204.728%205.882%204.728%202.131%200%203.607-.882%204.703-2.525h4.87c-1.762%204.144-5.204%206.692-9.657%206.692-6.084%200-10.537-4.858-10.537-10.49%200-6.108%204.524-10.776%2010.335-10.776%206.239%200%2010.442%204.954%2010.502%2010.43Zm-4.763-1.405c-.333-2.846-2.643-4.858-5.691-4.858-2.894%200-5.287%201.929-5.621%204.858h11.312Zm-72.667%203.44c0%204.787-3.287%208.371-9.419%208.371H119.363V64.66c-1.917.274-3.87.69-5.811%201.238l4.537%2011.121h-5.418l-3.596-9.585c-5.144%202.084-10.085%205.216-14.217%209.585h-4.786L101.8%2048.312h4.56l5.68%2013.883a44.112%2044.112%200%200%201%207.323-1.774V48.312h9.084c1.703%200%203.156.143%204.061.393%203.453.929%205.727%203.667%205.727%207.323%200%201.917-.738%204.179-2.81%205.691%203.06%201.56%204.501%204.025%204.501%206.93Zm-15.634-8.667a62.664%2062.664%200%200%201%202.06-.036c1.703.012%203.239.131%204.608.37%201.441-.549%202.357-1.727%202.357-3.537%200-1.941-.881-3.144-2.488-3.667-.548-.18-1.358-.286-2.322-.286h-4.215v7.156Zm-16.55%203.905-3.715-9.894-6.394%2016.502c2.833-2.595%206.263-4.858%2010.109-6.608Zm27.254%204.74c0-2.775-3.131-4.347-8.513-4.418-.715%200-1.441.011-2.191.047v8.252h5.918c2.548%200%204.786-1.37%204.786-3.882Z'%20clip-rule='evenodd'/%3e%3c/g%3e%3cdefs%3e%3clinearGradient%20id='b'%20x1='51.47'%20x2='85.916'%20y1='62.946'%20y2='62.946'%20gradientUnits='userSpaceOnUse'%3e%3cstop%20stop-color='%23CD9F28'/%3e%3cstop%20offset='1'%20stop-color='%23ECD80B'/%3e%3c/linearGradient%3e%3cclipPath%20id='a'%3e%3cpath%20fill='%23fff'%20d='M51.47%2045.728h186.104V80.14H51.47z'/%3e%3c/clipPath%3e%3c/defs%3e%3c/svg%3e)


More from Atlas Copco


Explore Other Assets


© 2026 MaintainX. All rights reserved.