


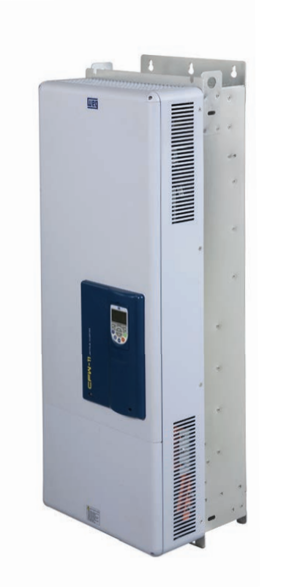
WEG Frequency Inverter CFW110312T4
Need answers fast?
Explore the manual using AI.

Turn manuals into instant answers
with your AI-powered assistantTurn manuals into instant answers
with your AI-powered assistant
Manual for WEG Frequency Inverter CFW110312T4
Complete asset maintenance, one click away
Get instant access to all the maintenance information you need. Empower technicians to perform preventive maintenance with asset packages, ready to use right out of the box.

Documents & Manuals
Find all the essential guides in one place.
 Tensioning Guide
- Belt-diagram
- C-120 pulleys
+ 13 more

Work Order Templates
Pre-built workflows to keep your asset running smoothly.
- Daily Electrical System Inspection
- Replace Roller and Pulley
- Install Engine B-120
+ 29 more

Procedures
Integrate maintenance plans directly into your work orders.
- Motion Industries
- Applied Industrial Technologies
- Electrical Brothers
+ 5 more

Parts
Access the parts list for your equipment in MaintainX.
- Drive Motor
- B2 Rollers
- Tensioning System
+ 40 more
WEG Frequency Inverter CFW110312T4
Create an account to install this asset package.
Maintenance Plans for WEG Frequency Inverter Model CFW110312T4
Integrate maintenance plans directly into your work orders in MaintainX.
1 Yearly Inverter Inspection
Warning: This inspection requires trained personnel with PPE!
Manufacturing date of the inverter
If the inverter is stocked (not being used): Reforming
Enter the power applied to the inverter (voltage between 220 and 230 Vac, single-phase or three-phase, 50 or 60 Hz)
Apply power to the inverter for at least one hour
Then, disconnect the power supply and wait at least 24 hours before using the inverter (reapply power)
Sign off on the inverter inspection

10 Yearly Electrolytic Capacitors Replacement
- If the inverter is stocked (not being used) make electrolytic capacitors “Reforming”
Every year from the manufacturing date printed on the inverter identification label (refer to section 2.4).
Apply power to the inverter (voltage between 220 and 230 Vac, single-phase or three-phase, 50 or 60 Hz) for at least one hour.
Then disconnect the power supply and wait at least 24 hours before using the inverter again (reapply power).
- If inverter in operation replace electrolytic capacitors every 10 years.
Contact WEG technical support to obtain the replacement procedures.;
10 Yearly Keypad Battery Replacement
Warning: Follow the steps carefully to avoid damaging the keypad
Locate the battery access cover
Press the cover and rotate it counterclockwise
Remove the cover
Remove the battery with the help of a screwdriver positioned at the right side
Upload a photo of the HMI without the battery
Install the new battery positioning it first at the left side
Press the battery for its insertion
Put the cover back and rotate it clockwise
Inverter Cleaning
When it is necessary to clean the inverter, follow the instructions below.
Ventilation system:
Disconnect the inverter power supply and wait at least 10 minutes.
Remove the dust from the cooling air inlet using a soft brush or a flannel.
Remove the dust from the heatsink fins and from the fan blades using compressed air.
Electronic boards:
Disconnect the inverter power supply and wait at least 10 minutes.
Remove the dust from the electronic board using an anti-static brush or an ion air gun (Charges Burtes Ion Gun – reference A6030-6 DESCO).
If necessary, remove the boards from the inverter.
Parts for WEG Frequency Inverter CFW110312T4
Access the parts list for your equipment in MaintainX.
IOA Module: 1 Voltage/Current Analog Input (14 Bits); 2 Digital Inputs; 2 Voltage/Current Analog Outputs (14 Bits); 2 Open-Collector Digital Outputs
11008162
IOB Module: 2 Isolated Analog Inputs (Voltage/Current); 2 Digital Inputs; 2 Isolated Analog Outputs (Voltage/Current); 2 Open-Collector Digital Outputs
11008099
Encoder Module: 5 To 12 Vdc Incremental Encoder Module, 100 KHz, With An Encoder Signal Repeater
11008100
Encoder Module: 5 To 12 Vdc Incremental Encoder Module, 100 KHz
11008101
RS-485 Serial Communication Module (Modbus)
11008102
Unlock efficiency
with MaintainX CoPilot
MaintainX CoPilot is your expert colleague, on call 24/7, helping your team find the answers they need to keep equipment running.
Reduce Unplanned Downtime
Ensure your team follows consistent procedures to minimize equipment failures and costly delays.
Maximize Asset Availability
Keep your assets running longer and more reliably, with standardized maintenance workflows from OEM manuals.
Lower Maintenance Costs
Turn any technician into an expert to streamline operations, maintain more assets, and reduce overall costs.
Thousands of companies manage their assets with MaintainX

'%3e%3cpath%20fill='url(%23b)'%20d='M66.008%2080.068c-5.084-.786-9.763-3.834-12.442-8.68a16.942%2016.942%200%200%201-1.87-5.18c1.096.19%202.203.476%203.298.87%206.525%202.333%2010.836%207.68%2011.014%2012.99ZM51.47%2061.576c.488-5.524%203.62-10.716%208.847-13.597a17.132%2017.132%200%200%201%2011.335-1.882c-.798%208.145-7.43%2014.848-16.038%2015.599-1.417.119-2.799.07-4.144-.12Zm28.564-11.478a17.513%2017.513%200%200%201%203.727%204.62c4.608%208.335%201.584%2018.813-6.75%2023.409a16.988%2016.988%200%200%201-4.359%201.679%2019.624%2019.624%200%200%201-3.977-12.776c.346-7.561%204.942-13.931%2011.36-16.932Z'/%3e%3cpath%20fill='%23110F0D'%20fill-rule='evenodd'%20d='M142.831%2048.324h4.977V77.03h-4.977V48.324Zm27.278%2013.002c.322%201.048.453%202.263.453%203.62v12.073h-4.787V66.208c0-.75-.047-1.572-.154-2.143-.453-2.382-1.822-3.572-4.215-3.572-2.31%200-3.882%201.274-4.43%203.476-.143.596-.226%201.405-.226%202.25v10.8h-4.787V56.623h4.477v2.989c1.536-2.5%203.906-3.43%206.371-3.43%203.488%200%206.263%201.68%207.298%205.144Zm24.636%207.323c0%203.882-2.358%206.525-5.763%207.727-1.298.453-2.632.643-4.62.643h-10.169V48.324h9.085c1.691%200%203.156.143%204.049.38%203.465.93%205.727%203.68%205.727%207.335%200%202.441-.81%204.156-2.762%205.644%202.905%201.417%204.453%203.727%204.453%206.966Zm-15.634-8.656h4.584c1.024%200%201.917-.143%202.536-.417%201.215-.548%201.905-1.608%201.905-3.167%200-1.548-.643-2.572-1.845-3.132-.691-.31-1.762-.452-2.763-.452h-4.417v7.168Zm10.716%208.465c0-1.536-.893-3.37-3.227-3.893-.428-.095-1.036-.143-1.571-.143h-5.918v8.085h5.501c.56%200%201.429-.048%201.953-.167%201.94-.453%203.262-1.846%203.262-3.882Zm47.747-11.847-8.097%2020.408h-4.429l-8.109-20.408h5.191l5.192%2014.574%205.108-14.574h5.144Zm-20.218%2010.002c0%20.69-.036%201.262-.155%201.94h-15.943c.631%202.87%202.714%204.728%205.882%204.728%202.131%200%203.607-.882%204.703-2.525h4.87c-1.762%204.144-5.204%206.692-9.657%206.692-6.084%200-10.537-4.858-10.537-10.49%200-6.108%204.524-10.776%2010.335-10.776%206.239%200%2010.442%204.954%2010.502%2010.43Zm-4.763-1.405c-.333-2.846-2.643-4.858-5.691-4.858-2.894%200-5.287%201.929-5.621%204.858h11.312Zm-72.667%203.44c0%204.787-3.287%208.371-9.419%208.371H119.363V64.66c-1.917.274-3.87.69-5.811%201.238l4.537%2011.121h-5.418l-3.596-9.585c-5.144%202.084-10.085%205.216-14.217%209.585h-4.786L101.8%2048.312h4.56l5.68%2013.883a44.112%2044.112%200%200%201%207.323-1.774V48.312h9.084c1.703%200%203.156.143%204.061.393%203.453.929%205.727%203.667%205.727%207.323%200%201.917-.738%204.179-2.81%205.691%203.06%201.56%204.501%204.025%204.501%206.93Zm-15.634-8.667a62.664%2062.664%200%200%201%202.06-.036c1.703.012%203.239.131%204.608.37%201.441-.549%202.357-1.727%202.357-3.537%200-1.941-.881-3.144-2.488-3.667-.548-.18-1.358-.286-2.322-.286h-4.215v7.156Zm-16.55%203.905-3.715-9.894-6.394%2016.502c2.833-2.595%206.263-4.858%2010.109-6.608Zm27.254%204.74c0-2.775-3.131-4.347-8.513-4.418-.715%200-1.441.011-2.191.047v8.252h5.918c2.548%200%204.786-1.37%204.786-3.882Z'%20clip-rule='evenodd'/%3e%3c/g%3e%3cdefs%3e%3clinearGradient%20id='b'%20x1='51.47'%20x2='85.916'%20y1='62.946'%20y2='62.946'%20gradientUnits='userSpaceOnUse'%3e%3cstop%20stop-color='%23CD9F28'/%3e%3cstop%20offset='1'%20stop-color='%23ECD80B'/%3e%3c/linearGradient%3e%3cclipPath%20id='a'%3e%3cpath%20fill='%23fff'%20d='M51.47%2045.728h186.104V80.14H51.47z'/%3e%3c/clipPath%3e%3c/defs%3e%3c/svg%3e)


More from WEG


Explore Other Assets


© 2026 MaintainX. All rights reserved.