


Trane Stealth™ Air-Cooled Chiller SCWH1203
Need answers fast?
Explore the manual using AI.
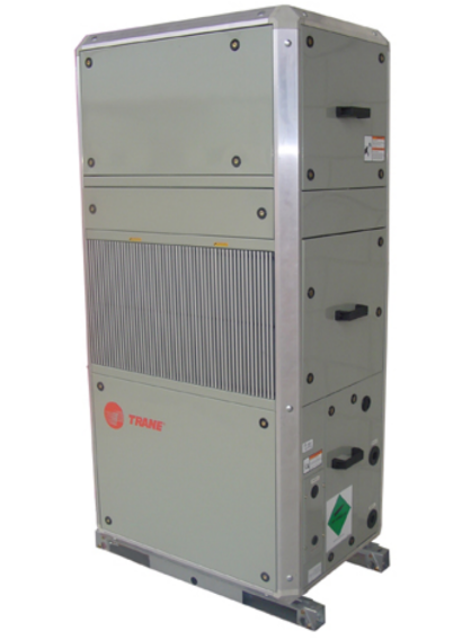
The Trane Stealth™ Air-Cooled Chiller SCWH1203 is a high-efficiency cooling solution designed for industrial applications. This advanced chiller offers reliable performance and energy savings, making it ideal for various commercial environments. Experience optimal temperature control with Trane's innovative technology.
Turn manuals into instant answers
with your AI-powered assistantTurn manuals into instant answers
with your AI-powered assistant
Manual for Trane Stealth™ Air-Cooled Chiller SCWH1203
Complete asset maintenance, one click away
Get instant access to all the maintenance information you need. Empower technicians to perform preventive maintenance with asset packages, ready to use right out of the box.

Documents & Manuals
Find all the essential guides in one place.
 Tensioning Guide
- Belt-diagram
- C-120 pulleys
+ 13 more

Work Order Templates
Pre-built workflows to keep your asset running smoothly.
- Daily Electrical System Inspection
- Replace Roller and Pulley
- Install Engine B-120
+ 29 more

Procedures
Integrate maintenance plans directly into your work orders.
- Motion Industries
- Applied Industrial Technologies
- Electrical Brothers
+ 5 more

Parts
Access the parts list for your equipment in MaintainX.
- Drive Motor
- B2 Rollers
- Tensioning System
+ 40 more
Trane Stealth™ Air-Cooled Chiller SCWH1203
Create an account to install this asset package.
Maintenance Plans for Trane Stealth™ Air-Cooled Chiller Model SCWH1203
Integrate maintenance plans directly into your work orders in MaintainX.
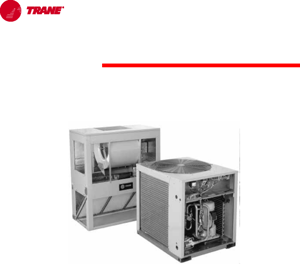
Fan Discharge Conversion
Remove all mid and top fan section panels
Loosen the brackets inside the unit that clamp the mid and fan sections together
Remove the control box cover and disconnect the motor power wires. Feed wires up through the unit and secure out of the way until rotation is complete
Rotate the fan section to desired position
Re-route the motor power wires back to the control box. Ensure all wiring is free and not routed over any sharp edges
Reconnect the motor power wires per the unit wiring diagram
Bolt and/or clamp all brackets back into place
Replace control box cover and all exterior panels
Verify the fan rotation and motor amp draw

1 Monthly Stealth™ Air-Cooled Chiller Maintenance
WARNING: Hazardous Voltage! Disconnect all electrical power including remote disconnects before servicing unit. Follow proper lockout/tagout procedures to ensure power cannot be inadvertently energized. Failure to disconnect power before servicing could result in death or serious injury.
Inspect unit air filters. Clean or replace if airflow is blocked or if filters are dirty.
Inspect coils for icing. Icing on the coils may indicate low airflow supply, restricted airflow from dirty fins.
Check the fan belt condition and tension. Adjust tension if belt is floppy or squeals continually.
Check and record operating pressures.
Sign off on the monthly maintenance
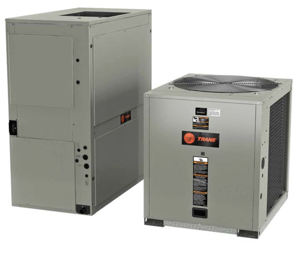
Plenum Installation
Uncrate the plenum and accessory bag.
Rotate the evaporator blower to the vertical discharge configuration.
Apply the soft gasket provided around the aluminum frame on top of the unit as shown in Figure I-IP-1.
Using a screwdriver, tighten the self-drilling screws as shown in Figure I-IP-1. Be sure to tighten all screws on the rear, right, and left sides through the pilot holes on the plenum panels.
When installation is complete, adjust the motor pulley and the discharge grille for proper airflow.
Sign off on the plenum installation
1 Yearly Condenser Coils Cleaning
WARNING: Hazardous Chemicals! Coil cleaning agents can be either acidic or highly alkaline. Handle chemical carefully. Proper handling should include goggles or face shield, chemical resistant gloves, boots, apron, or protective suit as required. For personal safety, refer to the cleaning agent manufacturer’s materials safety data sheet and follow all recommended safe handling practices. Failure to follow all safety instructions could result in death or serious injury.
Disconnect power to the unit.
Remove panels from the unit to gain access to the coil.
Use a soft brush to remove loose dirt and debris form both sides of the coil.
Straighten coil fins with fin comb as required.
Mix the detergent with water according to the manufacturers instructions. Observe all recommendations of the cleanser manufacturer. The coil cleanser manufacturer’s recommendations, warnings and cautions will at all times take precedence to these instructions.
Place solution in the sprayer. Be sure to follow these guidelines if using a high-pressure sprayer: a) Keep minimum nozzle spray angle 15°. b) Spray solution at a 90° angle to the coil face. c) Keep sprayer nozzle at least six inches from the coil. d) Sprayer pressure must not exceed 600 psi.
Spray leaving air side of the coil first then spray the entering air side of the coil. Allow the detergent and water solution to stand on the coil for five minutes.
Rinse both sides of the coil with cool, clean water.
1 Yearly Stealth™ Air-Cooled Chiller Maintenance
Check and tighten all set screws, bolts, locking collars and sheaves
Inspect, clean, and tighten all electrical connections
Visually inspect the entire unit casing for chips or corrosion. Remove rust or corrosion and repaint surfaces
Visually check for leaks in refrigerant piping
Inspect fan, motor, and control contacts. Replace badly worn or eroded contacts
Inspect the thermal expansion valve sensing bulbs for cleanliness, good contact with the suction line, and adequate insulation from ambient air
Sign off on the yearly maintenance
Parts for Trane Stealth™ Air-Cooled Chiller SCWH1203
Access the parts list for your equipment in MaintainX.
Refrigerant TXV control refrigerant charge (Ckt 1 / 2), lbs. 6.5/6.3
R-410A
Refrigerant TXV control refrigerant charge (Ckt 1 / 2), lbs. 6.5/6.3
R-410A
Refrigerant TXV control refrigerant charge (Ckt 1 / 2), lbs. 6.5/6.3
R-410A
Unlock efficiency
with MaintainX CoPilot
MaintainX CoPilot is your expert colleague, on call 24/7, helping your team find the answers they need to keep equipment running.
Reduce Unplanned Downtime
Ensure your team follows consistent procedures to minimize equipment failures and costly delays.
Maximize Asset Availability
Keep your assets running longer and more reliably, with standardized maintenance workflows from OEM manuals.
Lower Maintenance Costs
Turn any technician into an expert to streamline operations, maintain more assets, and reduce overall costs.
Thousands of companies manage their assets with MaintainX

'%3e%3cpath%20fill='url(%23b)'%20d='M66.008%2080.068c-5.084-.786-9.763-3.834-12.442-8.68a16.942%2016.942%200%200%201-1.87-5.18c1.096.19%202.203.476%203.298.87%206.525%202.333%2010.836%207.68%2011.014%2012.99ZM51.47%2061.576c.488-5.524%203.62-10.716%208.847-13.597a17.132%2017.132%200%200%201%2011.335-1.882c-.798%208.145-7.43%2014.848-16.038%2015.599-1.417.119-2.799.07-4.144-.12Zm28.564-11.478a17.513%2017.513%200%200%201%203.727%204.62c4.608%208.335%201.584%2018.813-6.75%2023.409a16.988%2016.988%200%200%201-4.359%201.679%2019.624%2019.624%200%200%201-3.977-12.776c.346-7.561%204.942-13.931%2011.36-16.932Z'/%3e%3cpath%20fill='%23110F0D'%20fill-rule='evenodd'%20d='M142.831%2048.324h4.977V77.03h-4.977V48.324Zm27.278%2013.002c.322%201.048.453%202.263.453%203.62v12.073h-4.787V66.208c0-.75-.047-1.572-.154-2.143-.453-2.382-1.822-3.572-4.215-3.572-2.31%200-3.882%201.274-4.43%203.476-.143.596-.226%201.405-.226%202.25v10.8h-4.787V56.623h4.477v2.989c1.536-2.5%203.906-3.43%206.371-3.43%203.488%200%206.263%201.68%207.298%205.144Zm24.636%207.323c0%203.882-2.358%206.525-5.763%207.727-1.298.453-2.632.643-4.62.643h-10.169V48.324h9.085c1.691%200%203.156.143%204.049.38%203.465.93%205.727%203.68%205.727%207.335%200%202.441-.81%204.156-2.762%205.644%202.905%201.417%204.453%203.727%204.453%206.966Zm-15.634-8.656h4.584c1.024%200%201.917-.143%202.536-.417%201.215-.548%201.905-1.608%201.905-3.167%200-1.548-.643-2.572-1.845-3.132-.691-.31-1.762-.452-2.763-.452h-4.417v7.168Zm10.716%208.465c0-1.536-.893-3.37-3.227-3.893-.428-.095-1.036-.143-1.571-.143h-5.918v8.085h5.501c.56%200%201.429-.048%201.953-.167%201.94-.453%203.262-1.846%203.262-3.882Zm47.747-11.847-8.097%2020.408h-4.429l-8.109-20.408h5.191l5.192%2014.574%205.108-14.574h5.144Zm-20.218%2010.002c0%20.69-.036%201.262-.155%201.94h-15.943c.631%202.87%202.714%204.728%205.882%204.728%202.131%200%203.607-.882%204.703-2.525h4.87c-1.762%204.144-5.204%206.692-9.657%206.692-6.084%200-10.537-4.858-10.537-10.49%200-6.108%204.524-10.776%2010.335-10.776%206.239%200%2010.442%204.954%2010.502%2010.43Zm-4.763-1.405c-.333-2.846-2.643-4.858-5.691-4.858-2.894%200-5.287%201.929-5.621%204.858h11.312Zm-72.667%203.44c0%204.787-3.287%208.371-9.419%208.371H119.363V64.66c-1.917.274-3.87.69-5.811%201.238l4.537%2011.121h-5.418l-3.596-9.585c-5.144%202.084-10.085%205.216-14.217%209.585h-4.786L101.8%2048.312h4.56l5.68%2013.883a44.112%2044.112%200%200%201%207.323-1.774V48.312h9.084c1.703%200%203.156.143%204.061.393%203.453.929%205.727%203.667%205.727%207.323%200%201.917-.738%204.179-2.81%205.691%203.06%201.56%204.501%204.025%204.501%206.93Zm-15.634-8.667a62.664%2062.664%200%200%201%202.06-.036c1.703.012%203.239.131%204.608.37%201.441-.549%202.357-1.727%202.357-3.537%200-1.941-.881-3.144-2.488-3.667-.548-.18-1.358-.286-2.322-.286h-4.215v7.156Zm-16.55%203.905-3.715-9.894-6.394%2016.502c2.833-2.595%206.263-4.858%2010.109-6.608Zm27.254%204.74c0-2.775-3.131-4.347-8.513-4.418-.715%200-1.441.011-2.191.047v8.252h5.918c2.548%200%204.786-1.37%204.786-3.882Z'%20clip-rule='evenodd'/%3e%3c/g%3e%3cdefs%3e%3clinearGradient%20id='b'%20x1='51.47'%20x2='85.916'%20y1='62.946'%20y2='62.946'%20gradientUnits='userSpaceOnUse'%3e%3cstop%20stop-color='%23CD9F28'/%3e%3cstop%20offset='1'%20stop-color='%23ECD80B'/%3e%3c/linearGradient%3e%3cclipPath%20id='a'%3e%3cpath%20fill='%23fff'%20d='M51.47%2045.728h186.104V80.14H51.47z'/%3e%3c/clipPath%3e%3c/defs%3e%3c/svg%3e)


More from Trane


Explore Other Assets


© 2026 MaintainX. All rights reserved.