


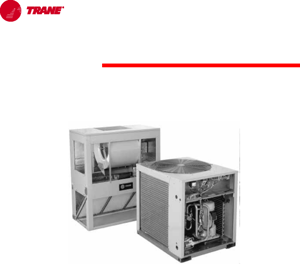
Trane Modular Air Handler M-Series TEM6A0C36H
Need answers fast?
Explore the manual using AI.

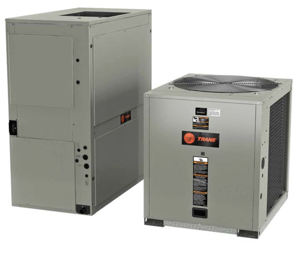
The Trane Modular Air Handler M-Series TEM6A0C36H is a highly efficient air handling unit designed for commercial applications. With its modular design, it provides flexible installation options and reliable performance, ensuring optimal indoor air quality and comfort. Ideal for various HVAC needs, this model is built to deliver consistent airflow and energy savings.
Turn manuals into instant answers
with your AI-powered assistantTurn manuals into instant answers
with your AI-powered assistant
Manual for Trane Modular Air Handler M-Series TEM6A0C36H
Complete asset maintenance, one click away
Get instant access to all the maintenance information you need. Empower technicians to perform preventive maintenance with asset packages, ready to use right out of the box.

Documents & Manuals
Find all the essential guides in one place.
 Tensioning Guide
- Belt-diagram
- C-120 pulleys
+ 13 more

Work Order Templates
Pre-built workflows to keep your asset running smoothly.
- Daily Electrical System Inspection
- Replace Roller and Pulley
- Install Engine B-120
+ 29 more

Procedures
Integrate maintenance plans directly into your work orders.
- Motion Industries
- Applied Industrial Technologies
- Electrical Brothers
+ 5 more

Parts
Access the parts list for your equipment in MaintainX.
- Drive Motor
- B2 Rollers
- Tensioning System
+ 40 more
Trane Modular Air Handler M-Series TEM6A0C36H
Create an account to install this asset package.
Maintenance Plans for Trane Modular Air Handler Model M-Series TEM6A0C36H
Integrate maintenance plans directly into your work orders in MaintainX.
3 Monthly Type UW, UU, W, P2, P4, P8, WD, 5D, and 5W Coils Cleaning
Warning: Use care in removing header plugs from Type P2, P4, and P8 coils. Over-torquing may result in twisted tubes
Remove the vent and drain plugs
Blow the coil out as completely as possible with compressed air
Fill and drain the coil several times with full strength glycol so that it mixes thoroughly with the water retained in the coil
Drain the coil out as completely as possible
To ensure no water remains in the coil, do not replace the vent and drain plugs until the coils are put back into service
Sign off on the coil cleaning

6 Monthly Fan Maintenance
- Inspect and clean fan
WARNING
Rotating Components!
Disconnect all electric power, including remote disconnects before servicing. Follow proper lockout/ tagout procedures to ensure the power can not be inadvertently energized. Secure drive sheaves to ensure rotor cannot freewheel
Failure to secure drive sheaves or disconnect power before servicing could result in death or serious injury
Fan sections of air handlers should be inspected every six months at a minimum or more frequently if operating experience dictates. If evidence of microbial growth (mold) is found, identify and remedy the cause immediately
1. Disconnect all electrical power to the unit
2. Wearing the appropriate personal protective equipment, remove any contamination
3. Vacuum the section with a vacuum device that uses high- efficiency particulate arrestance (HEPA) filters with a minimum efficiency of 99.97 percent at 0.3 micron particle size
Air Handler Maintenance
Moisture Purge Cycle
Close the outdoor air dampers
Turn off the cooling coil
Open any variable-air-volume terminals connected to the air handler
Operate the supply fan for 10 to 15 minutes
Rotate inlet guide vanes full open to full close
Note: Air movement discourages water condensation and hastens re-evaporation of any condensate that does happen to form. This simple preventative measure effectively combats microbial growth and curbs moisture-related deterioration of air-handling components.
Sign off on the air handler maintenance
3 Monthly Type K Coils Cleaning
Remove all vent and drain plugs
Allow the water to drain from the coil
Remove the header covers
If tubes are fouled, clean the tubes with a nylon or wire brush
To ensure no water remains in the coil, do not replace the header covers until the coils are put back into service
Note: When the coils are put back into service, use new gaskets. Trane recommends washers be used under the bolt heads and bolts be evenly tightened to 50 ft-lbs torque
Sign off on the coil cleaning
1 Yearly Air Handler Maintenance
Inspect the unit casing for corrosion. If damage is found, clean and repaint the surface with a rust-resistant primer and vinyl chlorinated lacquer
Clean the fan wheels and fan shaft
Inspect and clean drain pans
Check damper linkages, set screws, and blade adjustment. Clean, but do not lubricate, the nylon damper rod bushings
Clean damper operators
Inspect electrical components and insulation
Inspect wiring for damage
Rotate the fan wheel and check for obstructions in the fan housing. The wheel should not rub on the fan housing. Adjust the center if necessary and tighten wheel set screws to the proper torque
Lubricate motor bearings in accordance with motor manufacturer’s recommendations
Parts for Trane Modular Air Handler M-Series TEM6A0C36H
Access the parts list for your equipment in MaintainX.
Self-drilling Screws, #10, On 8-in. Centers
SCR01789
Clip
CLP0312
Self-drilling Screw, 0.25-in
SCR01369
Saddle Bracket
BRK03007
Gasket
GKT 03870
Self-drilling Screws, #10, On 8-in. Centers
SCR01789
Clip
CLP0312
Self-drilling Screw, 0.25-in
SCR01369
Saddle Bracket
BRK03007
Gasket
GKT 03870
Self-drilling Screws, #10, On 8-in. Centers
SCR01789
Clip
CLP0312
Self-drilling Screw, 0.25-in
SCR01369
Saddle Bracket
BRK03007
Gasket
GKT 03870
Unlock efficiency
with MaintainX CoPilot
MaintainX CoPilot is your expert colleague, on call 24/7, helping your team find the answers they need to keep equipment running.
Reduce Unplanned Downtime
Ensure your team follows consistent procedures to minimize equipment failures and costly delays.
Maximize Asset Availability
Keep your assets running longer and more reliably, with standardized maintenance workflows from OEM manuals.
Lower Maintenance Costs
Turn any technician into an expert to streamline operations, maintain more assets, and reduce overall costs.
Thousands of companies manage their assets with MaintainX

'%3e%3cpath%20fill='url(%23b)'%20d='M66.008%2080.068c-5.084-.786-9.763-3.834-12.442-8.68a16.942%2016.942%200%200%201-1.87-5.18c1.096.19%202.203.476%203.298.87%206.525%202.333%2010.836%207.68%2011.014%2012.99ZM51.47%2061.576c.488-5.524%203.62-10.716%208.847-13.597a17.132%2017.132%200%200%201%2011.335-1.882c-.798%208.145-7.43%2014.848-16.038%2015.599-1.417.119-2.799.07-4.144-.12Zm28.564-11.478a17.513%2017.513%200%200%201%203.727%204.62c4.608%208.335%201.584%2018.813-6.75%2023.409a16.988%2016.988%200%200%201-4.359%201.679%2019.624%2019.624%200%200%201-3.977-12.776c.346-7.561%204.942-13.931%2011.36-16.932Z'/%3e%3cpath%20fill='%23110F0D'%20fill-rule='evenodd'%20d='M142.831%2048.324h4.977V77.03h-4.977V48.324Zm27.278%2013.002c.322%201.048.453%202.263.453%203.62v12.073h-4.787V66.208c0-.75-.047-1.572-.154-2.143-.453-2.382-1.822-3.572-4.215-3.572-2.31%200-3.882%201.274-4.43%203.476-.143.596-.226%201.405-.226%202.25v10.8h-4.787V56.623h4.477v2.989c1.536-2.5%203.906-3.43%206.371-3.43%203.488%200%206.263%201.68%207.298%205.144Zm24.636%207.323c0%203.882-2.358%206.525-5.763%207.727-1.298.453-2.632.643-4.62.643h-10.169V48.324h9.085c1.691%200%203.156.143%204.049.38%203.465.93%205.727%203.68%205.727%207.335%200%202.441-.81%204.156-2.762%205.644%202.905%201.417%204.453%203.727%204.453%206.966Zm-15.634-8.656h4.584c1.024%200%201.917-.143%202.536-.417%201.215-.548%201.905-1.608%201.905-3.167%200-1.548-.643-2.572-1.845-3.132-.691-.31-1.762-.452-2.763-.452h-4.417v7.168Zm10.716%208.465c0-1.536-.893-3.37-3.227-3.893-.428-.095-1.036-.143-1.571-.143h-5.918v8.085h5.501c.56%200%201.429-.048%201.953-.167%201.94-.453%203.262-1.846%203.262-3.882Zm47.747-11.847-8.097%2020.408h-4.429l-8.109-20.408h5.191l5.192%2014.574%205.108-14.574h5.144Zm-20.218%2010.002c0%20.69-.036%201.262-.155%201.94h-15.943c.631%202.87%202.714%204.728%205.882%204.728%202.131%200%203.607-.882%204.703-2.525h4.87c-1.762%204.144-5.204%206.692-9.657%206.692-6.084%200-10.537-4.858-10.537-10.49%200-6.108%204.524-10.776%2010.335-10.776%206.239%200%2010.442%204.954%2010.502%2010.43Zm-4.763-1.405c-.333-2.846-2.643-4.858-5.691-4.858-2.894%200-5.287%201.929-5.621%204.858h11.312Zm-72.667%203.44c0%204.787-3.287%208.371-9.419%208.371H119.363V64.66c-1.917.274-3.87.69-5.811%201.238l4.537%2011.121h-5.418l-3.596-9.585c-5.144%202.084-10.085%205.216-14.217%209.585h-4.786L101.8%2048.312h4.56l5.68%2013.883a44.112%2044.112%200%200%201%207.323-1.774V48.312h9.084c1.703%200%203.156.143%204.061.393%203.453.929%205.727%203.667%205.727%207.323%200%201.917-.738%204.179-2.81%205.691%203.06%201.56%204.501%204.025%204.501%206.93Zm-15.634-8.667a62.664%2062.664%200%200%201%202.06-.036c1.703.012%203.239.131%204.608.37%201.441-.549%202.357-1.727%202.357-3.537%200-1.941-.881-3.144-2.488-3.667-.548-.18-1.358-.286-2.322-.286h-4.215v7.156Zm-16.55%203.905-3.715-9.894-6.394%2016.502c2.833-2.595%206.263-4.858%2010.109-6.608Zm27.254%204.74c0-2.775-3.131-4.347-8.513-4.418-.715%200-1.441.011-2.191.047v8.252h5.918c2.548%200%204.786-1.37%204.786-3.882Z'%20clip-rule='evenodd'/%3e%3c/g%3e%3cdefs%3e%3clinearGradient%20id='b'%20x1='51.47'%20x2='85.916'%20y1='62.946'%20y2='62.946'%20gradientUnits='userSpaceOnUse'%3e%3cstop%20stop-color='%23CD9F28'/%3e%3cstop%20offset='1'%20stop-color='%23ECD80B'/%3e%3c/linearGradient%3e%3cclipPath%20id='a'%3e%3cpath%20fill='%23fff'%20d='M51.47%2045.728h186.104V80.14H51.47z'/%3e%3c/clipPath%3e%3c/defs%3e%3c/svg%3e)


More from Trane


Explore Other Assets


© 2026 MaintainX. All rights reserved.