


Trane Modular Air Handler M-Series TEM6A0B24H
Need answers fast?
Explore the manual using AI.
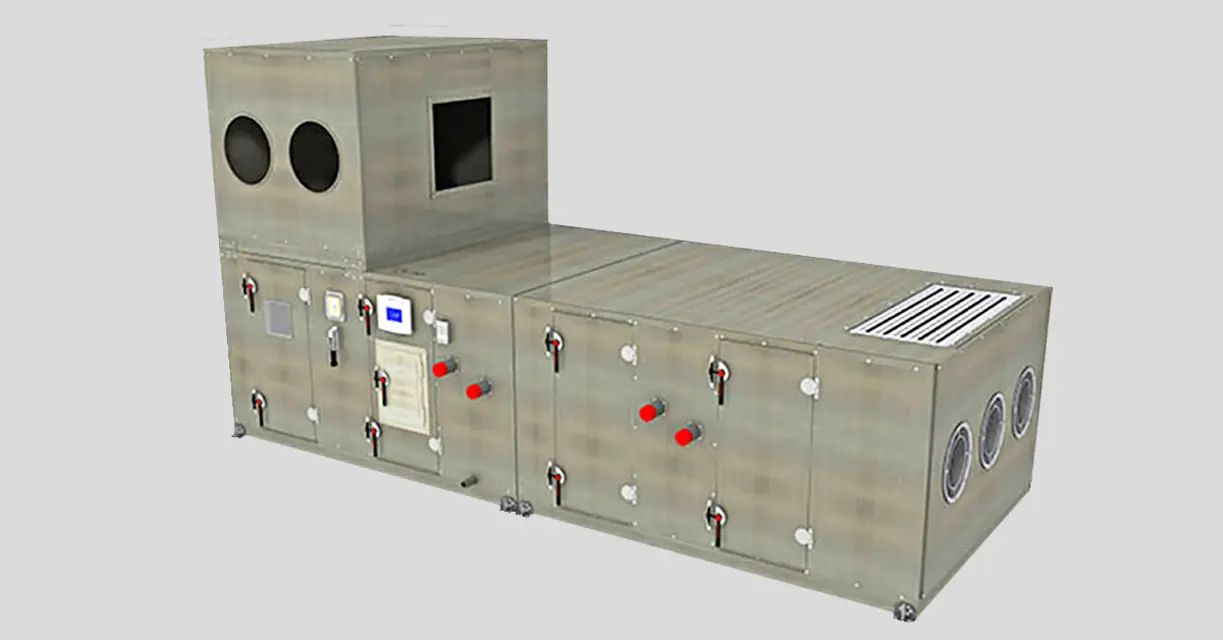
The Trane Modular Air Handler M-Series TEM6A0B24H is a versatile and efficient air handling unit designed for optimal indoor climate control. With advanced features and robust construction, it ensures reliable performance in various commercial applications, making it an ideal choice for HVAC systems.
Turn manuals into instant answers
with your AI-powered assistantTurn manuals into instant answers
with your AI-powered assistant
Manual for Trane Modular Air Handler M-Series TEM6A0B24H
Complete asset maintenance, one click away
Get instant access to all the maintenance information you need. Empower technicians to perform preventive maintenance with asset packages, ready to use right out of the box.

Documents & Manuals
Find all the essential guides in one place.
 Tensioning Guide
- Belt-diagram
- C-120 pulleys
+ 13 more

Work Order Templates
Pre-built workflows to keep your asset running smoothly.
- Daily Electrical System Inspection
- Replace Roller and Pulley
- Install Engine B-120
+ 29 more

Procedures
Integrate maintenance plans directly into your work orders.
- Motion Industries
- Applied Industrial Technologies
- Electrical Brothers
+ 5 more

Parts
Access the parts list for your equipment in MaintainX.
- Drive Motor
- B2 Rollers
- Tensioning System
+ 40 more
Trane Modular Air Handler M-Series TEM6A0B24H
Create an account to install this asset package.
Maintenance Plans for Trane Modular Air Handler Model M-Series TEM6A0B24H
Integrate maintenance plans directly into your work orders in MaintainX.
1 Yearly Air Handler Maintenance
Inspect the unit casing for corrosion. If damage is found, clean and repaint the surface with a rust-resistant primer and vinyl chlorinated lacquer
Clean the fan wheels and fan shaft
Inspect and clean drain pans
Check damper linkages, set screws, and blade adjustment. Clean, but do not lubricate, the nylon damper rod bushings
Clean damper operators
Inspect electrical components and insulation
Inspect wiring for damage
Rotate the fan wheel and check for obstructions in the fan housing. The wheel should not rub on the fan housing. Adjust the center if necessary and tighten wheel set screws to the proper torque
Lubricate motor bearings in accordance with motor manufacturer’s recommendations

3 Monthly Type UW, UU, W, P2, P4, P8, WD, 5D, and 5W Coils Cleaning
Warning: Use care in removing header plugs from Type P2, P4, and P8 coils. Over-torquing may result in twisted tubes
Remove the vent and drain plugs
Blow the coil out as completely as possible with compressed air
Fill and drain the coil several times with full strength glycol so that it mixes thoroughly with the water retained in the coil
Drain the coil out as completely as possible
To ensure no water remains in the coil, do not replace the vent and drain plugs until the coils are put back into service
Sign off on the coil cleaning
1 Yearly Motor Bearings Lubrication
WARNING: Hazardous Voltage! Disconnect all electric power, including remote disconnects before servicing. Follow proper lockout/ tagout procedure to ensure the power cannot be inadvertently energized. Failure to disconnect power before servicing could result in death or serious injury
Motor bearings are factory-lubricated for normal life
In the case of a double-shielded bearing, the grease provided is that which is in the bearing
To regrease motors without grease fittings, remove the bearing brackets
If the original bearing is to be relubricated, remove the shield opposite the rotor
Flush old grease from bearing with suitable solvent
Lubricate the bearing and add grease to the bearing chamber
The chamber should be three-quarters full of grease
Lubricate the bearing according to the motor manufacturer's recommendations and use the manufacturer-recommended grease
1 Monthly Air Handler Maintenance
WARNING: Hazardous Service Procedures! The maintenance and troubleshooting procedures recommended in this section of the manual could result in exposure to electrical, mechanical or other potential safety hazards. Always refer to the safety warnings provided throughout this manual concerning these procedures.
WARNING: Rotating Components! Disconnect all electric power, including remote disconnects before servicing. Follow proper lockout/ tagout procedures to ensure the power can not be inadvertently energized. Secure drive sheaves to ensure rotor cannot freewheel.
Clean or replace air filters if clogged or dirty
Coat permanent filters with oil after cleaning
Change bag filters when pressure drop is 1 in. wg
Relubricate fan bearings if necessary
Check and adjust fan belt tension
Sign off on the monthly air handler maintenance
3 Monthly Air Handler Maintenance
Check fan bearing grease line connections. Lines should be tight to the bearings
Check bearing and motor bracket bolt torque and bearing setscrew torque
Align fan and motor sheaves. Tighten sheave set screws to the proper torque
Inspect and clean drain pans
Tighten electrical connections
Inspect coils for dirt build-up
Parts for Trane Modular Air Handler M-Series TEM6A0B24H
Access the parts list for your equipment in MaintainX.
Bearing Bracket Assembly
BRK1756
Bolt, 1/2-in.
SCR00011
Self-drilling Screws, #10, On 8-in. Centers
SCR01789
Kit With Sensor
X13790452010 SEN-01212
Drive Rod
SHF1709
Bearing Bracket Assembly
BRK1756
Bolt, 1/2-in.
SCR00011
Self-drilling Screws, #10, On 8-in. Centers
SCR01789
Kit With Sensor
X13790452010 SEN-01212
Drive Rod
SHF1709
Bearing Bracket Assembly
BRK1756
Bolt, 1/2-in.
SCR00011
Self-drilling Screws, #10, On 8-in. Centers
SCR01789
Kit With Sensor
X13790452010 SEN-01212
Drive Rod
SHF1709
Unlock efficiency
with MaintainX CoPilot
MaintainX CoPilot is your expert colleague, on call 24/7, helping your team find the answers they need to keep equipment running.
Reduce Unplanned Downtime
Ensure your team follows consistent procedures to minimize equipment failures and costly delays.
Maximize Asset Availability
Keep your assets running longer and more reliably, with standardized maintenance workflows from OEM manuals.
Lower Maintenance Costs
Turn any technician into an expert to streamline operations, maintain more assets, and reduce overall costs.
Thousands of companies manage their assets with MaintainX

'%3e%3cpath%20fill='url(%23b)'%20d='M66.008%2080.068c-5.084-.786-9.763-3.834-12.442-8.68a16.942%2016.942%200%200%201-1.87-5.18c1.096.19%202.203.476%203.298.87%206.525%202.333%2010.836%207.68%2011.014%2012.99ZM51.47%2061.576c.488-5.524%203.62-10.716%208.847-13.597a17.132%2017.132%200%200%201%2011.335-1.882c-.798%208.145-7.43%2014.848-16.038%2015.599-1.417.119-2.799.07-4.144-.12Zm28.564-11.478a17.513%2017.513%200%200%201%203.727%204.62c4.608%208.335%201.584%2018.813-6.75%2023.409a16.988%2016.988%200%200%201-4.359%201.679%2019.624%2019.624%200%200%201-3.977-12.776c.346-7.561%204.942-13.931%2011.36-16.932Z'/%3e%3cpath%20fill='%23110F0D'%20fill-rule='evenodd'%20d='M142.831%2048.324h4.977V77.03h-4.977V48.324Zm27.278%2013.002c.322%201.048.453%202.263.453%203.62v12.073h-4.787V66.208c0-.75-.047-1.572-.154-2.143-.453-2.382-1.822-3.572-4.215-3.572-2.31%200-3.882%201.274-4.43%203.476-.143.596-.226%201.405-.226%202.25v10.8h-4.787V56.623h4.477v2.989c1.536-2.5%203.906-3.43%206.371-3.43%203.488%200%206.263%201.68%207.298%205.144Zm24.636%207.323c0%203.882-2.358%206.525-5.763%207.727-1.298.453-2.632.643-4.62.643h-10.169V48.324h9.085c1.691%200%203.156.143%204.049.38%203.465.93%205.727%203.68%205.727%207.335%200%202.441-.81%204.156-2.762%205.644%202.905%201.417%204.453%203.727%204.453%206.966Zm-15.634-8.656h4.584c1.024%200%201.917-.143%202.536-.417%201.215-.548%201.905-1.608%201.905-3.167%200-1.548-.643-2.572-1.845-3.132-.691-.31-1.762-.452-2.763-.452h-4.417v7.168Zm10.716%208.465c0-1.536-.893-3.37-3.227-3.893-.428-.095-1.036-.143-1.571-.143h-5.918v8.085h5.501c.56%200%201.429-.048%201.953-.167%201.94-.453%203.262-1.846%203.262-3.882Zm47.747-11.847-8.097%2020.408h-4.429l-8.109-20.408h5.191l5.192%2014.574%205.108-14.574h5.144Zm-20.218%2010.002c0%20.69-.036%201.262-.155%201.94h-15.943c.631%202.87%202.714%204.728%205.882%204.728%202.131%200%203.607-.882%204.703-2.525h4.87c-1.762%204.144-5.204%206.692-9.657%206.692-6.084%200-10.537-4.858-10.537-10.49%200-6.108%204.524-10.776%2010.335-10.776%206.239%200%2010.442%204.954%2010.502%2010.43Zm-4.763-1.405c-.333-2.846-2.643-4.858-5.691-4.858-2.894%200-5.287%201.929-5.621%204.858h11.312Zm-72.667%203.44c0%204.787-3.287%208.371-9.419%208.371H119.363V64.66c-1.917.274-3.87.69-5.811%201.238l4.537%2011.121h-5.418l-3.596-9.585c-5.144%202.084-10.085%205.216-14.217%209.585h-4.786L101.8%2048.312h4.56l5.68%2013.883a44.112%2044.112%200%200%201%207.323-1.774V48.312h9.084c1.703%200%203.156.143%204.061.393%203.453.929%205.727%203.667%205.727%207.323%200%201.917-.738%204.179-2.81%205.691%203.06%201.56%204.501%204.025%204.501%206.93Zm-15.634-8.667a62.664%2062.664%200%200%201%202.06-.036c1.703.012%203.239.131%204.608.37%201.441-.549%202.357-1.727%202.357-3.537%200-1.941-.881-3.144-2.488-3.667-.548-.18-1.358-.286-2.322-.286h-4.215v7.156Zm-16.55%203.905-3.715-9.894-6.394%2016.502c2.833-2.595%206.263-4.858%2010.109-6.608Zm27.254%204.74c0-2.775-3.131-4.347-8.513-4.418-.715%200-1.441.011-2.191.047v8.252h5.918c2.548%200%204.786-1.37%204.786-3.882Z'%20clip-rule='evenodd'/%3e%3c/g%3e%3cdefs%3e%3clinearGradient%20id='b'%20x1='51.47'%20x2='85.916'%20y1='62.946'%20y2='62.946'%20gradientUnits='userSpaceOnUse'%3e%3cstop%20stop-color='%23CD9F28'/%3e%3cstop%20offset='1'%20stop-color='%23ECD80B'/%3e%3c/linearGradient%3e%3cclipPath%20id='a'%3e%3cpath%20fill='%23fff'%20d='M51.47%2045.728h186.104V80.14H51.47z'/%3e%3c/clipPath%3e%3c/defs%3e%3c/svg%3e)


More from Trane


Explore Other Assets


© 2026 MaintainX. All rights reserved.