


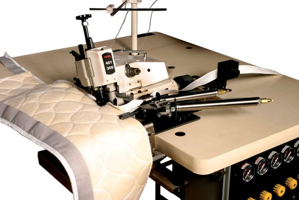
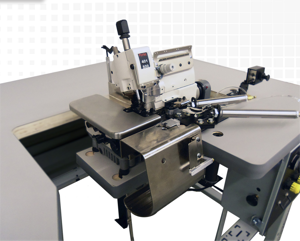
Porter International Flange Machine PFM-4000
Need answers fast?
Explore the manual using AI.
Turn manuals into instant answers
with your AI-powered assistantTurn manuals into instant answers
with your AI-powered assistant
Complete asset maintenance, one click away
Get instant access to all the maintenance information you need. Empower technicians to perform preventive maintenance with asset packages, ready to use right out of the box.

Documents & Manuals
Find all the essential guides in one place.
 Tensioning Guide
- Belt-diagram
- C-120 pulleys
+ 13 more

Work Order Templates
Pre-built workflows to keep your asset running smoothly.
- Daily Electrical System Inspection
- Replace Roller and Pulley
- Install Engine B-120
+ 29 more

Procedures
Integrate maintenance plans directly into your work orders.
- Motion Industries
- Applied Industrial Technologies
- Electrical Brothers
+ 5 more

Parts
Access the parts list for your equipment in MaintainX.
- Drive Motor
- B2 Rollers
- Tensioning System
+ 40 more
Porter International Flange Machine PFM-4000
Create an account to install this asset package.
Maintenance Plans for Porter International Flange Machine Model PFM-4000
Integrate maintenance plans directly into your work orders in MaintainX.
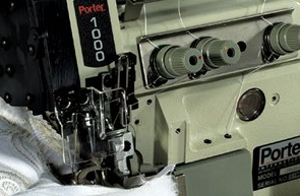
Top Knife Replacement
Warning: Wear cut-resistant gloves during the procedure
Loosen the bottom knife holder screw
Push the bottom knife holder as far left as possible, and lightly tighten the screw
Remove the top knife screw
Grasp the top knife and remove, pulling in a downward motion
Rotate the handwheel until the top knife clamp is in its lowest position
Insert the new top knife, but do not tighten the top knife screw completely
Set the top knife blade so that its cutting edge overlaps the bottom knife by 0.5 mm to 1.0 mm
After the knife position is correct, tighten the top knife screw securely

6 Monthly Oil Filter Replacement
CAUTION: Replace the oil filter every six months. Clogging of the oil filter can cause insufficient lubrication to the sewing head. Failure of the sewing head components can result.
The oil jet in the oil sight window is restricted or weak
The oil contains foam or debris
The filter shows signs of wear
Follow the instructions under 'Draining the Sewing Head Oil'
Top cover of the sewing head removed
Three screws that secure the oil filter cover removed
Oil cap and the O-ring removed
Old filter replaced with the new one
Top Knife Adjustment
Rotate the handwheel until the knife is in its highest position.
Loosen the top knife screw and move the top knife holder as far left as possible without interference with the presser foot.
Check for interference by manually moving the presser foot up and down. The motion should not cause interference with the top knife holder.
When the setting is correct, tighten the top knife screw.
Sign off on the top knife adjustment
1 Daily Flange Machine Cleaning
Clean the flange machine daily. Use these supplies:
Lint-free rags or shop towels
Small brush
Mild spray cleaner or soap and water
A vacuum cleaner
Compressed air
CAUTION: Do not exceed 30 psi (2 bars) when using compressed air for cleaning purposes.
Dirt and lint accumulation is the most common cause for a poorly operating machine. Lint build-up can destroy certain machine parts. It may be necessary to remove covers to access areas housing some components.
CAUTION: Do not service any of the pneumatic components until the unit is relieved of air pressure. Always wear a mask or turn your face away from the regulator when releasing air pressure. Oil, residue, and debris from the floor may spray with force into the air.
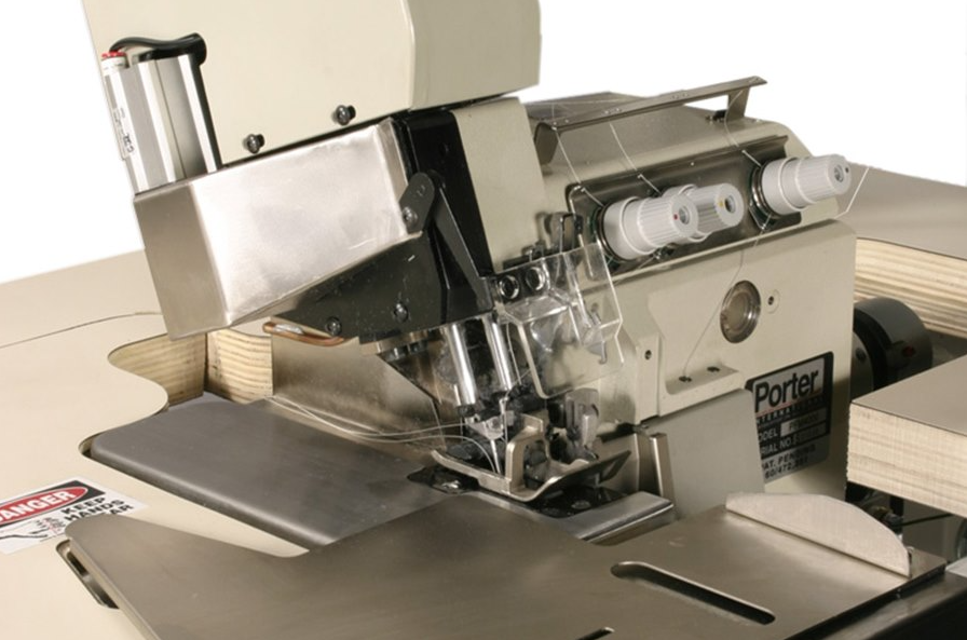
Knives Adjustment
The PFM-4000 Flange Machine has a top knife and a bottom knife. To adjust the I knives, you must set them one at a time in the following order:
1 Set the bottom knife
2 Set the top knife
3 Adjust the bottom knife left or right
4 Adjust the top knife left or right
5 Check the setting of the knives
WARNING: Use extreme caution when handling knives. The blades are extremely sharp. When handling knives, always wear cutresistant gloves.;
Parts for Porter International Flange Machine PFM-4000
Access the parts list for your equipment in MaintainX.
Bottom (Lower) Knife, Right
6Z0386
Flat Head Machine Screw, Fillister
6Z0947
Overedge Looper
6Z1444
Safety Stitch Looper
6Z1532
Needle Set Screw
6Z1631
Bottom (Lower) Knife, Right
6Z0386
Flat Head Machine Screw, Fillister
6Z0947
Overedge Looper
6Z1444
Safety Stitch Looper
6Z1532
Needle Set Screw
6Z1631
Bottom (Lower) Knife, Right
6Z0386
Flat Head Machine Screw, Fillister
6Z0947
Overedge Looper
6Z1444
Safety Stitch Looper
6Z1532
Needle Set Screw
6Z1631
Unlock efficiency
with MaintainX CoPilot
MaintainX CoPilot is your expert colleague, on call 24/7, helping your team find the answers they need to keep equipment running.
Reduce Unplanned Downtime
Ensure your team follows consistent procedures to minimize equipment failures and costly delays.
Maximize Asset Availability
Keep your assets running longer and more reliably, with standardized maintenance workflows from OEM manuals.
Lower Maintenance Costs
Turn any technician into an expert to streamline operations, maintain more assets, and reduce overall costs.
Thousands of companies manage their assets with MaintainX

'%3e%3cpath%20fill='url(%23b)'%20d='M66.008%2080.068c-5.084-.786-9.763-3.834-12.442-8.68a16.942%2016.942%200%200%201-1.87-5.18c1.096.19%202.203.476%203.298.87%206.525%202.333%2010.836%207.68%2011.014%2012.99ZM51.47%2061.576c.488-5.524%203.62-10.716%208.847-13.597a17.132%2017.132%200%200%201%2011.335-1.882c-.798%208.145-7.43%2014.848-16.038%2015.599-1.417.119-2.799.07-4.144-.12Zm28.564-11.478a17.513%2017.513%200%200%201%203.727%204.62c4.608%208.335%201.584%2018.813-6.75%2023.409a16.988%2016.988%200%200%201-4.359%201.679%2019.624%2019.624%200%200%201-3.977-12.776c.346-7.561%204.942-13.931%2011.36-16.932Z'/%3e%3cpath%20fill='%23110F0D'%20fill-rule='evenodd'%20d='M142.831%2048.324h4.977V77.03h-4.977V48.324Zm27.278%2013.002c.322%201.048.453%202.263.453%203.62v12.073h-4.787V66.208c0-.75-.047-1.572-.154-2.143-.453-2.382-1.822-3.572-4.215-3.572-2.31%200-3.882%201.274-4.43%203.476-.143.596-.226%201.405-.226%202.25v10.8h-4.787V56.623h4.477v2.989c1.536-2.5%203.906-3.43%206.371-3.43%203.488%200%206.263%201.68%207.298%205.144Zm24.636%207.323c0%203.882-2.358%206.525-5.763%207.727-1.298.453-2.632.643-4.62.643h-10.169V48.324h9.085c1.691%200%203.156.143%204.049.38%203.465.93%205.727%203.68%205.727%207.335%200%202.441-.81%204.156-2.762%205.644%202.905%201.417%204.453%203.727%204.453%206.966Zm-15.634-8.656h4.584c1.024%200%201.917-.143%202.536-.417%201.215-.548%201.905-1.608%201.905-3.167%200-1.548-.643-2.572-1.845-3.132-.691-.31-1.762-.452-2.763-.452h-4.417v7.168Zm10.716%208.465c0-1.536-.893-3.37-3.227-3.893-.428-.095-1.036-.143-1.571-.143h-5.918v8.085h5.501c.56%200%201.429-.048%201.953-.167%201.94-.453%203.262-1.846%203.262-3.882Zm47.747-11.847-8.097%2020.408h-4.429l-8.109-20.408h5.191l5.192%2014.574%205.108-14.574h5.144Zm-20.218%2010.002c0%20.69-.036%201.262-.155%201.94h-15.943c.631%202.87%202.714%204.728%205.882%204.728%202.131%200%203.607-.882%204.703-2.525h4.87c-1.762%204.144-5.204%206.692-9.657%206.692-6.084%200-10.537-4.858-10.537-10.49%200-6.108%204.524-10.776%2010.335-10.776%206.239%200%2010.442%204.954%2010.502%2010.43Zm-4.763-1.405c-.333-2.846-2.643-4.858-5.691-4.858-2.894%200-5.287%201.929-5.621%204.858h11.312Zm-72.667%203.44c0%204.787-3.287%208.371-9.419%208.371H119.363V64.66c-1.917.274-3.87.69-5.811%201.238l4.537%2011.121h-5.418l-3.596-9.585c-5.144%202.084-10.085%205.216-14.217%209.585h-4.786L101.8%2048.312h4.56l5.68%2013.883a44.112%2044.112%200%200%201%207.323-1.774V48.312h9.084c1.703%200%203.156.143%204.061.393%203.453.929%205.727%203.667%205.727%207.323%200%201.917-.738%204.179-2.81%205.691%203.06%201.56%204.501%204.025%204.501%206.93Zm-15.634-8.667a62.664%2062.664%200%200%201%202.06-.036c1.703.012%203.239.131%204.608.37%201.441-.549%202.357-1.727%202.357-3.537%200-1.941-.881-3.144-2.488-3.667-.548-.18-1.358-.286-2.322-.286h-4.215v7.156Zm-16.55%203.905-3.715-9.894-6.394%2016.502c2.833-2.595%206.263-4.858%2010.109-6.608Zm27.254%204.74c0-2.775-3.131-4.347-8.513-4.418-.715%200-1.441.011-2.191.047v8.252h5.918c2.548%200%204.786-1.37%204.786-3.882Z'%20clip-rule='evenodd'/%3e%3c/g%3e%3cdefs%3e%3clinearGradient%20id='b'%20x1='51.47'%20x2='85.916'%20y1='62.946'%20y2='62.946'%20gradientUnits='userSpaceOnUse'%3e%3cstop%20stop-color='%23CD9F28'/%3e%3cstop%20offset='1'%20stop-color='%23ECD80B'/%3e%3c/linearGradient%3e%3cclipPath%20id='a'%3e%3cpath%20fill='%23fff'%20d='M51.47%2045.728h186.104V80.14H51.47z'/%3e%3c/clipPath%3e%3c/defs%3e%3c/svg%3e)


More from Porter International


Explore Other Assets


© 2026 MaintainX. All rights reserved.