


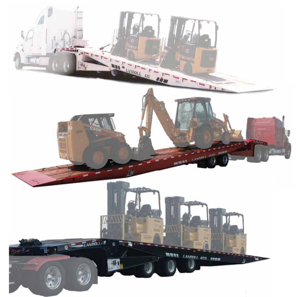
Landoll Axle Trailer 425B
Need answers fast?
Explore the manual using AI.

Turn manuals into instant answers
with your AI-powered assistantTurn manuals into instant answers
with your AI-powered assistant
Manual for Landoll Axle Trailer 425B
Complete asset maintenance, one click away
Get instant access to all the maintenance information you need. Empower technicians to perform preventive maintenance with asset packages, ready to use right out of the box.

Documents & Manuals
Find all the essential guides in one place.
 Tensioning Guide
- Belt-diagram
- C-120 pulleys
+ 13 more

Work Order Templates
Pre-built workflows to keep your asset running smoothly.
- Daily Electrical System Inspection
- Replace Roller and Pulley
- Install Engine B-120
+ 29 more

Procedures
Integrate maintenance plans directly into your work orders.
- Motion Industries
- Applied Industrial Technologies
- Electrical Brothers
+ 5 more

Parts
Access the parts list for your equipment in MaintainX.
- Drive Motor
- B2 Rollers
- Tensioning System
+ 40 more
Landoll Axle Trailer 425B
Create an account to install this asset package.
Maintenance Plans for Landoll Axle Trailer Model 425B
Integrate maintenance plans directly into your work orders in MaintainX.
50 Hourly Axle Trailer Maintenance
Change Crankcase Oil (Standard Base w/ Filter)
Was the crankcase oil changed?
Check Battery Electrolyte Level
Was the battery electrolyte level checked?
Clean Cooling Fins
Were the cooling fins cleaned?
Sign off on the 50 Hourly Axle Trailer Maintenance

Brake Assembly Maintenance
Warning: Do not allow grease to contact brake linings as this could result in reduced braking performance.
Brake linings visually inspected
Measure the thinnest portion of the lining
Is the thinnest portion of the lining 3/8 in. (9.5 mm) or less?
If yes, remove the wheel and drum and replace the linings.
Lining rivet not contacting the drum
Upload a photo of the lubricated brake assembly
Sign off on the brake assembly maintenance
Axle Trailer Cleaning
Warning: Paint thinner and other solvents are flammable and toxic to eyes, skin, and respiratory tract. Avoid skin and eye contact. Good general ventilation is normally adequate. Keep away from open flames or other combustible items.
Wash semitrailer to remove all accumulated dirt and grime
Use any mineral spirits paint thinner (or its equivalent) to remove grease and oil from all parts of the trailer. Rinse degreasing solution off with cold water
Inspect semitrailer for cause of any reported troubles
Scrape, sand, prime, and repaint areas where finish is missing or where there is evidence of corrosion
Sign off on the axle trailer cleaning
Initial 5 Hours / 50 Mi Axle Trailer Maintenance
LIGHTS Inspect
WIRING AND CONNECTIONS Inspect
FASTENERS Inspect
FASTENERS Tighten/Adjust Torque
KING PIN AND PLATE Inspect
BRAKE AIR SYSTEM Inspect
BRAKE ADJ & WEAR Inspect
SLACK ADJUSTERS Inspect
CAMSHAFT ASSEMBLIES Inspect
Slack Adjuster Replacement
Chock wheels to prevent vehicle from rolling. Release spring and service brake. Air chamber push rod must be fully released.
Maintain a fully released parking brake, a minimum of 105 psi reservoir pressure must be maintained. If air pressure is not available the spring brake must be manually caged.
Remove the existing slack adjuster and clevis - DO NOT REMOVE EXISTING JAM NUT.
Install the new clevis (with 1/2” pin) onto the push rod up to the jam nut -DO NOT TIGHTEN JAM NUT.
Fit the installation guide over the cam splines so the 1/2” pin slots face the air chamber.
Swing the guide into the clevis until the appropriate slot totally engages 1/2” pin.
Observe the guide pointer arrow: If the guide pointer is above the clevis pointer, adjust clevis CCW for alignment. If the guide pointer is below the clevis pointer, adjust clevis CW for alignment.
Reposition clevis until the guide pointer aligns with the clevis pointer.
Verify by engaging 1/4” pin through the clevis and guide.
Unlock efficiency
with MaintainX CoPilot
MaintainX CoPilot is your expert colleague, on call 24/7, helping your team find the answers they need to keep equipment running.
Reduce Unplanned Downtime
Ensure your team follows consistent procedures to minimize equipment failures and costly delays.
Maximize Asset Availability
Keep your assets running longer and more reliably, with standardized maintenance workflows from OEM manuals.
Lower Maintenance Costs
Turn any technician into an expert to streamline operations, maintain more assets, and reduce overall costs.
Thousands of companies manage their assets with MaintainX

'%3e%3cpath%20fill='url(%23b)'%20d='M66.008%2080.068c-5.084-.786-9.763-3.834-12.442-8.68a16.942%2016.942%200%200%201-1.87-5.18c1.096.19%202.203.476%203.298.87%206.525%202.333%2010.836%207.68%2011.014%2012.99ZM51.47%2061.576c.488-5.524%203.62-10.716%208.847-13.597a17.132%2017.132%200%200%201%2011.335-1.882c-.798%208.145-7.43%2014.848-16.038%2015.599-1.417.119-2.799.07-4.144-.12Zm28.564-11.478a17.513%2017.513%200%200%201%203.727%204.62c4.608%208.335%201.584%2018.813-6.75%2023.409a16.988%2016.988%200%200%201-4.359%201.679%2019.624%2019.624%200%200%201-3.977-12.776c.346-7.561%204.942-13.931%2011.36-16.932Z'/%3e%3cpath%20fill='%23110F0D'%20fill-rule='evenodd'%20d='M142.831%2048.324h4.977V77.03h-4.977V48.324Zm27.278%2013.002c.322%201.048.453%202.263.453%203.62v12.073h-4.787V66.208c0-.75-.047-1.572-.154-2.143-.453-2.382-1.822-3.572-4.215-3.572-2.31%200-3.882%201.274-4.43%203.476-.143.596-.226%201.405-.226%202.25v10.8h-4.787V56.623h4.477v2.989c1.536-2.5%203.906-3.43%206.371-3.43%203.488%200%206.263%201.68%207.298%205.144Zm24.636%207.323c0%203.882-2.358%206.525-5.763%207.727-1.298.453-2.632.643-4.62.643h-10.169V48.324h9.085c1.691%200%203.156.143%204.049.38%203.465.93%205.727%203.68%205.727%207.335%200%202.441-.81%204.156-2.762%205.644%202.905%201.417%204.453%203.727%204.453%206.966Zm-15.634-8.656h4.584c1.024%200%201.917-.143%202.536-.417%201.215-.548%201.905-1.608%201.905-3.167%200-1.548-.643-2.572-1.845-3.132-.691-.31-1.762-.452-2.763-.452h-4.417v7.168Zm10.716%208.465c0-1.536-.893-3.37-3.227-3.893-.428-.095-1.036-.143-1.571-.143h-5.918v8.085h5.501c.56%200%201.429-.048%201.953-.167%201.94-.453%203.262-1.846%203.262-3.882Zm47.747-11.847-8.097%2020.408h-4.429l-8.109-20.408h5.191l5.192%2014.574%205.108-14.574h5.144Zm-20.218%2010.002c0%20.69-.036%201.262-.155%201.94h-15.943c.631%202.87%202.714%204.728%205.882%204.728%202.131%200%203.607-.882%204.703-2.525h4.87c-1.762%204.144-5.204%206.692-9.657%206.692-6.084%200-10.537-4.858-10.537-10.49%200-6.108%204.524-10.776%2010.335-10.776%206.239%200%2010.442%204.954%2010.502%2010.43Zm-4.763-1.405c-.333-2.846-2.643-4.858-5.691-4.858-2.894%200-5.287%201.929-5.621%204.858h11.312Zm-72.667%203.44c0%204.787-3.287%208.371-9.419%208.371H119.363V64.66c-1.917.274-3.87.69-5.811%201.238l4.537%2011.121h-5.418l-3.596-9.585c-5.144%202.084-10.085%205.216-14.217%209.585h-4.786L101.8%2048.312h4.56l5.68%2013.883a44.112%2044.112%200%200%201%207.323-1.774V48.312h9.084c1.703%200%203.156.143%204.061.393%203.453.929%205.727%203.667%205.727%207.323%200%201.917-.738%204.179-2.81%205.691%203.06%201.56%204.501%204.025%204.501%206.93Zm-15.634-8.667a62.664%2062.664%200%200%201%202.06-.036c1.703.012%203.239.131%204.608.37%201.441-.549%202.357-1.727%202.357-3.537%200-1.941-.881-3.144-2.488-3.667-.548-.18-1.358-.286-2.322-.286h-4.215v7.156Zm-16.55%203.905-3.715-9.894-6.394%2016.502c2.833-2.595%206.263-4.858%2010.109-6.608Zm27.254%204.74c0-2.775-3.131-4.347-8.513-4.418-.715%200-1.441.011-2.191.047v8.252h5.918c2.548%200%204.786-1.37%204.786-3.882Z'%20clip-rule='evenodd'/%3e%3c/g%3e%3cdefs%3e%3clinearGradient%20id='b'%20x1='51.47'%20x2='85.916'%20y1='62.946'%20y2='62.946'%20gradientUnits='userSpaceOnUse'%3e%3cstop%20stop-color='%23CD9F28'/%3e%3cstop%20offset='1'%20stop-color='%23ECD80B'/%3e%3c/linearGradient%3e%3cclipPath%20id='a'%3e%3cpath%20fill='%23fff'%20d='M51.47%2045.728h186.104V80.14H51.47z'/%3e%3c/clipPath%3e%3c/defs%3e%3c/svg%3e)


More from Landoll


Explore Other Assets


© 2026 MaintainX. All rights reserved.