


Intermec Bar Code Label Printer 3400
Need answers fast?
Explore the manual using AI.
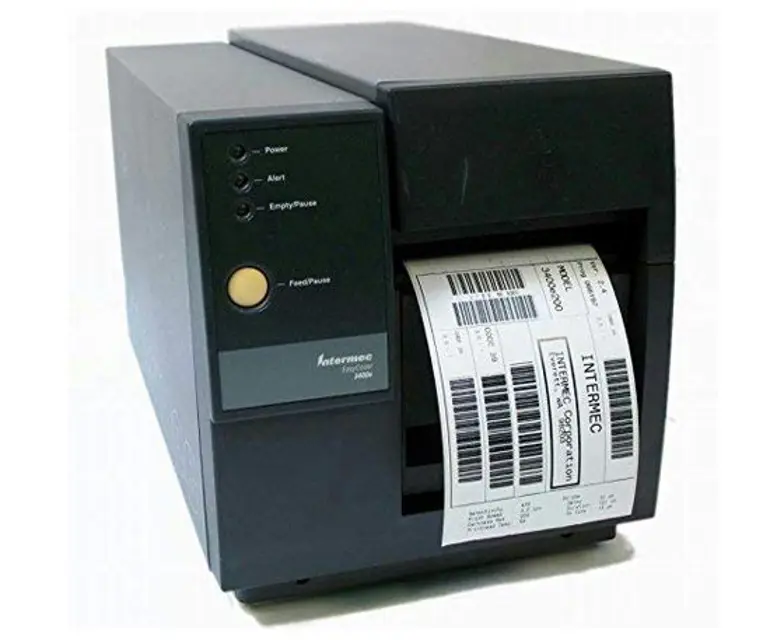
The Intermec Bar Code Label Printer 3400 is a reliable industrial printer designed for high-quality label printing. Known for its durability and efficiency, this model excels in various applications, making it essential for businesses that require precise barcode labeling solutions. Optimize your operations with the dependable performance of the Intermec 3400.
Turn manuals into instant answers
with your AI-powered assistantTurn manuals into instant answers
with your AI-powered assistant
Manual for Intermec Bar Code Label Printer 3400
Complete asset maintenance, one click away
Get instant access to all the maintenance information you need. Empower technicians to perform preventive maintenance with asset packages, ready to use right out of the box.

Documents & Manuals
Find all the essential guides in one place.
 Tensioning Guide
- Belt-diagram
- C-120 pulleys
+ 13 more

Work Order Templates
Pre-built workflows to keep your asset running smoothly.
- Daily Electrical System Inspection
- Replace Roller and Pulley
- Install Engine B-120
+ 29 more

Procedures
Integrate maintenance plans directly into your work orders.
- Motion Industries
- Applied Industrial Technologies
- Electrical Brothers
+ 5 more

Parts
Access the parts list for your equipment in MaintainX.
- Drive Motor
- B2 Rollers
- Tensioning System
+ 40 more
Intermec Bar Code Label Printer 3400
Create an account to install this asset package.
Maintenance Plans for Intermec Bar Code Label Printer Model 3400
Integrate maintenance plans directly into your work orders in MaintainX.
Media Guides and Media Path Cleaning
Warning: Always clean the media guides immediately after a label jam in the printer.
Turn the On/Off switch to the off position and remove the power cord.
Remove the media cover.
Remove the media and ribbon (if necessary).
Pull down on the lower media guide to open up the media path.
Use the cloth moistened with isopropyl alcohol to clean the upper and lower media guides. Be sure to remove all traces of debris. Release the lower media guide.
Remove all traces of dust, paper, and adhesive from the media path with a soft bristle brush or vacuum.
Replace the media and ribbon.
If you are finished cleaning, replace the media cover.

Label Sensors Cleaning
Warning: Ensure the printer is turned off and unplugged before starting the cleaning process.
Turn the On/Off switch to the off position and remove the power cord.
Remove the media cover.
Rotate the head lift lever clockwise to release the printhead.
Remove the media and ribbon (if necessary).
Clean the label taken sensor with a cotton swab moistened with isopropyl alcohol.
Pull down on the lower media guide to expose the label gap sensor.
Using a cleaning brush or vacuum, remove all debris and dust from the label gap sensor.
Clean the label gap sensor with a cotton swab and alcohol.
Printer Inspection
Inspect the printer and the rest of your data collection system equipment on a regular basis. Your inspection should include the following:
• Make sure you have properly grounded the printer.
• Inspect the work environment. Large electric motors, welders, and switching equipment can affect printer performance.
• Keep the printer away from liquids.
• Check the data collection network regularly for loose wires or poorly installed connections. Be sure to replace corroded wires.;
Printer Covers Cleaning
Warning: Do not use abrasive cleansers or solvents.
General purpose cleaner (soapy water/mild detergent) used for cleaning?
Transparent panel on the media cover cleaned?
Is the media supply inside the printer visible when you close the cover?
Sign off on the printer covers cleaning
Drive Roller and Tear Bar Cleaning
Turn the On/Off switch to the off position and remove the power cord
Remove the media cover
Rotate the head lift lever clockwise to release the printhead
Remove the media and ribbon (if necessary)
Clean the drive roller by using a cloth dampened with isopropyl alcohol. Move the cloth over the drive roller in a side-to-side motion. Make sure to rotate the roller so that you can clean all areas
Clean both sides of the tear bar with a cloth dampened with isopropyl alcohol. Remove all traces of dust, paper, and adhesive
Replace the media and ribbon
Engage the printhead by turning the head lift lever counterclockwise until the printhead locks
If you are finished cleaning, replace the media cover
Parts for Intermec Bar Code Label Printer 3400
Access the parts list for your equipment in MaintainX.
9154 Multi-Drop Line Controller System Manual
048517
Data Communications Reference Manual
044737
Twinax Interface Card
056835
Coaxial Cable
2577672
9161B Installation Manual
049572
9154 Multi-Drop Line Controller System Manual
048517
Data Communications Reference Manual
044737
Twinax Interface Card
056835
Coaxial Cable
2577672
9161B Installation Manual
049572
9154 Multi-Drop Line Controller System Manual
048517
Data Communications Reference Manual
044737
Twinax Interface Card
056835
Coaxial Cable
2577672
9161B Installation Manual
049572
Unlock efficiency
with MaintainX CoPilot
MaintainX CoPilot is your expert colleague, on call 24/7, helping your team find the answers they need to keep equipment running.
Reduce Unplanned Downtime
Ensure your team follows consistent procedures to minimize equipment failures and costly delays.
Maximize Asset Availability
Keep your assets running longer and more reliably, with standardized maintenance workflows from OEM manuals.
Lower Maintenance Costs
Turn any technician into an expert to streamline operations, maintain more assets, and reduce overall costs.
Thousands of companies manage their assets with MaintainX

'%3e%3cpath%20fill='url(%23b)'%20d='M66.008%2080.068c-5.084-.786-9.763-3.834-12.442-8.68a16.942%2016.942%200%200%201-1.87-5.18c1.096.19%202.203.476%203.298.87%206.525%202.333%2010.836%207.68%2011.014%2012.99ZM51.47%2061.576c.488-5.524%203.62-10.716%208.847-13.597a17.132%2017.132%200%200%201%2011.335-1.882c-.798%208.145-7.43%2014.848-16.038%2015.599-1.417.119-2.799.07-4.144-.12Zm28.564-11.478a17.513%2017.513%200%200%201%203.727%204.62c4.608%208.335%201.584%2018.813-6.75%2023.409a16.988%2016.988%200%200%201-4.359%201.679%2019.624%2019.624%200%200%201-3.977-12.776c.346-7.561%204.942-13.931%2011.36-16.932Z'/%3e%3cpath%20fill='%23110F0D'%20fill-rule='evenodd'%20d='M142.831%2048.324h4.977V77.03h-4.977V48.324Zm27.278%2013.002c.322%201.048.453%202.263.453%203.62v12.073h-4.787V66.208c0-.75-.047-1.572-.154-2.143-.453-2.382-1.822-3.572-4.215-3.572-2.31%200-3.882%201.274-4.43%203.476-.143.596-.226%201.405-.226%202.25v10.8h-4.787V56.623h4.477v2.989c1.536-2.5%203.906-3.43%206.371-3.43%203.488%200%206.263%201.68%207.298%205.144Zm24.636%207.323c0%203.882-2.358%206.525-5.763%207.727-1.298.453-2.632.643-4.62.643h-10.169V48.324h9.085c1.691%200%203.156.143%204.049.38%203.465.93%205.727%203.68%205.727%207.335%200%202.441-.81%204.156-2.762%205.644%202.905%201.417%204.453%203.727%204.453%206.966Zm-15.634-8.656h4.584c1.024%200%201.917-.143%202.536-.417%201.215-.548%201.905-1.608%201.905-3.167%200-1.548-.643-2.572-1.845-3.132-.691-.31-1.762-.452-2.763-.452h-4.417v7.168Zm10.716%208.465c0-1.536-.893-3.37-3.227-3.893-.428-.095-1.036-.143-1.571-.143h-5.918v8.085h5.501c.56%200%201.429-.048%201.953-.167%201.94-.453%203.262-1.846%203.262-3.882Zm47.747-11.847-8.097%2020.408h-4.429l-8.109-20.408h5.191l5.192%2014.574%205.108-14.574h5.144Zm-20.218%2010.002c0%20.69-.036%201.262-.155%201.94h-15.943c.631%202.87%202.714%204.728%205.882%204.728%202.131%200%203.607-.882%204.703-2.525h4.87c-1.762%204.144-5.204%206.692-9.657%206.692-6.084%200-10.537-4.858-10.537-10.49%200-6.108%204.524-10.776%2010.335-10.776%206.239%200%2010.442%204.954%2010.502%2010.43Zm-4.763-1.405c-.333-2.846-2.643-4.858-5.691-4.858-2.894%200-5.287%201.929-5.621%204.858h11.312Zm-72.667%203.44c0%204.787-3.287%208.371-9.419%208.371H119.363V64.66c-1.917.274-3.87.69-5.811%201.238l4.537%2011.121h-5.418l-3.596-9.585c-5.144%202.084-10.085%205.216-14.217%209.585h-4.786L101.8%2048.312h4.56l5.68%2013.883a44.112%2044.112%200%200%201%207.323-1.774V48.312h9.084c1.703%200%203.156.143%204.061.393%203.453.929%205.727%203.667%205.727%207.323%200%201.917-.738%204.179-2.81%205.691%203.06%201.56%204.501%204.025%204.501%206.93Zm-15.634-8.667a62.664%2062.664%200%200%201%202.06-.036c1.703.012%203.239.131%204.608.37%201.441-.549%202.357-1.727%202.357-3.537%200-1.941-.881-3.144-2.488-3.667-.548-.18-1.358-.286-2.322-.286h-4.215v7.156Zm-16.55%203.905-3.715-9.894-6.394%2016.502c2.833-2.595%206.263-4.858%2010.109-6.608Zm27.254%204.74c0-2.775-3.131-4.347-8.513-4.418-.715%200-1.441.011-2.191.047v8.252h5.918c2.548%200%204.786-1.37%204.786-3.882Z'%20clip-rule='evenodd'/%3e%3c/g%3e%3cdefs%3e%3clinearGradient%20id='b'%20x1='51.47'%20x2='85.916'%20y1='62.946'%20y2='62.946'%20gradientUnits='userSpaceOnUse'%3e%3cstop%20stop-color='%23CD9F28'/%3e%3cstop%20offset='1'%20stop-color='%23ECD80B'/%3e%3c/linearGradient%3e%3cclipPath%20id='a'%3e%3cpath%20fill='%23fff'%20d='M51.47%2045.728h186.104V80.14H51.47z'/%3e%3c/clipPath%3e%3c/defs%3e%3c/svg%3e)


Explore Other Assets


© 2026 MaintainX. All rights reserved.