


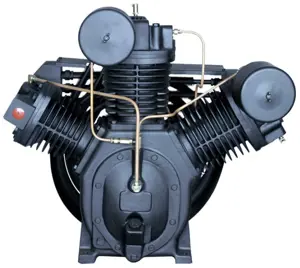
Ingersoll Rand Mobile Compressor 9/270
Need answers fast?
Explore the manual using AI.
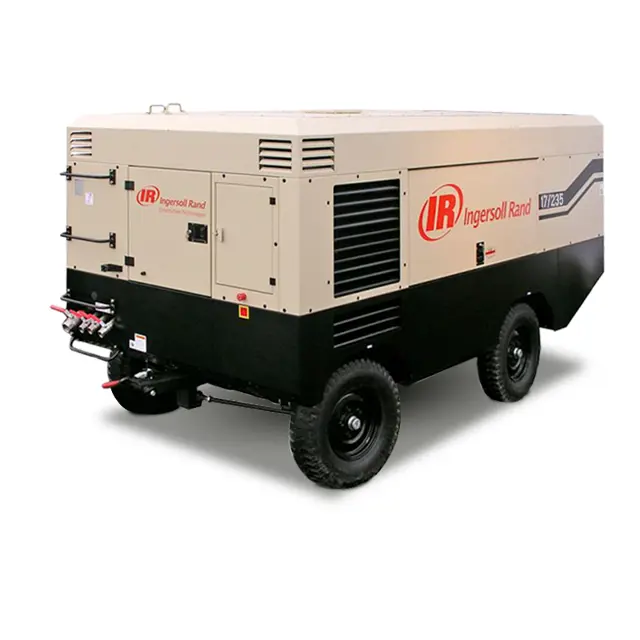
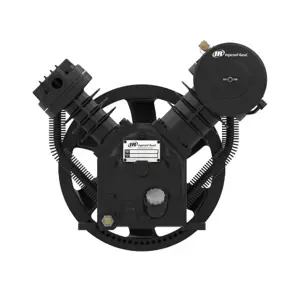
The Ingersoll Rand Mobile Compressor 9/270 is a robust and efficient industrial air compressor designed for demanding applications. Known for its reliability and performance, this model provides high-quality compressed air solutions, making it ideal for construction and maintenance tasks. Experience superior efficiency and durability with Ingersoll Rand's trusted engineering.
Turn manuals into instant answers
with your AI-powered assistantTurn manuals into instant answers
with your AI-powered assistant
Manual for Ingersoll Rand Mobile Compressor 9/270
Complete asset maintenance, one click away
Get instant access to all the maintenance information you need. Empower technicians to perform preventive maintenance with asset packages, ready to use right out of the box.

Documents & Manuals
Find all the essential guides in one place.
 Tensioning Guide
- Belt-diagram
- C-120 pulleys
+ 13 more

Work Order Templates
Pre-built workflows to keep your asset running smoothly.
- Daily Electrical System Inspection
- Replace Roller and Pulley
- Install Engine B-120
+ 29 more

Procedures
Integrate maintenance plans directly into your work orders.
- Motion Industries
- Applied Industrial Technologies
- Electrical Brothers
+ 5 more

Parts
Access the parts list for your equipment in MaintainX.
- Drive Motor
- B2 Rollers
- Tensioning System
+ 40 more
Ingersoll Rand Mobile Compressor 9/270
Create an account to install this asset package.
Maintenance Plans for Ingersoll Rand Mobile Compressor Model 9/270
Integrate maintenance plans directly into your work orders in MaintainX.
3 Monthly / 500 Hourly Compressor Oil Separator Element Maintenance
1. Removal
WARNING: Do not remove the filter(s) without first making sure that the machine is stopped and the system has been completely relieved of all air pressure.
• Disconnect all hoses and tubes from the separator tank cover plate.
• Remove the drop–tube from the separator tank cover plate and then remove the cover plate. Remove the separator element.
2. Inspection
• Examine the filter element. Examine all hoses and tubes, and replace if necessary.
3. Reassembly
• Thoroughly clean the orifice/drop tube and filter gasket contact area before reassembly. Install the new element.
WARNING! Do not remove the staple from the anti–static gasket on the separator element since it serves to ground any possible static build–up.Do not use gasket sealant since this will affect electrical conductance.

6 Monthly / 1000 Hourly Scavenge Line Inspection
Warning: This inspection requires trained personnel with PPE!
Scavenge line runs from the combined orifice/drop tube in the separator tank to the orifice fitting located in the airend
Orifice, check valve and hoses examined
Scavenge line and tube are clear of any obstruction
Enter the compressor's hour meter reading
Sign off on the scavenge line inspection
500 Hourly Air Filter Element Replacement
Warning: Never remove and replace element(s) when the machine is running.
Cleaned the exterior of the filter housing?
Removed the filter element by releasing the nut?
If the safety element is to be renewed, thoroughly cleaned the interior of the filter housing?
Checked for cracks, holes or any other damage to the element by holding it up to a light source, or by passing a lamp inside?
Checked the seal at the end of the element and replaced if any sign of damage is evident?
Assembled the new element into the filter housing ensuring that the seal seats properly?
Secured the element in the housing by hand tightening the nut?
Assembled the dust collector box parts, ensuring that they are correctly positioned?
1 Monthly Compressor Oil Cooler and Engine Radiator Air Charge Cooler
Warning: This procedure requires trained personnel with PPE!
When grease, oil and dirt accumulate on the exterior surfaces of the oil cooler and radiator, the efficiency is impaired.
Oil cooler and radiator cleaned with compressed air and non-flammable cleaning solvent?
This should remove any accumulation of oil, grease and dirt from the exterior core of the cooler so that the entire cooling area can radiate the heat of the lubricating and cooling oil/water into the air stream.
Warning: Hot engine coolant and steam can cause injury.
When adding coolant or antifreeze solution to the engine radiator, stop the engine at least one minute prior to releasing the radiator filler cap.
Engine stopped at least one minute prior to releasing the radiator filler cap?
Using a cloth to protect the hand, slowly release the filler cap, absorbing any released fluid with the cloth.
Filler cap slowly released and any released fluid absorbed with a cloth?
3 Monthly / 500 Hourly Compressor Oil Filter Element Replacement
WARNING: Do not remove the filter(s) without first making sure that the machine is stopped and the system has been completely relieved of all air pressure.
1. Removal
• Clean the exterior of the filter housing and remove the spin–on element by turning it in a counter–clockwise direction.
2. Inspection
• Examine the filter element.
CAUTION: If there is any indication of the formation of varnishes, shellacs or lacquers on the filter element, it is a warning that the compressor lubricating and cooling oil has deteriorated and that it should be changed immediately. Refer to LUBRICATION later in this section.
3. Reassembly
• Clean the filter gasket contact area and install the new element by screwing in a clockwise direction until the gasket makes contact with the filter housing. Tighten a further 1/2 to 3/4 of a revolution.
CAUTION: Start the machine and check for leakage before the machine is put back into service.;
Parts for Ingersoll Rand Mobile Compressor 9/270
Access the parts list for your equipment in MaintainX.
Mag Speed Sensor
36785319
Pro–Tec, 208 Litre
89292981
0–225 Pressure Trans
54496773
Pro–Tec, 5 Gal.
36899706
Relay, Magnetic 24V K1
35577873
Mag Speed Sensor
36785319
Pro–Tec, 208 Litre
89292981
0–225 Pressure Trans
54496773
Pro–Tec, 5 Gal.
36899706
Relay, Magnetic 24V K1
35577873
Mag Speed Sensor
36785319
Pro–Tec, 208 Litre
89292981
0–225 Pressure Trans
54496773
Pro–Tec, 5 Gal.
36899706
Relay, Magnetic 24V K1
35577873
Unlock efficiency
with MaintainX CoPilot
MaintainX CoPilot is your expert colleague, on call 24/7, helping your team find the answers they need to keep equipment running.
Reduce Unplanned Downtime
Ensure your team follows consistent procedures to minimize equipment failures and costly delays.
Maximize Asset Availability
Keep your assets running longer and more reliably, with standardized maintenance workflows from OEM manuals.
Lower Maintenance Costs
Turn any technician into an expert to streamline operations, maintain more assets, and reduce overall costs.
Thousands of companies manage their assets with MaintainX

'%3e%3cpath%20fill='url(%23b)'%20d='M66.008%2080.068c-5.084-.786-9.763-3.834-12.442-8.68a16.942%2016.942%200%200%201-1.87-5.18c1.096.19%202.203.476%203.298.87%206.525%202.333%2010.836%207.68%2011.014%2012.99ZM51.47%2061.576c.488-5.524%203.62-10.716%208.847-13.597a17.132%2017.132%200%200%201%2011.335-1.882c-.798%208.145-7.43%2014.848-16.038%2015.599-1.417.119-2.799.07-4.144-.12Zm28.564-11.478a17.513%2017.513%200%200%201%203.727%204.62c4.608%208.335%201.584%2018.813-6.75%2023.409a16.988%2016.988%200%200%201-4.359%201.679%2019.624%2019.624%200%200%201-3.977-12.776c.346-7.561%204.942-13.931%2011.36-16.932Z'/%3e%3cpath%20fill='%23110F0D'%20fill-rule='evenodd'%20d='M142.831%2048.324h4.977V77.03h-4.977V48.324Zm27.278%2013.002c.322%201.048.453%202.263.453%203.62v12.073h-4.787V66.208c0-.75-.047-1.572-.154-2.143-.453-2.382-1.822-3.572-4.215-3.572-2.31%200-3.882%201.274-4.43%203.476-.143.596-.226%201.405-.226%202.25v10.8h-4.787V56.623h4.477v2.989c1.536-2.5%203.906-3.43%206.371-3.43%203.488%200%206.263%201.68%207.298%205.144Zm24.636%207.323c0%203.882-2.358%206.525-5.763%207.727-1.298.453-2.632.643-4.62.643h-10.169V48.324h9.085c1.691%200%203.156.143%204.049.38%203.465.93%205.727%203.68%205.727%207.335%200%202.441-.81%204.156-2.762%205.644%202.905%201.417%204.453%203.727%204.453%206.966Zm-15.634-8.656h4.584c1.024%200%201.917-.143%202.536-.417%201.215-.548%201.905-1.608%201.905-3.167%200-1.548-.643-2.572-1.845-3.132-.691-.31-1.762-.452-2.763-.452h-4.417v7.168Zm10.716%208.465c0-1.536-.893-3.37-3.227-3.893-.428-.095-1.036-.143-1.571-.143h-5.918v8.085h5.501c.56%200%201.429-.048%201.953-.167%201.94-.453%203.262-1.846%203.262-3.882Zm47.747-11.847-8.097%2020.408h-4.429l-8.109-20.408h5.191l5.192%2014.574%205.108-14.574h5.144Zm-20.218%2010.002c0%20.69-.036%201.262-.155%201.94h-15.943c.631%202.87%202.714%204.728%205.882%204.728%202.131%200%203.607-.882%204.703-2.525h4.87c-1.762%204.144-5.204%206.692-9.657%206.692-6.084%200-10.537-4.858-10.537-10.49%200-6.108%204.524-10.776%2010.335-10.776%206.239%200%2010.442%204.954%2010.502%2010.43Zm-4.763-1.405c-.333-2.846-2.643-4.858-5.691-4.858-2.894%200-5.287%201.929-5.621%204.858h11.312Zm-72.667%203.44c0%204.787-3.287%208.371-9.419%208.371H119.363V64.66c-1.917.274-3.87.69-5.811%201.238l4.537%2011.121h-5.418l-3.596-9.585c-5.144%202.084-10.085%205.216-14.217%209.585h-4.786L101.8%2048.312h4.56l5.68%2013.883a44.112%2044.112%200%200%201%207.323-1.774V48.312h9.084c1.703%200%203.156.143%204.061.393%203.453.929%205.727%203.667%205.727%207.323%200%201.917-.738%204.179-2.81%205.691%203.06%201.56%204.501%204.025%204.501%206.93Zm-15.634-8.667a62.664%2062.664%200%200%201%202.06-.036c1.703.012%203.239.131%204.608.37%201.441-.549%202.357-1.727%202.357-3.537%200-1.941-.881-3.144-2.488-3.667-.548-.18-1.358-.286-2.322-.286h-4.215v7.156Zm-16.55%203.905-3.715-9.894-6.394%2016.502c2.833-2.595%206.263-4.858%2010.109-6.608Zm27.254%204.74c0-2.775-3.131-4.347-8.513-4.418-.715%200-1.441.011-2.191.047v8.252h5.918c2.548%200%204.786-1.37%204.786-3.882Z'%20clip-rule='evenodd'/%3e%3c/g%3e%3cdefs%3e%3clinearGradient%20id='b'%20x1='51.47'%20x2='85.916'%20y1='62.946'%20y2='62.946'%20gradientUnits='userSpaceOnUse'%3e%3cstop%20stop-color='%23CD9F28'/%3e%3cstop%20offset='1'%20stop-color='%23ECD80B'/%3e%3c/linearGradient%3e%3cclipPath%20id='a'%3e%3cpath%20fill='%23fff'%20d='M51.47%2045.728h186.104V80.14H51.47z'/%3e%3c/clipPath%3e%3c/defs%3e%3c/svg%3e)


More from Ingersoll Rand


Explore Other Assets


© 2025 MaintainX. All rights reserved.