


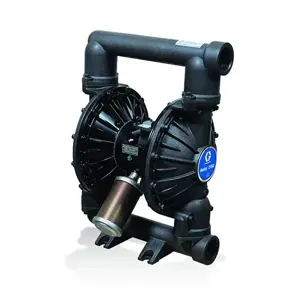
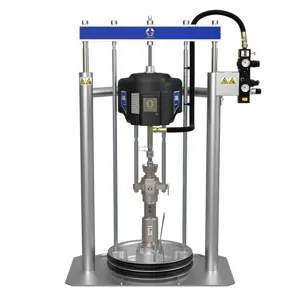
Graco Air-Powered Ram 253017
Need answers fast?
Explore the manual using AI.
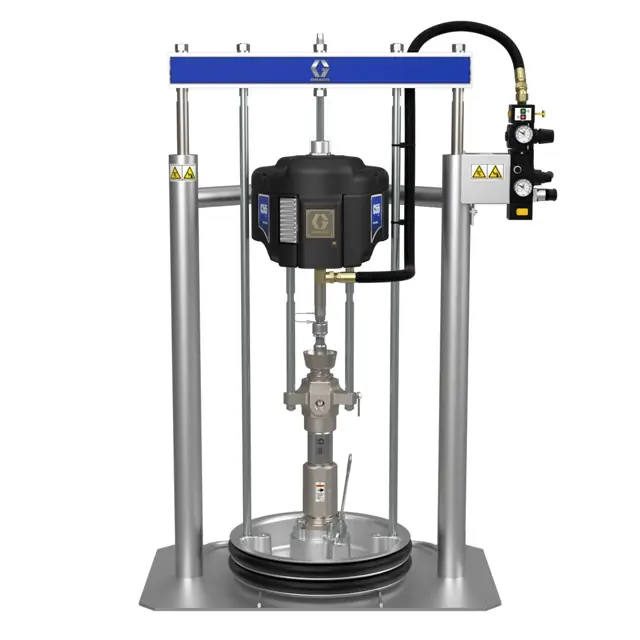
The Graco Air-Powered Ram 253017 is a robust industrial tool designed for efficient material handling and application. This air-powered ram is ideal for various applications, ensuring reliable performance and durability in demanding environments. Regular maintenance is essential for optimal operation and longevity.
Turn manuals into instant answers
with your AI-powered assistantTurn manuals into instant answers
with your AI-powered assistant
Manual for Graco Air-Powered Ram 253017
Complete asset maintenance, one click away
Get instant access to all the maintenance information you need. Empower technicians to perform preventive maintenance with asset packages, ready to use right out of the box.

Documents & Manuals
Find all the essential guides in one place.
 Tensioning Guide
- Belt-diagram
- C-120 pulleys
+ 13 more

Work Order Templates
Pre-built workflows to keep your asset running smoothly.
- Daily Electrical System Inspection
- Replace Roller and Pulley
- Install Engine B-120
+ 29 more

Procedures
Integrate maintenance plans directly into your work orders.
- Motion Industries
- Applied Industrial Technologies
- Electrical Brothers
+ 5 more

Parts
Access the parts list for your equipment in MaintainX.
- Drive Motor
- B2 Rollers
- Tensioning System
+ 40 more
Graco Air-Powered Ram 253017
Create an account to install this asset package.
Maintenance Plans for Graco Air-Powered Ram Model 253017
Integrate maintenance plans directly into your work orders in MaintainX.
Ram Piston Maintenance
NOTE: Some older series of Model 207279 Ram use a different piston assembly than current models. For Series A through H of Model 207279, order Repair Kit 220501. This kit is also necessary to convert the ram from air to hydraulic operation. See page 29 for parts.
⚠️ WARNING: To reduce the risk of serious injury whenever you are instructed to relieve pressure, always follow the Pressure Relief Procedure on page 9.
Pressure relieved?
Support beam (3) removed?
Cylinder cap (67) removed and slid off the piston rod (68)?
Packing nut (46), bearing (49), and housing assembly (70) carefully slid off the rod?
Piston rod (68) carefully pulled straight up out of the cylinder (2)?
Piston and rod laid down carefully to avoid bending the rod?
Piston retainer nut (37), washer (36), piston (78), outer piston seal (54), inner piston seal (41) and spring (52) removed?

Piston Rod Packing Maintenance
⚠️ WARNING: To reduce the risk of serious injury whenever you are instructed to relieve pressure, always follow the Pressure Relief Procedure on page 9.
Air leaks around the piston rod packing nut (46)
If air leak continues, relieve the pressure and continue as follows.
Remove the four nuts (37) and lockwashers (36) holding the support beam (3) to the rod (68), and remove the support beam.
Screw the packing nut (46) out of the housing (70) and slide it up off the rod (68).
Remove the bearing (49), female gland (42), packings (47), male gland (43) and spring (44) and slide them up off the rod (68).
Inspect the parts for wear or damage. Replace as necessary.
Slide the spring (44) and male gland (43) onto the rod (68). Lubricate the packings (47) and slide them onto the rod one at a time, with the lips facing down.
Slide the female gland (42) onto the rod and push all of the packings into the housing (70). Slide the bearing (49) onto the rod.
Wipers Replacement
Raise the wiper plate up out of the drum. Remove the drum from the base. Wipe the fluid off the wiper plate.
Separate the wiper joint (A) and bend back the strapping (65) covering the clamp setscrew (B). Loosen the setscrew, pull the end of the strapping through the clamp (72) and remove the wiper.
Slide the strapping (65) through the new wiper (59 or 60). Slide the clamp (72) onto the new strapping and bend the strapping back approximately 3 in. (76 mm). Insert the strapping through the clamp a second time.
Install the wipers on the wiper plate. Position the wipers so that their joints (A) are 180° apart.
Grip the strapping (65) with the tool (C) as shown. With your thumb on the gripper lever (E), turn the tool handle (F) clockwise to apply tension.
Continue turning the tool handle until you see the strapping stop moving through the clamp (72). Stop turning the handle.
Tighten the setscrew (B) with a wrench (G). Pull the cutting handle (D) to cut. Remove the tool (C). Bend the strapping back over the clamp (72).
Pound the wiper all the way around with a rubber mallet until the joints (A) are butted tightly together.
Sign off on the wipers replacement
Parts for Graco Air-Powered Ram 253017
Access the parts list for your equipment in MaintainX.
Adapter, Union; 1/8 Npt(M) X 1/4 Npsm(F)
113915
Air Control Valve Assy
113896
Beam, Support
167646
Housing, Packing
176630
Screw, Square Hd Cup Point; 3/8–16 X 1 In. (25.4 Mm) Long
100672
Adapter, Union; 1/8 Npt(M) X 1/4 Npsm(F)
113915
Air Control Valve Assy
113896
Beam, Support
167646
Housing, Packing
176630
Screw, Square Hd Cup Point; 3/8–16 X 1 In. (25.4 Mm) Long
100672
Adapter, Union; 1/8 Npt(M) X 1/4 Npsm(F)
113915
Air Control Valve Assy
113896
Beam, Support
167646
Housing, Packing
176630
Screw, Square Hd Cup Point; 3/8–16 X 1 In. (25.4 Mm) Long
100672
Unlock efficiency
with MaintainX CoPilot
MaintainX CoPilot is your expert colleague, on call 24/7, helping your team find the answers they need to keep equipment running.
Reduce Unplanned Downtime
Ensure your team follows consistent procedures to minimize equipment failures and costly delays.
Maximize Asset Availability
Keep your assets running longer and more reliably, with standardized maintenance workflows from OEM manuals.
Lower Maintenance Costs
Turn any technician into an expert to streamline operations, maintain more assets, and reduce overall costs.
Thousands of companies manage their assets with MaintainX

'%3e%3cpath%20fill='url(%23b)'%20d='M66.008%2080.068c-5.084-.786-9.763-3.834-12.442-8.68a16.942%2016.942%200%200%201-1.87-5.18c1.096.19%202.203.476%203.298.87%206.525%202.333%2010.836%207.68%2011.014%2012.99ZM51.47%2061.576c.488-5.524%203.62-10.716%208.847-13.597a17.132%2017.132%200%200%201%2011.335-1.882c-.798%208.145-7.43%2014.848-16.038%2015.599-1.417.119-2.799.07-4.144-.12Zm28.564-11.478a17.513%2017.513%200%200%201%203.727%204.62c4.608%208.335%201.584%2018.813-6.75%2023.409a16.988%2016.988%200%200%201-4.359%201.679%2019.624%2019.624%200%200%201-3.977-12.776c.346-7.561%204.942-13.931%2011.36-16.932Z'/%3e%3cpath%20fill='%23110F0D'%20fill-rule='evenodd'%20d='M142.831%2048.324h4.977V77.03h-4.977V48.324Zm27.278%2013.002c.322%201.048.453%202.263.453%203.62v12.073h-4.787V66.208c0-.75-.047-1.572-.154-2.143-.453-2.382-1.822-3.572-4.215-3.572-2.31%200-3.882%201.274-4.43%203.476-.143.596-.226%201.405-.226%202.25v10.8h-4.787V56.623h4.477v2.989c1.536-2.5%203.906-3.43%206.371-3.43%203.488%200%206.263%201.68%207.298%205.144Zm24.636%207.323c0%203.882-2.358%206.525-5.763%207.727-1.298.453-2.632.643-4.62.643h-10.169V48.324h9.085c1.691%200%203.156.143%204.049.38%203.465.93%205.727%203.68%205.727%207.335%200%202.441-.81%204.156-2.762%205.644%202.905%201.417%204.453%203.727%204.453%206.966Zm-15.634-8.656h4.584c1.024%200%201.917-.143%202.536-.417%201.215-.548%201.905-1.608%201.905-3.167%200-1.548-.643-2.572-1.845-3.132-.691-.31-1.762-.452-2.763-.452h-4.417v7.168Zm10.716%208.465c0-1.536-.893-3.37-3.227-3.893-.428-.095-1.036-.143-1.571-.143h-5.918v8.085h5.501c.56%200%201.429-.048%201.953-.167%201.94-.453%203.262-1.846%203.262-3.882Zm47.747-11.847-8.097%2020.408h-4.429l-8.109-20.408h5.191l5.192%2014.574%205.108-14.574h5.144Zm-20.218%2010.002c0%20.69-.036%201.262-.155%201.94h-15.943c.631%202.87%202.714%204.728%205.882%204.728%202.131%200%203.607-.882%204.703-2.525h4.87c-1.762%204.144-5.204%206.692-9.657%206.692-6.084%200-10.537-4.858-10.537-10.49%200-6.108%204.524-10.776%2010.335-10.776%206.239%200%2010.442%204.954%2010.502%2010.43Zm-4.763-1.405c-.333-2.846-2.643-4.858-5.691-4.858-2.894%200-5.287%201.929-5.621%204.858h11.312Zm-72.667%203.44c0%204.787-3.287%208.371-9.419%208.371H119.363V64.66c-1.917.274-3.87.69-5.811%201.238l4.537%2011.121h-5.418l-3.596-9.585c-5.144%202.084-10.085%205.216-14.217%209.585h-4.786L101.8%2048.312h4.56l5.68%2013.883a44.112%2044.112%200%200%201%207.323-1.774V48.312h9.084c1.703%200%203.156.143%204.061.393%203.453.929%205.727%203.667%205.727%207.323%200%201.917-.738%204.179-2.81%205.691%203.06%201.56%204.501%204.025%204.501%206.93Zm-15.634-8.667a62.664%2062.664%200%200%201%202.06-.036c1.703.012%203.239.131%204.608.37%201.441-.549%202.357-1.727%202.357-3.537%200-1.941-.881-3.144-2.488-3.667-.548-.18-1.358-.286-2.322-.286h-4.215v7.156Zm-16.55%203.905-3.715-9.894-6.394%2016.502c2.833-2.595%206.263-4.858%2010.109-6.608Zm27.254%204.74c0-2.775-3.131-4.347-8.513-4.418-.715%200-1.441.011-2.191.047v8.252h5.918c2.548%200%204.786-1.37%204.786-3.882Z'%20clip-rule='evenodd'/%3e%3c/g%3e%3cdefs%3e%3clinearGradient%20id='b'%20x1='51.47'%20x2='85.916'%20y1='62.946'%20y2='62.946'%20gradientUnits='userSpaceOnUse'%3e%3cstop%20stop-color='%23CD9F28'/%3e%3cstop%20offset='1'%20stop-color='%23ECD80B'/%3e%3c/linearGradient%3e%3cclipPath%20id='a'%3e%3cpath%20fill='%23fff'%20d='M51.47%2045.728h186.104V80.14H51.47z'/%3e%3c/clipPath%3e%3c/defs%3e%3c/svg%3e)


More from Graco


Explore Other Assets


© 2026 MaintainX. All rights reserved.