


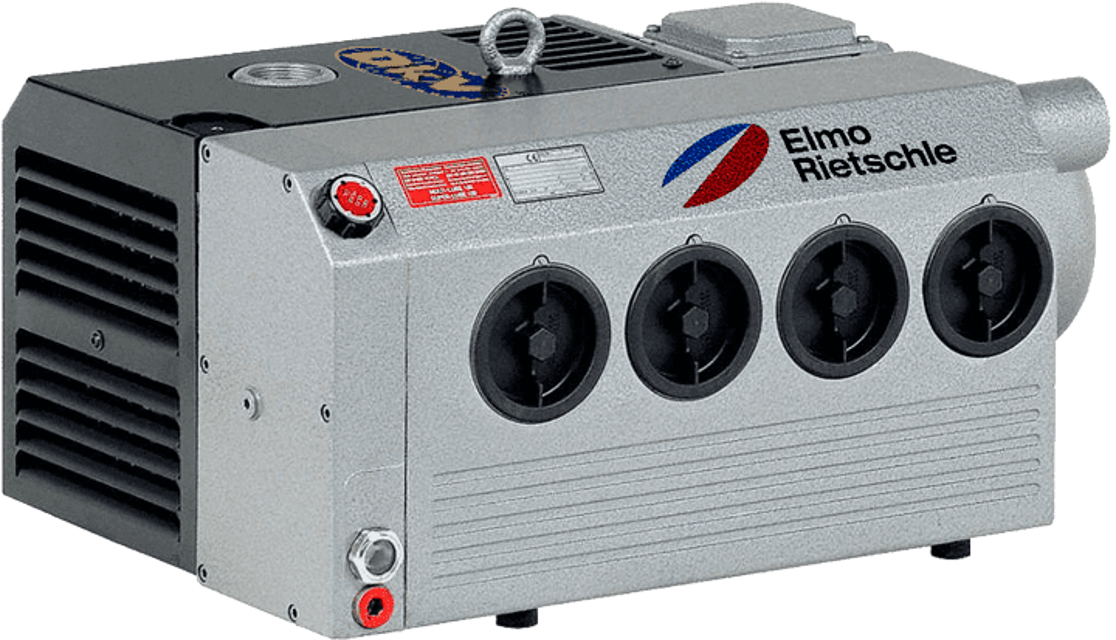
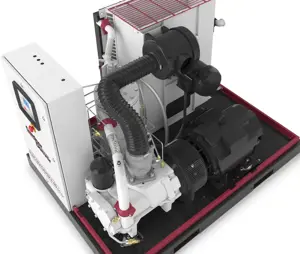
Gardner Denver Vacuum Pump VC 200
Need answers fast?
Explore the manual using AI.
Turn manuals into instant answers
with your AI-powered assistantTurn manuals into instant answers
with your AI-powered assistant
Manual for Gardner Denver Vacuum Pump VC 200
Complete asset maintenance, one click away
Get instant access to all the maintenance information you need. Empower technicians to perform preventive maintenance with asset packages, ready to use right out of the box.

Documents & Manuals
Find all the essential guides in one place.
 Tensioning Guide
- Belt-diagram
- C-120 pulleys
+ 13 more

Work Order Templates
Pre-built workflows to keep your asset running smoothly.
- Daily Electrical System Inspection
- Replace Roller and Pulley
- Install Engine B-120
+ 29 more

Procedures
Integrate maintenance plans directly into your work orders.
- Motion Industries
- Applied Industrial Technologies
- Electrical Brothers
+ 5 more

Parts
Access the parts list for your equipment in MaintainX.
- Drive Motor
- B2 Rollers
- Tensioning System
+ 40 more
Gardner Denver Vacuum Pump VC 200
Create an account to install this asset package.
Maintenance Plans for Gardner Denver Vacuum Pump Model VC 200
Integrate maintenance plans directly into your work orders in MaintainX.
1 Yearly Vacuum Pump Maintenance
Check for coupling wear.
CAUTION: Defective coupling sprocket. Defective sprockets may lead to the rotor shaft breaking.
Switch off the motor and ensure it cannot be switched on again.
Undo the screws on the motor flange.
Remove the coupling half on the motor side and the motor flange axially and suspend with a lifting device.
Check if the sprocket is damaged or worn. If so, replace it.
Check the fan for damage from time to time and replace if necessary.
NOTICE: Frequent starting up and high ambient temperature. The service life of the sprocket is reduced as a result of this.
Re-assemble in reverse order.

500 Hourly Vacuum Pump Maintenance
NOTICE: Always change the oil when the machine is at operating temperature and in an atmospherically ventilated area. If it is not completely emptied the amount that can be refilled is reduced.
The waste oil must be disposed of in compliance with the local environmental protection regulations.
If you are going to use another oil type, empty the oil removing device housing and oil cooler completely.
Enter the current operating hours of the vacuum pump
Is the oil level at the upper edge of the sight glass?
Select the type of oil used
First oil change after 500 hours of operation. Subsequent oil changes after 500-2000 hours of operation.
Reduce the change intervals accordingly depending on how contaminated the discharged medium is.
Only vacuum pump oils as per DIN 51506-VDL, ISO 6743-3 DVA and DVC or a synthetic oil released by Elmo Rietschle may be used.
2000 Hourly Vacuum Pump Maintenance
WARNING: Heavily contaminated air oil removing devices lead to increased pump temperatures and in extreme cases may cause the lubricating oil to ignite spontaneously.
Check if the oil separator elements are contaminated by dust particles
Replace these components every 2000 operating hours or when the filter resistance is 0.7 bar because it is not possible to clean them.
Enter the current filter resistance
Reduce the change intervals accordingly depending on how contaminated the discharged medium is.
Undo the air oil removers with a ring spanner rotating counter clockwise.
Insert new air oil removers with the open lock symbol with the arrow on the insert and fix turning clockwise.
Sign off on the vacuum pump maintenance
1 Daily Vacuum Pump Maintenance
Warning: Always change the oil when the machine is at operating temperature and in an atmospherically ventilated area.
Check the oil level.
Notice: The waste oil must be disposed of in compliance with the local environmental protection regulations.
If you are going to use another oil type, empty the oil removing device housing and oil cooler completely.
The oil level must be checked at least once a day, if necessary top the oil up to the upper edge of the sight glass.
First oil change after 500 hours of operation. Subsequent oil changes after 500-2000 hours of operation.
Reduce the change intervals accordingly depending on how contaminated the discharged medium is.
Only vacuum pump oils as per DIN 51506-VDL, ISO 6743-3 DVA and DVC or a synthetic oil released by Elmo Rietschle may be used.
The viscosity of the oil must comply with ISO VG 100 as per DIN 51519.
1 Monthly Vacuum Pump Maintenance
Check the pipes and screws for leaks and to ensure they are seated properly and if necessary seal again or tighten up.
Check the terminal box and cable inlet holes for leaks and if necessary re-seal.
Clean the ventilation slots on the machine and the motor cooling ribs.
Sign off on the vacuum pump maintenance
Unlock efficiency
with MaintainX CoPilot
MaintainX CoPilot is your expert colleague, on call 24/7, helping your team find the answers they need to keep equipment running.
Reduce Unplanned Downtime
Ensure your team follows consistent procedures to minimize equipment failures and costly delays.
Maximize Asset Availability
Keep your assets running longer and more reliably, with standardized maintenance workflows from OEM manuals.
Lower Maintenance Costs
Turn any technician into an expert to streamline operations, maintain more assets, and reduce overall costs.
Thousands of companies manage their assets with MaintainX

'%3e%3cpath%20fill='url(%23b)'%20d='M66.008%2080.068c-5.084-.786-9.763-3.834-12.442-8.68a16.942%2016.942%200%200%201-1.87-5.18c1.096.19%202.203.476%203.298.87%206.525%202.333%2010.836%207.68%2011.014%2012.99ZM51.47%2061.576c.488-5.524%203.62-10.716%208.847-13.597a17.132%2017.132%200%200%201%2011.335-1.882c-.798%208.145-7.43%2014.848-16.038%2015.599-1.417.119-2.799.07-4.144-.12Zm28.564-11.478a17.513%2017.513%200%200%201%203.727%204.62c4.608%208.335%201.584%2018.813-6.75%2023.409a16.988%2016.988%200%200%201-4.359%201.679%2019.624%2019.624%200%200%201-3.977-12.776c.346-7.561%204.942-13.931%2011.36-16.932Z'/%3e%3cpath%20fill='%23110F0D'%20fill-rule='evenodd'%20d='M142.831%2048.324h4.977V77.03h-4.977V48.324Zm27.278%2013.002c.322%201.048.453%202.263.453%203.62v12.073h-4.787V66.208c0-.75-.047-1.572-.154-2.143-.453-2.382-1.822-3.572-4.215-3.572-2.31%200-3.882%201.274-4.43%203.476-.143.596-.226%201.405-.226%202.25v10.8h-4.787V56.623h4.477v2.989c1.536-2.5%203.906-3.43%206.371-3.43%203.488%200%206.263%201.68%207.298%205.144Zm24.636%207.323c0%203.882-2.358%206.525-5.763%207.727-1.298.453-2.632.643-4.62.643h-10.169V48.324h9.085c1.691%200%203.156.143%204.049.38%203.465.93%205.727%203.68%205.727%207.335%200%202.441-.81%204.156-2.762%205.644%202.905%201.417%204.453%203.727%204.453%206.966Zm-15.634-8.656h4.584c1.024%200%201.917-.143%202.536-.417%201.215-.548%201.905-1.608%201.905-3.167%200-1.548-.643-2.572-1.845-3.132-.691-.31-1.762-.452-2.763-.452h-4.417v7.168Zm10.716%208.465c0-1.536-.893-3.37-3.227-3.893-.428-.095-1.036-.143-1.571-.143h-5.918v8.085h5.501c.56%200%201.429-.048%201.953-.167%201.94-.453%203.262-1.846%203.262-3.882Zm47.747-11.847-8.097%2020.408h-4.429l-8.109-20.408h5.191l5.192%2014.574%205.108-14.574h5.144Zm-20.218%2010.002c0%20.69-.036%201.262-.155%201.94h-15.943c.631%202.87%202.714%204.728%205.882%204.728%202.131%200%203.607-.882%204.703-2.525h4.87c-1.762%204.144-5.204%206.692-9.657%206.692-6.084%200-10.537-4.858-10.537-10.49%200-6.108%204.524-10.776%2010.335-10.776%206.239%200%2010.442%204.954%2010.502%2010.43Zm-4.763-1.405c-.333-2.846-2.643-4.858-5.691-4.858-2.894%200-5.287%201.929-5.621%204.858h11.312Zm-72.667%203.44c0%204.787-3.287%208.371-9.419%208.371H119.363V64.66c-1.917.274-3.87.69-5.811%201.238l4.537%2011.121h-5.418l-3.596-9.585c-5.144%202.084-10.085%205.216-14.217%209.585h-4.786L101.8%2048.312h4.56l5.68%2013.883a44.112%2044.112%200%200%201%207.323-1.774V48.312h9.084c1.703%200%203.156.143%204.061.393%203.453.929%205.727%203.667%205.727%207.323%200%201.917-.738%204.179-2.81%205.691%203.06%201.56%204.501%204.025%204.501%206.93Zm-15.634-8.667a62.664%2062.664%200%200%201%202.06-.036c1.703.012%203.239.131%204.608.37%201.441-.549%202.357-1.727%202.357-3.537%200-1.941-.881-3.144-2.488-3.667-.548-.18-1.358-.286-2.322-.286h-4.215v7.156Zm-16.55%203.905-3.715-9.894-6.394%2016.502c2.833-2.595%206.263-4.858%2010.109-6.608Zm27.254%204.74c0-2.775-3.131-4.347-8.513-4.418-.715%200-1.441.011-2.191.047v8.252h5.918c2.548%200%204.786-1.37%204.786-3.882Z'%20clip-rule='evenodd'/%3e%3c/g%3e%3cdefs%3e%3clinearGradient%20id='b'%20x1='51.47'%20x2='85.916'%20y1='62.946'%20y2='62.946'%20gradientUnits='userSpaceOnUse'%3e%3cstop%20stop-color='%23CD9F28'/%3e%3cstop%20offset='1'%20stop-color='%23ECD80B'/%3e%3c/linearGradient%3e%3cclipPath%20id='a'%3e%3cpath%20fill='%23fff'%20d='M51.47%2045.728h186.104V80.14H51.47z'/%3e%3c/clipPath%3e%3c/defs%3e%3c/svg%3e)


More from Gardner Denver


Explore Other Assets


© 2026 MaintainX. All rights reserved.