


Gardner Denver Compressor EBQ99FO8
Need answers fast?
Explore the manual using AI.
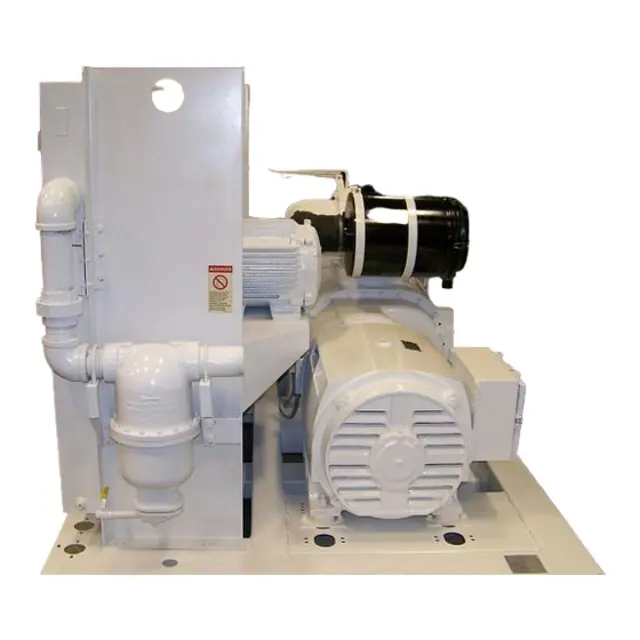
The Gardner Denver Compressor EBQ99FO8 is a robust industrial compressor designed for high efficiency and reliability. This model is ideal for various applications, providing consistent performance and durability in demanding environments. Optimize your operations with this trusted OEM solution.
Turn manuals into instant answers
with your AI-powered assistantTurn manuals into instant answers
with your AI-powered assistant
Manual for Gardner Denver Compressor EBQ99FO8
Complete asset maintenance, one click away
Get instant access to all the maintenance information you need. Empower technicians to perform preventive maintenance with asset packages, ready to use right out of the box.

Documents & Manuals
Find all the essential guides in one place.
 Tensioning Guide
- Belt-diagram
- C-120 pulleys
+ 13 more

Work Order Templates
Pre-built workflows to keep your asset running smoothly.
- Daily Electrical System Inspection
- Replace Roller and Pulley
- Install Engine B-120
+ 29 more

Procedures
Integrate maintenance plans directly into your work orders.
- Motion Industries
- Applied Industrial Technologies
- Electrical Brothers
+ 5 more

Parts
Access the parts list for your equipment in MaintainX.
- Drive Motor
- B2 Rollers
- Tensioning System
+ 40 more
Gardner Denver Compressor EBQ99FO8
Create an account to install this asset package.
Maintenance Plans for Gardner Denver Compressor Model EBQ99FO8
Integrate maintenance plans directly into your work orders in MaintainX.
Filter Element Replacement
Number of cleanings performed on the element
Visual inspection: Any rupture, crack or pin hole in the pleated media?
Pressure drop through the filter with a freshly cleaned element
Is the pressure drop below three (3) inches (76 mm) of water with the compressor running at full load?
Sign off on the filter element replacement

Inlet Tube Cleaning
Inspect the inlet screen and tube for dirt accumulation
Clean the tube when required by ramming a clean dry cloth through the tube
Wipe the inside of the filter body to remove any dirt falling from the inlet tube before reinstalling the element
Sign off on the inlet tube cleaning
50 Hour Air Filter Cleaning
Warning: Ensure the machine is turned off and disconnected from power source before starting the procedure
Remove the wingnut and pull out the filter element
Visually inspect the element. If cleaning is not necessary, reinstall the filter element
Wash the element by soaking about 15 minutes in warm water with a mild nonsudsing detergent. Rinse the element thoroughly with clean water; a hose may be used if the water pressure does not exceed 40 psig (2.8 Bars)
Inspect the element for ruptures or cracks in the pleated media; replace the element if any are found. Inspect the gasket on the bottom (outlet end) of the element; replace the entire element if the gasket is damaged. A spare element will keep down time to a minimum
Allow the element to air dry COMPLETELY. Do not expose the element to heat over 150 F (66 C). Install the element in the filter body and fasten securely with the wing nut
Sign off on the air filter cleaning
125 Hour Maintenance
Check for dirt accumulation on oil/aftercooler core faces and the cooling fan
If cleaning is required, clean the exterior fin surfaces of the cores by blowing compressed air carrying a nonflammable safety solvent in a direction opposite that of the cooling fan air flow
Change the oil filter element every 1000 Hour
Change the compressor lubricant every 4000 Hour
Check the relief valve for proper operation every 1 Year
Regrease electric motor after one– or two–shift operation every 18 Month
Regrease electric motor after one– or two–shift operation every 12 Month
Regrease electric motor after continous operation every 9 Month
Regrease electric motor after continous operation every 6 Month
Compressor Oil System Check
The following readings are based on ambient temperature of 80 F (27 C) for air–cooled oil cooler and 80 F inlet water on water–cooled oil cooler, with the system in good condition
Compressor should be at operating temperature at the time of checks
One–half hour of loaded operation is usually sufficient to reach level–out operating temperatures
Enter the ambient temperature
Is the compressor at operating temperature?
Enter the time of loaded operation
Has the compressor reached level-out operating temperatures?
Sign off on the compressor oil system check
Parts for Gardner Denver Compressor EBQ99FO8
Access the parts list for your equipment in MaintainX.
Kit
EAQ68330
Oil Stop Valve
90AR243
Control Group
200ECM4002
Check Valve
90J113
Kit
EAQ68330
Oil Stop Valve
90AR243
Control Group
200ECM4002
Check Valve
90J113
Kit
EAQ68330
Oil Stop Valve
90AR243
Control Group
200ECM4002
Check Valve
90J113
Unlock efficiency
with MaintainX CoPilot
MaintainX CoPilot is your expert colleague, on call 24/7, helping your team find the answers they need to keep equipment running.
Reduce Unplanned Downtime
Ensure your team follows consistent procedures to minimize equipment failures and costly delays.
Maximize Asset Availability
Keep your assets running longer and more reliably, with standardized maintenance workflows from OEM manuals.
Lower Maintenance Costs
Turn any technician into an expert to streamline operations, maintain more assets, and reduce overall costs.
Thousands of companies manage their assets with MaintainX

'%3e%3cpath%20fill='url(%23b)'%20d='M66.008%2080.068c-5.084-.786-9.763-3.834-12.442-8.68a16.942%2016.942%200%200%201-1.87-5.18c1.096.19%202.203.476%203.298.87%206.525%202.333%2010.836%207.68%2011.014%2012.99ZM51.47%2061.576c.488-5.524%203.62-10.716%208.847-13.597a17.132%2017.132%200%200%201%2011.335-1.882c-.798%208.145-7.43%2014.848-16.038%2015.599-1.417.119-2.799.07-4.144-.12Zm28.564-11.478a17.513%2017.513%200%200%201%203.727%204.62c4.608%208.335%201.584%2018.813-6.75%2023.409a16.988%2016.988%200%200%201-4.359%201.679%2019.624%2019.624%200%200%201-3.977-12.776c.346-7.561%204.942-13.931%2011.36-16.932Z'/%3e%3cpath%20fill='%23110F0D'%20fill-rule='evenodd'%20d='M142.831%2048.324h4.977V77.03h-4.977V48.324Zm27.278%2013.002c.322%201.048.453%202.263.453%203.62v12.073h-4.787V66.208c0-.75-.047-1.572-.154-2.143-.453-2.382-1.822-3.572-4.215-3.572-2.31%200-3.882%201.274-4.43%203.476-.143.596-.226%201.405-.226%202.25v10.8h-4.787V56.623h4.477v2.989c1.536-2.5%203.906-3.43%206.371-3.43%203.488%200%206.263%201.68%207.298%205.144Zm24.636%207.323c0%203.882-2.358%206.525-5.763%207.727-1.298.453-2.632.643-4.62.643h-10.169V48.324h9.085c1.691%200%203.156.143%204.049.38%203.465.93%205.727%203.68%205.727%207.335%200%202.441-.81%204.156-2.762%205.644%202.905%201.417%204.453%203.727%204.453%206.966Zm-15.634-8.656h4.584c1.024%200%201.917-.143%202.536-.417%201.215-.548%201.905-1.608%201.905-3.167%200-1.548-.643-2.572-1.845-3.132-.691-.31-1.762-.452-2.763-.452h-4.417v7.168Zm10.716%208.465c0-1.536-.893-3.37-3.227-3.893-.428-.095-1.036-.143-1.571-.143h-5.918v8.085h5.501c.56%200%201.429-.048%201.953-.167%201.94-.453%203.262-1.846%203.262-3.882Zm47.747-11.847-8.097%2020.408h-4.429l-8.109-20.408h5.191l5.192%2014.574%205.108-14.574h5.144Zm-20.218%2010.002c0%20.69-.036%201.262-.155%201.94h-15.943c.631%202.87%202.714%204.728%205.882%204.728%202.131%200%203.607-.882%204.703-2.525h4.87c-1.762%204.144-5.204%206.692-9.657%206.692-6.084%200-10.537-4.858-10.537-10.49%200-6.108%204.524-10.776%2010.335-10.776%206.239%200%2010.442%204.954%2010.502%2010.43Zm-4.763-1.405c-.333-2.846-2.643-4.858-5.691-4.858-2.894%200-5.287%201.929-5.621%204.858h11.312Zm-72.667%203.44c0%204.787-3.287%208.371-9.419%208.371H119.363V64.66c-1.917.274-3.87.69-5.811%201.238l4.537%2011.121h-5.418l-3.596-9.585c-5.144%202.084-10.085%205.216-14.217%209.585h-4.786L101.8%2048.312h4.56l5.68%2013.883a44.112%2044.112%200%200%201%207.323-1.774V48.312h9.084c1.703%200%203.156.143%204.061.393%203.453.929%205.727%203.667%205.727%207.323%200%201.917-.738%204.179-2.81%205.691%203.06%201.56%204.501%204.025%204.501%206.93Zm-15.634-8.667a62.664%2062.664%200%200%201%202.06-.036c1.703.012%203.239.131%204.608.37%201.441-.549%202.357-1.727%202.357-3.537%200-1.941-.881-3.144-2.488-3.667-.548-.18-1.358-.286-2.322-.286h-4.215v7.156Zm-16.55%203.905-3.715-9.894-6.394%2016.502c2.833-2.595%206.263-4.858%2010.109-6.608Zm27.254%204.74c0-2.775-3.131-4.347-8.513-4.418-.715%200-1.441.011-2.191.047v8.252h5.918c2.548%200%204.786-1.37%204.786-3.882Z'%20clip-rule='evenodd'/%3e%3c/g%3e%3cdefs%3e%3clinearGradient%20id='b'%20x1='51.47'%20x2='85.916'%20y1='62.946'%20y2='62.946'%20gradientUnits='userSpaceOnUse'%3e%3cstop%20stop-color='%23CD9F28'/%3e%3cstop%20offset='1'%20stop-color='%23ECD80B'/%3e%3c/linearGradient%3e%3cclipPath%20id='a'%3e%3cpath%20fill='%23fff'%20d='M51.47%2045.728h186.104V80.14H51.47z'/%3e%3c/clipPath%3e%3c/defs%3e%3c/svg%3e)


More from Gardner Denver

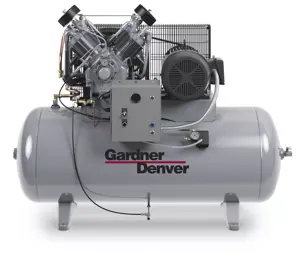


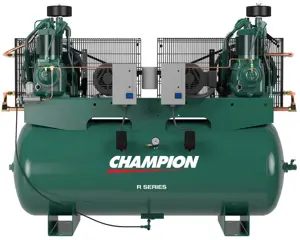

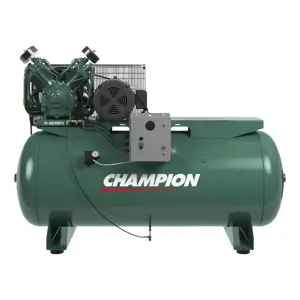


Explore Other Assets


© 2026 MaintainX. All rights reserved.