


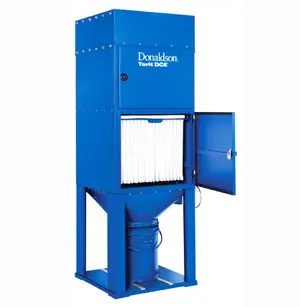
Donaldson Torit Dust Collector UMA 450V
Need answers fast?
Explore the manual using AI.

Turn manuals into instant answers
with your AI-powered assistantTurn manuals into instant answers
with your AI-powered assistant
Manual for Donaldson Torit Dust Collector UMA 450V
Complete asset maintenance, one click away
Get instant access to all the maintenance information you need. Empower technicians to perform preventive maintenance with asset packages, ready to use right out of the box.

Documents & Manuals
Find all the essential guides in one place.
 Tensioning Guide
- Belt-diagram
- C-120 pulleys
+ 13 more

Work Order Templates
Pre-built workflows to keep your asset running smoothly.
- Daily Electrical System Inspection
- Replace Roller and Pulley
- Install Engine B-120
+ 29 more

Procedures
Integrate maintenance plans directly into your work orders.
- Motion Industries
- Applied Industrial Technologies
- Electrical Brothers
+ 5 more

Parts
Access the parts list for your equipment in MaintainX.
- Drive Motor
- B2 Rollers
- Tensioning System
+ 40 more
Donaldson Torit Dust Collector UMA 450V
Create an account to install this asset package.
Maintenance Plans for Donaldson Torit Dust Collector Model UMA 450V
Integrate maintenance plans directly into your work orders in MaintainX.
Absolute Filter Replacement
Warning: Ensure you are wearing appropriate PPE before starting the procedure.
Open secondary/absolute filter door.
UMA 40MM – Lift bar to release sealing mechanism.
UMA 100-450 – Undo clamping nuts or clips as appropriate and remove retaining mesh or frame.
UMA 750 – Undo clamping nuts sufficient to allow element removal.
Remove used element, place it directly into a plastic bag and then seal the bag.
Slide the new element into the housing, with the element seal against the secondary/absolute filter seal frame, until it reaches the backstop.
Clamp element in position using the arrangement provided.
Close secondary/absolute filter door.

1 Weekly Dust Collector Maintenance
Pressure drop across the filter assembly
Record the figure in the log book
Pressure drop increased significantly over two or three successive checks?
Check the filter if the pressure drop increased significantly
Pressure drop across the secondary or absolute filter
Change the filter when the pressure drop reaches 100 mm W.G.
Inspect the explosion relief assembly weekly
Ensure the bursting panels are intact and clear of obstruction
Prevent build-up of snow or ice on explosion panels during winter
Dust Collector Inspection
Warning: This inspection requires trained personnel with PPE!
Any abnormal change in pressure differential across the filter assembly?
Enter the filter resistance in mm WG
For UMA 750 collectors, a resistance of 125 to 175 mm WG may be expected.
Is the secondary or absolute filter monitor functioning properly?
General casing integrity check
Door fastener threads lubricated?
Ignition minimising fans are fitted with a lining inside the casing?
Sign off on the dust collector inspection
Filter Assembly Replacement
Filter assembly removal
1 Isolate electrical controls and open fan and filter chamber access doors.
2 Fully slacken the four captive wing-nuts located in the fan chamber, on the top plate of venting type collectors or in the side outlet box.
3 With the aid of a colleague, withdraw the complete filter assembly through the front of the filter chamber.
(Filter bag assembly renewal)
4 Remove wire mesh insert frames from individual filter bags. These should be checked for broken mesh and worn material edgings, especially around the area of any filter bag damage.
5 Detach filter bag assembly from supporting frame.
6 Fit new filter bag assembly into supporting frame, feeding individual filter bags between locating bars, and fold collar over peripheral sealing flange.
7 Prior to fitting wire mesh inserts, any material edgings that need replacing should be fitted around the three edges of the insert that do not have the insert frame joint. The inserts should then be fitted, edging first, into the filter bags.
Fan Assembly Replacement
Fan assembly removal/replacement (UMA 70-750)
Isolate electrical power supply.
1 Open fan access door.
2 On UMA 750 collectors only – Remove door frame centre member, remove mattress support frame from its storage position and remove fork lifting beam.
3 Disconnect electrical cables from terminal box.
4 Remove fan outlet grille cover plate.
5 Remove fan securing bolts.
6 The fan assembly can now be removed using a suitable lifting arrangement.
Renewing fan impeller and/or motor:
Unlock efficiency
with MaintainX CoPilot
MaintainX CoPilot is your expert colleague, on call 24/7, helping your team find the answers they need to keep equipment running.
Reduce Unplanned Downtime
Ensure your team follows consistent procedures to minimize equipment failures and costly delays.
Maximize Asset Availability
Keep your assets running longer and more reliably, with standardized maintenance workflows from OEM manuals.
Lower Maintenance Costs
Turn any technician into an expert to streamline operations, maintain more assets, and reduce overall costs.
Thousands of companies manage their assets with MaintainX

'%3e%3cpath%20fill='url(%23b)'%20d='M66.008%2080.068c-5.084-.786-9.763-3.834-12.442-8.68a16.942%2016.942%200%200%201-1.87-5.18c1.096.19%202.203.476%203.298.87%206.525%202.333%2010.836%207.68%2011.014%2012.99ZM51.47%2061.576c.488-5.524%203.62-10.716%208.847-13.597a17.132%2017.132%200%200%201%2011.335-1.882c-.798%208.145-7.43%2014.848-16.038%2015.599-1.417.119-2.799.07-4.144-.12Zm28.564-11.478a17.513%2017.513%200%200%201%203.727%204.62c4.608%208.335%201.584%2018.813-6.75%2023.409a16.988%2016.988%200%200%201-4.359%201.679%2019.624%2019.624%200%200%201-3.977-12.776c.346-7.561%204.942-13.931%2011.36-16.932Z'/%3e%3cpath%20fill='%23110F0D'%20fill-rule='evenodd'%20d='M142.831%2048.324h4.977V77.03h-4.977V48.324Zm27.278%2013.002c.322%201.048.453%202.263.453%203.62v12.073h-4.787V66.208c0-.75-.047-1.572-.154-2.143-.453-2.382-1.822-3.572-4.215-3.572-2.31%200-3.882%201.274-4.43%203.476-.143.596-.226%201.405-.226%202.25v10.8h-4.787V56.623h4.477v2.989c1.536-2.5%203.906-3.43%206.371-3.43%203.488%200%206.263%201.68%207.298%205.144Zm24.636%207.323c0%203.882-2.358%206.525-5.763%207.727-1.298.453-2.632.643-4.62.643h-10.169V48.324h9.085c1.691%200%203.156.143%204.049.38%203.465.93%205.727%203.68%205.727%207.335%200%202.441-.81%204.156-2.762%205.644%202.905%201.417%204.453%203.727%204.453%206.966Zm-15.634-8.656h4.584c1.024%200%201.917-.143%202.536-.417%201.215-.548%201.905-1.608%201.905-3.167%200-1.548-.643-2.572-1.845-3.132-.691-.31-1.762-.452-2.763-.452h-4.417v7.168Zm10.716%208.465c0-1.536-.893-3.37-3.227-3.893-.428-.095-1.036-.143-1.571-.143h-5.918v8.085h5.501c.56%200%201.429-.048%201.953-.167%201.94-.453%203.262-1.846%203.262-3.882Zm47.747-11.847-8.097%2020.408h-4.429l-8.109-20.408h5.191l5.192%2014.574%205.108-14.574h5.144Zm-20.218%2010.002c0%20.69-.036%201.262-.155%201.94h-15.943c.631%202.87%202.714%204.728%205.882%204.728%202.131%200%203.607-.882%204.703-2.525h4.87c-1.762%204.144-5.204%206.692-9.657%206.692-6.084%200-10.537-4.858-10.537-10.49%200-6.108%204.524-10.776%2010.335-10.776%206.239%200%2010.442%204.954%2010.502%2010.43Zm-4.763-1.405c-.333-2.846-2.643-4.858-5.691-4.858-2.894%200-5.287%201.929-5.621%204.858h11.312Zm-72.667%203.44c0%204.787-3.287%208.371-9.419%208.371H119.363V64.66c-1.917.274-3.87.69-5.811%201.238l4.537%2011.121h-5.418l-3.596-9.585c-5.144%202.084-10.085%205.216-14.217%209.585h-4.786L101.8%2048.312h4.56l5.68%2013.883a44.112%2044.112%200%200%201%207.323-1.774V48.312h9.084c1.703%200%203.156.143%204.061.393%203.453.929%205.727%203.667%205.727%207.323%200%201.917-.738%204.179-2.81%205.691%203.06%201.56%204.501%204.025%204.501%206.93Zm-15.634-8.667a62.664%2062.664%200%200%201%202.06-.036c1.703.012%203.239.131%204.608.37%201.441-.549%202.357-1.727%202.357-3.537%200-1.941-.881-3.144-2.488-3.667-.548-.18-1.358-.286-2.322-.286h-4.215v7.156Zm-16.55%203.905-3.715-9.894-6.394%2016.502c2.833-2.595%206.263-4.858%2010.109-6.608Zm27.254%204.74c0-2.775-3.131-4.347-8.513-4.418-.715%200-1.441.011-2.191.047v8.252h5.918c2.548%200%204.786-1.37%204.786-3.882Z'%20clip-rule='evenodd'/%3e%3c/g%3e%3cdefs%3e%3clinearGradient%20id='b'%20x1='51.47'%20x2='85.916'%20y1='62.946'%20y2='62.946'%20gradientUnits='userSpaceOnUse'%3e%3cstop%20stop-color='%23CD9F28'/%3e%3cstop%20offset='1'%20stop-color='%23ECD80B'/%3e%3c/linearGradient%3e%3cclipPath%20id='a'%3e%3cpath%20fill='%23fff'%20d='M51.47%2045.728h186.104V80.14H51.47z'/%3e%3c/clipPath%3e%3c/defs%3e%3c/svg%3e)


More from Donaldson Torit


Explore Other Assets


© 2026 MaintainX. All rights reserved.