


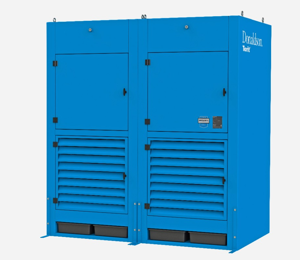
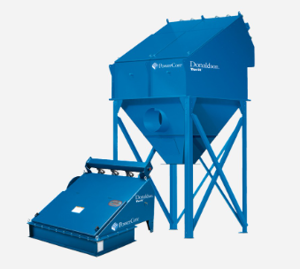
Donaldson Torit Cartridge Dust Collector DWST 6-1
Need answers fast?
Explore the manual using AI.

The Donaldson Torit Cartridge Dust Collector DWST 6-1 is a high-efficiency dust collection system designed for industrial applications. This model effectively captures airborne dust and particulate matter, ensuring a cleaner and safer work environment while maintaining optimal airflow and performance.
Turn manuals into instant answers
with your AI-powered assistantTurn manuals into instant answers
with your AI-powered assistant
Complete asset maintenance, one click away
Get instant access to all the maintenance information you need. Empower technicians to perform preventive maintenance with asset packages, ready to use right out of the box.

Documents & Manuals
Find all the essential guides in one place.
 Tensioning Guide
- Belt-diagram
- C-120 pulleys
+ 13 more

Work Order Templates
Pre-built workflows to keep your asset running smoothly.
- Daily Electrical System Inspection
- Replace Roller and Pulley
- Install Engine B-120
+ 29 more

Procedures
Integrate maintenance plans directly into your work orders.
- Motion Industries
- Applied Industrial Technologies
- Electrical Brothers
+ 5 more

Parts
Access the parts list for your equipment in MaintainX.
- Drive Motor
- B2 Rollers
- Tensioning System
+ 40 more
Donaldson Torit Cartridge Dust Collector DWST 6-1
Create an account to install this asset package.
Maintenance Plans for Donaldson Torit Cartridge Dust Collector Model DWST 6-1
Integrate maintenance plans directly into your work orders in MaintainX.
Dust Drawer Maintenance
Pull each dust drawer from the base of the power module.
Inspect and remove any residual dust from the base of the power module.
Cover the dust drawer to prevent leakage from the drawer during transport, and transport to an appropriate dust disposal location.
Empty the dust from the drawer into an appropriate disposal container.
Return each drawer to the base of the power module, ensuring the drawers are both inserted fully to the back of the power module.
Sign off on the dust drawer maintenance

Filter Replacement
Warning: Wear eye, respiratory, head and other protection equipment suitable for the type of dust.
Warning: Use proper safety and protective equipment when removing contaminants and filters.
Warning: Dirty filters may be heavier than they appear. Use appropriate lifting methods to avoid personal injury and/or property damage.
Warning: Turn power off and lock out all power before performing service or maintenance work.
Warning: Turn compressed air supply OFF, bleed and lock out lines before performing service or maintenance work.
Warning: Do not operate with missing or damaged filters.
Remove filter cartridges by removing the top and bottom access cover. Start with the top covers first.
Tum the knob counter clockwise. Remove access cover.
Break the seal between the filter cartridge and the sealing surface.
Cartridge Dust Collector Check
Warning: Set screws on fan wheels must be properly tightened to avoid severe personal injury and/or property damage.
Monitor the physical condition of the collector and repair or replace any damaged components.
Periodically check the compressed air components and replace compressed air filters.
Monitor pressure drop across filters.
Monitor exhaust.
Monitor dust disposal. Empty the dust drawers at the end of each shift, or more frequently if necessary. Dust drawers should be emptied when they are more than 2/3 full.
Check fan wheel set screws. Set screws should be checked and retightened to 10.5 foot pounds for 3/8-in stainless steel set screws and 25 foot pounds for 1/2-in stainless steel set screws after eight hours of operation and again after 80 hours of operation.
Sign off on the Cartridge Dust Collector Check
Optional Afterfilter Replacement
Loosen the retaining screws and clamping straps and pull the afterfilters out of the frames
Install the new afterfilters with the seal edge towards the power module cabinet. Airflow is from the inside of the plenum to the outside
Position the clamping straps and tighten the wing screws to secure the new afterfilter
Sign off on the afterfilter replacement
Unlock efficiency
with MaintainX CoPilot
MaintainX CoPilot is your expert colleague, on call 24/7, helping your team find the answers they need to keep equipment running.
Reduce Unplanned Downtime
Ensure your team follows consistent procedures to minimize equipment failures and costly delays.
Maximize Asset Availability
Keep your assets running longer and more reliably, with standardized maintenance workflows from OEM manuals.
Lower Maintenance Costs
Turn any technician into an expert to streamline operations, maintain more assets, and reduce overall costs.
Thousands of companies manage their assets with MaintainX

'%3e%3cpath%20fill='url(%23b)'%20d='M66.008%2080.068c-5.084-.786-9.763-3.834-12.442-8.68a16.942%2016.942%200%200%201-1.87-5.18c1.096.19%202.203.476%203.298.87%206.525%202.333%2010.836%207.68%2011.014%2012.99ZM51.47%2061.576c.488-5.524%203.62-10.716%208.847-13.597a17.132%2017.132%200%200%201%2011.335-1.882c-.798%208.145-7.43%2014.848-16.038%2015.599-1.417.119-2.799.07-4.144-.12Zm28.564-11.478a17.513%2017.513%200%200%201%203.727%204.62c4.608%208.335%201.584%2018.813-6.75%2023.409a16.988%2016.988%200%200%201-4.359%201.679%2019.624%2019.624%200%200%201-3.977-12.776c.346-7.561%204.942-13.931%2011.36-16.932Z'/%3e%3cpath%20fill='%23110F0D'%20fill-rule='evenodd'%20d='M142.831%2048.324h4.977V77.03h-4.977V48.324Zm27.278%2013.002c.322%201.048.453%202.263.453%203.62v12.073h-4.787V66.208c0-.75-.047-1.572-.154-2.143-.453-2.382-1.822-3.572-4.215-3.572-2.31%200-3.882%201.274-4.43%203.476-.143.596-.226%201.405-.226%202.25v10.8h-4.787V56.623h4.477v2.989c1.536-2.5%203.906-3.43%206.371-3.43%203.488%200%206.263%201.68%207.298%205.144Zm24.636%207.323c0%203.882-2.358%206.525-5.763%207.727-1.298.453-2.632.643-4.62.643h-10.169V48.324h9.085c1.691%200%203.156.143%204.049.38%203.465.93%205.727%203.68%205.727%207.335%200%202.441-.81%204.156-2.762%205.644%202.905%201.417%204.453%203.727%204.453%206.966Zm-15.634-8.656h4.584c1.024%200%201.917-.143%202.536-.417%201.215-.548%201.905-1.608%201.905-3.167%200-1.548-.643-2.572-1.845-3.132-.691-.31-1.762-.452-2.763-.452h-4.417v7.168Zm10.716%208.465c0-1.536-.893-3.37-3.227-3.893-.428-.095-1.036-.143-1.571-.143h-5.918v8.085h5.501c.56%200%201.429-.048%201.953-.167%201.94-.453%203.262-1.846%203.262-3.882Zm47.747-11.847-8.097%2020.408h-4.429l-8.109-20.408h5.191l5.192%2014.574%205.108-14.574h5.144Zm-20.218%2010.002c0%20.69-.036%201.262-.155%201.94h-15.943c.631%202.87%202.714%204.728%205.882%204.728%202.131%200%203.607-.882%204.703-2.525h4.87c-1.762%204.144-5.204%206.692-9.657%206.692-6.084%200-10.537-4.858-10.537-10.49%200-6.108%204.524-10.776%2010.335-10.776%206.239%200%2010.442%204.954%2010.502%2010.43Zm-4.763-1.405c-.333-2.846-2.643-4.858-5.691-4.858-2.894%200-5.287%201.929-5.621%204.858h11.312Zm-72.667%203.44c0%204.787-3.287%208.371-9.419%208.371H119.363V64.66c-1.917.274-3.87.69-5.811%201.238l4.537%2011.121h-5.418l-3.596-9.585c-5.144%202.084-10.085%205.216-14.217%209.585h-4.786L101.8%2048.312h4.56l5.68%2013.883a44.112%2044.112%200%200%201%207.323-1.774V48.312h9.084c1.703%200%203.156.143%204.061.393%203.453.929%205.727%203.667%205.727%207.323%200%201.917-.738%204.179-2.81%205.691%203.06%201.56%204.501%204.025%204.501%206.93Zm-15.634-8.667a62.664%2062.664%200%200%201%202.06-.036c1.703.012%203.239.131%204.608.37%201.441-.549%202.357-1.727%202.357-3.537%200-1.941-.881-3.144-2.488-3.667-.548-.18-1.358-.286-2.322-.286h-4.215v7.156Zm-16.55%203.905-3.715-9.894-6.394%2016.502c2.833-2.595%206.263-4.858%2010.109-6.608Zm27.254%204.74c0-2.775-3.131-4.347-8.513-4.418-.715%200-1.441.011-2.191.047v8.252h5.918c2.548%200%204.786-1.37%204.786-3.882Z'%20clip-rule='evenodd'/%3e%3c/g%3e%3cdefs%3e%3clinearGradient%20id='b'%20x1='51.47'%20x2='85.916'%20y1='62.946'%20y2='62.946'%20gradientUnits='userSpaceOnUse'%3e%3cstop%20stop-color='%23CD9F28'/%3e%3cstop%20offset='1'%20stop-color='%23ECD80B'/%3e%3c/linearGradient%3e%3cclipPath%20id='a'%3e%3cpath%20fill='%23fff'%20d='M51.47%2045.728h186.104V80.14H51.47z'/%3e%3c/clipPath%3e%3c/defs%3e%3c/svg%3e)


More from Donaldson Torit


Explore Other Assets


© 2026 MaintainX. All rights reserved.