


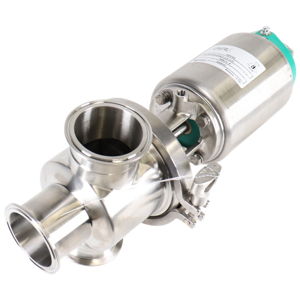
Daikin Split System Air Conditioner FAA71BUV1B
Need answers fast?
Explore the manual using AI.
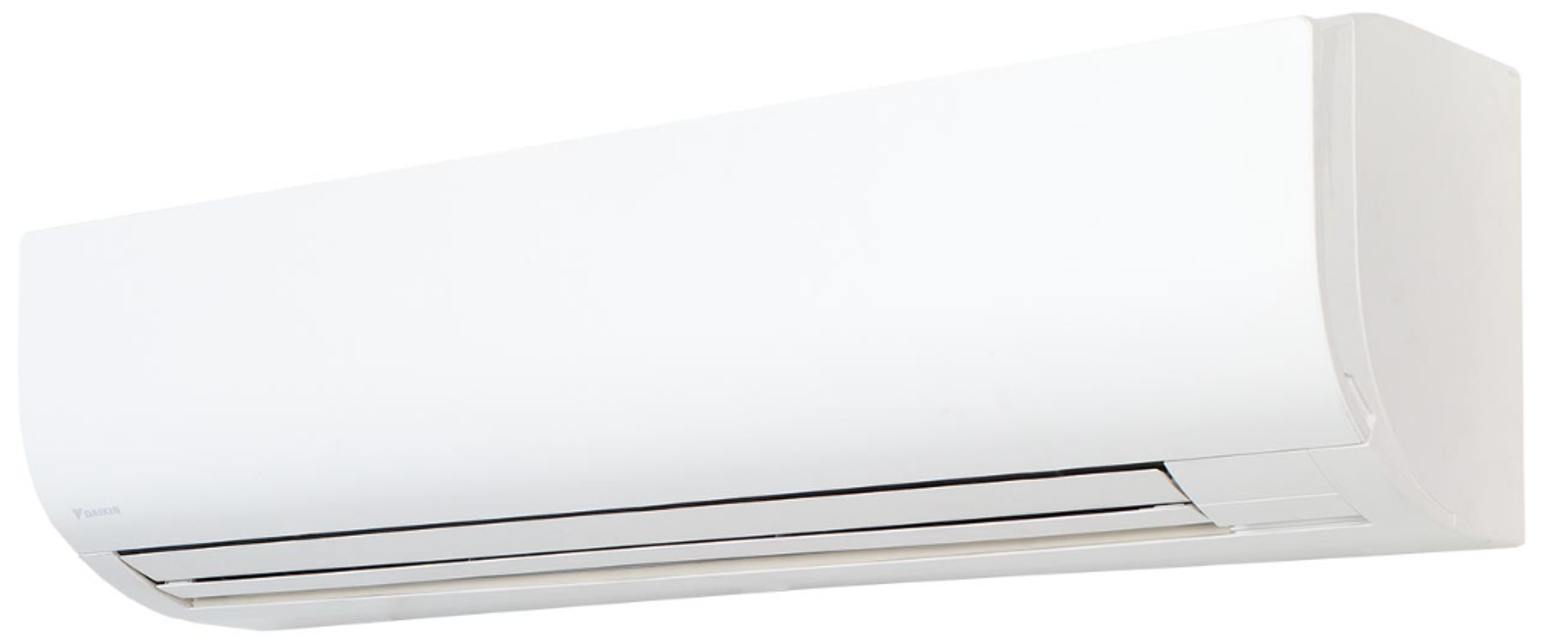
The Daikin Split System Air Conditioner FAA71BUV1B is a high-efficiency cooling solution designed for residential and commercial applications. Known for its reliability and advanced technology, this model ensures optimal comfort and energy savings, making it a preferred choice for climate control.
Turn manuals into instant answers
with your AI-powered assistantTurn manuals into instant answers
with your AI-powered assistant
Manual for Daikin Split System Air Conditioner FAA71BUV1B
Complete asset maintenance, one click away
Get instant access to all the maintenance information you need. Empower technicians to perform preventive maintenance with asset packages, ready to use right out of the box.

Documents & Manuals
Find all the essential guides in one place.
 Tensioning Guide
- Belt-diagram
- C-120 pulleys
+ 13 more

Work Order Templates
Pre-built workflows to keep your asset running smoothly.
- Daily Electrical System Inspection
- Replace Roller and Pulley
- Install Engine B-120
+ 29 more

Procedures
Integrate maintenance plans directly into your work orders.
- Motion Industries
- Applied Industrial Technologies
- Electrical Brothers
+ 5 more

Parts
Access the parts list for your equipment in MaintainX.
- Drive Motor
- B2 Rollers
- Tensioning System
+ 40 more
Daikin Split System Air Conditioner FAA71BUV1B
Create an account to install this asset package.
Maintenance Plans for Daikin Split System Air Conditioner Model FAA71BUV1B
Integrate maintenance plans directly into your work orders in MaintainX.
Pipe Port Cover Removal
INFORMATION: To connect the piping on right-side, right-bottom, left-side or left-bottom, the pipe port cover MUST be removed.
Remove the front grille
Cut off the pipe port cover from inside the front grille using a coping saw
Remove any burrs along the cut section using a half round needle file
NOTICE: Do NOT use nippers to remove the pipe port cover, as this would damage the front grille
Sign off on the pipe port cover removal

Water Leak Check
Warning: Ensure to follow the steps in the correct order
Air filters removed
Amount of water poured in the drain pan
Check for water leaks
Air filters reattached
Sign off on the water leak check
Front Grille Removal
CAUTION: Wear adequate personal protective equipment (protective gloves, safety glasses,…) when installing, maintaining or servicing the system.
Front panel removed
Number of screws removed
Grille clamps removed (only for class 100)
Upper hooks pushed down
Front grille removed without catching the horizontal flaps
Air Filter Cleaning
NOTICE: Do NOT use water of 50°C or higher. Possible consequence: Discoloration and deformation.
When to clean the air filter:
▪ Rule of thumb: Clean every 6 months. If the air in the room is extremely contaminated, increase the cleaning frequency.
▪ Depending on the settings, the user interface can display the "Time to clean filter" notification. Clean the air filter when the notification is displayed.
▪ If the dirt becomes impossible to clean, change the air filter (= optional equipment).
How to clean the air filter:
1 Open the front panel. Hold the front panel by the panel tabs on both sides and open until the panel stops.
2 Remove the air filter. Push up the tab in the center of the air filter slightly then pull the air filter out in a downward direction.
3 Clean the air filter. Use a vacuum cleaner or wash with water. If the air filter is very dirty, use a soft brush and neutral detergent.
Front Panel Cleaning
WARNING: Do NOT let the indoor unit get wet. Possible consequence: Electric shock or fire.
NOTICE
▪ Do NOT use gasoline, benzene, thinner polishing powder or liquid insecticide. Possible consequence: Discoloration and deformation.
▪ Do NOT use water or air of 50°C or higher. Possible consequence: Discoloration and deformation.
You can remove the front panel to clean it.
1 Open the front panel. Hold the front panel by the panel tabs on both sides and open until the panel stops.
2 Remove the front panel by pushing hooks on either side of the front panel towards the side of the unit and remove the panel.
3 Clean the front panel. Wipe it with a soft cloth soaked in water by using only neutral detergent.
4 Wipe panel with a dry soft cloth and let it dry up in the shade.
Unlock efficiency
with MaintainX CoPilot
MaintainX CoPilot is your expert colleague, on call 24/7, helping your team find the answers they need to keep equipment running.
Reduce Unplanned Downtime
Ensure your team follows consistent procedures to minimize equipment failures and costly delays.
Maximize Asset Availability
Keep your assets running longer and more reliably, with standardized maintenance workflows from OEM manuals.
Lower Maintenance Costs
Turn any technician into an expert to streamline operations, maintain more assets, and reduce overall costs.
Thousands of companies manage their assets with MaintainX

'%3e%3cpath%20fill='url(%23b)'%20d='M66.008%2080.068c-5.084-.786-9.763-3.834-12.442-8.68a16.942%2016.942%200%200%201-1.87-5.18c1.096.19%202.203.476%203.298.87%206.525%202.333%2010.836%207.68%2011.014%2012.99ZM51.47%2061.576c.488-5.524%203.62-10.716%208.847-13.597a17.132%2017.132%200%200%201%2011.335-1.882c-.798%208.145-7.43%2014.848-16.038%2015.599-1.417.119-2.799.07-4.144-.12Zm28.564-11.478a17.513%2017.513%200%200%201%203.727%204.62c4.608%208.335%201.584%2018.813-6.75%2023.409a16.988%2016.988%200%200%201-4.359%201.679%2019.624%2019.624%200%200%201-3.977-12.776c.346-7.561%204.942-13.931%2011.36-16.932Z'/%3e%3cpath%20fill='%23110F0D'%20fill-rule='evenodd'%20d='M142.831%2048.324h4.977V77.03h-4.977V48.324Zm27.278%2013.002c.322%201.048.453%202.263.453%203.62v12.073h-4.787V66.208c0-.75-.047-1.572-.154-2.143-.453-2.382-1.822-3.572-4.215-3.572-2.31%200-3.882%201.274-4.43%203.476-.143.596-.226%201.405-.226%202.25v10.8h-4.787V56.623h4.477v2.989c1.536-2.5%203.906-3.43%206.371-3.43%203.488%200%206.263%201.68%207.298%205.144Zm24.636%207.323c0%203.882-2.358%206.525-5.763%207.727-1.298.453-2.632.643-4.62.643h-10.169V48.324h9.085c1.691%200%203.156.143%204.049.38%203.465.93%205.727%203.68%205.727%207.335%200%202.441-.81%204.156-2.762%205.644%202.905%201.417%204.453%203.727%204.453%206.966Zm-15.634-8.656h4.584c1.024%200%201.917-.143%202.536-.417%201.215-.548%201.905-1.608%201.905-3.167%200-1.548-.643-2.572-1.845-3.132-.691-.31-1.762-.452-2.763-.452h-4.417v7.168Zm10.716%208.465c0-1.536-.893-3.37-3.227-3.893-.428-.095-1.036-.143-1.571-.143h-5.918v8.085h5.501c.56%200%201.429-.048%201.953-.167%201.94-.453%203.262-1.846%203.262-3.882Zm47.747-11.847-8.097%2020.408h-4.429l-8.109-20.408h5.191l5.192%2014.574%205.108-14.574h5.144Zm-20.218%2010.002c0%20.69-.036%201.262-.155%201.94h-15.943c.631%202.87%202.714%204.728%205.882%204.728%202.131%200%203.607-.882%204.703-2.525h4.87c-1.762%204.144-5.204%206.692-9.657%206.692-6.084%200-10.537-4.858-10.537-10.49%200-6.108%204.524-10.776%2010.335-10.776%206.239%200%2010.442%204.954%2010.502%2010.43Zm-4.763-1.405c-.333-2.846-2.643-4.858-5.691-4.858-2.894%200-5.287%201.929-5.621%204.858h11.312Zm-72.667%203.44c0%204.787-3.287%208.371-9.419%208.371H119.363V64.66c-1.917.274-3.87.69-5.811%201.238l4.537%2011.121h-5.418l-3.596-9.585c-5.144%202.084-10.085%205.216-14.217%209.585h-4.786L101.8%2048.312h4.56l5.68%2013.883a44.112%2044.112%200%200%201%207.323-1.774V48.312h9.084c1.703%200%203.156.143%204.061.393%203.453.929%205.727%203.667%205.727%207.323%200%201.917-.738%204.179-2.81%205.691%203.06%201.56%204.501%204.025%204.501%206.93Zm-15.634-8.667a62.664%2062.664%200%200%201%202.06-.036c1.703.012%203.239.131%204.608.37%201.441-.549%202.357-1.727%202.357-3.537%200-1.941-.881-3.144-2.488-3.667-.548-.18-1.358-.286-2.322-.286h-4.215v7.156Zm-16.55%203.905-3.715-9.894-6.394%2016.502c2.833-2.595%206.263-4.858%2010.109-6.608Zm27.254%204.74c0-2.775-3.131-4.347-8.513-4.418-.715%200-1.441.011-2.191.047v8.252h5.918c2.548%200%204.786-1.37%204.786-3.882Z'%20clip-rule='evenodd'/%3e%3c/g%3e%3cdefs%3e%3clinearGradient%20id='b'%20x1='51.47'%20x2='85.916'%20y1='62.946'%20y2='62.946'%20gradientUnits='userSpaceOnUse'%3e%3cstop%20stop-color='%23CD9F28'/%3e%3cstop%20offset='1'%20stop-color='%23ECD80B'/%3e%3c/linearGradient%3e%3cclipPath%20id='a'%3e%3cpath%20fill='%23fff'%20d='M51.47%2045.728h186.104V80.14H51.47z'/%3e%3c/clipPath%3e%3c/defs%3e%3c/svg%3e)


More from Daikin


Explore Other Assets


© 2026 MaintainX. All rights reserved.