


Crown Counter Pan Steamer EPXN-5
Need answers fast?
Explore the manual using AI.
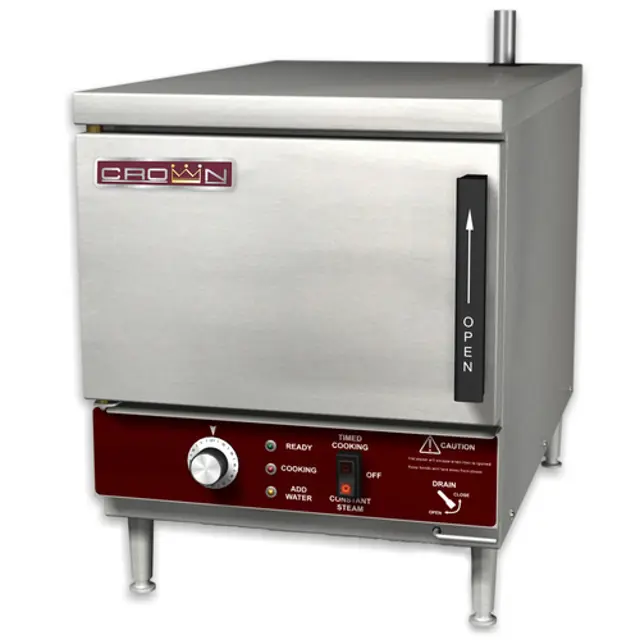
The Crown Counter Pan Steamer EPXN-5 is a high-performance commercial kitchen appliance designed for efficient steaming. With its robust construction and advanced features, this model ensures consistent cooking results, making it ideal for restaurants and food service operations. Optimize your kitchen's productivity with the reliable EPXN-5 from Crown.
Turn manuals into instant answers
with your AI-powered assistantTurn manuals into instant answers
with your AI-powered assistant
Manual for Crown Counter Pan Steamer EPXN-5
Complete asset maintenance, one click away
Get instant access to all the maintenance information you need. Empower technicians to perform preventive maintenance with asset packages, ready to use right out of the box.

Documents & Manuals
Find all the essential guides in one place.
 Tensioning Guide
- Belt-diagram
- C-120 pulleys
+ 13 more

Work Order Templates
Pre-built workflows to keep your asset running smoothly.
- Daily Electrical System Inspection
- Replace Roller and Pulley
- Install Engine B-120
+ 29 more

Procedures
Integrate maintenance plans directly into your work orders.
- Motion Industries
- Applied Industrial Technologies
- Electrical Brothers
+ 5 more

Parts
Access the parts list for your equipment in MaintainX.
- Drive Motor
- B2 Rollers
- Tensioning System
+ 40 more
Crown Counter Pan Steamer EPXN-5
Create an account to install this asset package.
Maintenance Plans for Crown Counter Pan Steamer Model EPXN-5
Integrate maintenance plans directly into your work orders in MaintainX.
Steamer Test
WARNING! The steamer and its parts are hot. Use care when operating, cleaning or servicing the steamer. The cooking compartment contains live steam and hot water. Stay clear while opening the door.
Check that door opens and closes for proper operation.
Inspect the door gasket to ensure there is no damage.
Check without water in the steamer and with 'CONTINUOUS' cooking mode selected, that the 'LOW WATER' indicator and alarm comes on within 10 minutes of a cold start.
Open compartment door and pour in water up to the 'Water Level' mark located at back of compartment.
Select TIMED COOKING mode with the power switch and set the timer to the OFF position.
Close door and wait approximately 10 minutes for the READY indicator to illuminate which will indicate the unit is up to proper operating temperature.
Open the door to verify the cavity has reached cooking temperature. Water in the bottom of the cooking cavity should be between 200 to 210°F.
Set the timer to 5 minutes and close the door to initiate the cooking cycle. The COOKING indicator should illuminate.

1 Daily Steamer Cleaning
WARNING! Disconnect the power supply to the appliance before cleaning or servicing.
WARNING! Never use chlorine or bleach solution for cleaning door gasket. Never use steel wool or other metallic pads to clean the steamer.
Weekly, or more often if necessary, clean the exterior with damp cloth and polish with soft dry cloth. Use a non-abrasive cleaner to remove discolourations.
After each period of daily operation (more frequently as required to maintain cleanliness), the cooker should be thoroughly cleaned by completing the following steps:
Perform SHUTDOWN procedure.
Remove the deflector plate and pan supports by lifting up and off mounting studs and wash with a mild detergent.
When the unit has cooled, use hot soapy water to clean the interior of the steamer and thoroughly rinse and dry all surfaces with a clean dry cloth.
Inspect the drain opening to assure there are no obstructions.
Replace the pan supports and deflector in compartment and leave door ajar.
1 Weekly Steamer Cleaning
CAUTION! Under no circumstances should hardware (or parts) be replaced with a different length, size, or type other than as specified in the parts list. The hardware used in the cooker has been selected or designed specifically for its application, and the use of other hardware may damage the equipment and will void any warranty.
WARNING! Disconnect the power supply to the appliance before cleaning or servicing.
CAUTION! The steamer and its parts are hot. Use care when operating, cleaning or servicing the steamer. The cooking compartment contains live steam. Stay clear when opening door.
Clean exterior with a damp cloth and polish with a soft dry cloth.
Use a non-abrasive cleaner to remove discolourations.
It is NOT RECOMMENDED to use cleaning agents that are corrosive. Use of cleaning agents that contain chloride, acids or salts which are corrosive may cause pitting and corrosion when used over a period of time; this will reduce the life of the appliance. Should pitting or corrosion occur, this is not covered by warranty.
Follow the recommended cleaning instructions. Use a mild detergent, warm water and rinse thoroughly.
WARNING! NEVER SPRAY WATER INTO ELECTRIC CONTROLS OR LOUVRES.
Sign off on the weekly steamer cleaning
Initial Steamer Cleaning
Warning: The steamer and its parts are hot. Use care when operating, cleaning or servicing the steamer. The cooking compartment contains live steam and hot water. Stay clear while opening the door.
Cleaned the protective oils from all surfaces of the steamer
Used a non-corrosive, grease dissolving commercial cleaner
Followed the cleaner manufacturer's directions
Rinsed thoroughly
Wiped dry with a soft clean cloth
Sign off on the initial steamer cleaning
1 Weekly Scale Deposits Cleaning
WARNING! Disconnect the power supply to the appliance before cleaning or servicing.
Your steamer comes with a sixteen weeks supply of Middleby QuickClean Scale Control product (16 oz. container).
QuickClean is a safe and efficient way to maintain a scale-free environment for your steamer.
Weekly descaling will enhance the life of your steamer.
Scale build up can damage your steamer and expose you to costly repairs.
Failure or malfunction of this appliance due to scale build up is not covered under warranty.
Read and follow instructions on the QuickClean bottle.
To order QuickClean or if you have questions about this product call 480-591-4073.
DESCALING PROCEDURE: WARNING! Read and follow instructions on the QuickClean bottle.
Unlock efficiency
with MaintainX CoPilot
MaintainX CoPilot is your expert colleague, on call 24/7, helping your team find the answers they need to keep equipment running.
Reduce Unplanned Downtime
Ensure your team follows consistent procedures to minimize equipment failures and costly delays.
Maximize Asset Availability
Keep your assets running longer and more reliably, with standardized maintenance workflows from OEM manuals.
Lower Maintenance Costs
Turn any technician into an expert to streamline operations, maintain more assets, and reduce overall costs.
Thousands of companies manage their assets with MaintainX

'%3e%3cpath%20fill='url(%23b)'%20d='M66.008%2080.068c-5.084-.786-9.763-3.834-12.442-8.68a16.942%2016.942%200%200%201-1.87-5.18c1.096.19%202.203.476%203.298.87%206.525%202.333%2010.836%207.68%2011.014%2012.99ZM51.47%2061.576c.488-5.524%203.62-10.716%208.847-13.597a17.132%2017.132%200%200%201%2011.335-1.882c-.798%208.145-7.43%2014.848-16.038%2015.599-1.417.119-2.799.07-4.144-.12Zm28.564-11.478a17.513%2017.513%200%200%201%203.727%204.62c4.608%208.335%201.584%2018.813-6.75%2023.409a16.988%2016.988%200%200%201-4.359%201.679%2019.624%2019.624%200%200%201-3.977-12.776c.346-7.561%204.942-13.931%2011.36-16.932Z'/%3e%3cpath%20fill='%23110F0D'%20fill-rule='evenodd'%20d='M142.831%2048.324h4.977V77.03h-4.977V48.324Zm27.278%2013.002c.322%201.048.453%202.263.453%203.62v12.073h-4.787V66.208c0-.75-.047-1.572-.154-2.143-.453-2.382-1.822-3.572-4.215-3.572-2.31%200-3.882%201.274-4.43%203.476-.143.596-.226%201.405-.226%202.25v10.8h-4.787V56.623h4.477v2.989c1.536-2.5%203.906-3.43%206.371-3.43%203.488%200%206.263%201.68%207.298%205.144Zm24.636%207.323c0%203.882-2.358%206.525-5.763%207.727-1.298.453-2.632.643-4.62.643h-10.169V48.324h9.085c1.691%200%203.156.143%204.049.38%203.465.93%205.727%203.68%205.727%207.335%200%202.441-.81%204.156-2.762%205.644%202.905%201.417%204.453%203.727%204.453%206.966Zm-15.634-8.656h4.584c1.024%200%201.917-.143%202.536-.417%201.215-.548%201.905-1.608%201.905-3.167%200-1.548-.643-2.572-1.845-3.132-.691-.31-1.762-.452-2.763-.452h-4.417v7.168Zm10.716%208.465c0-1.536-.893-3.37-3.227-3.893-.428-.095-1.036-.143-1.571-.143h-5.918v8.085h5.501c.56%200%201.429-.048%201.953-.167%201.94-.453%203.262-1.846%203.262-3.882Zm47.747-11.847-8.097%2020.408h-4.429l-8.109-20.408h5.191l5.192%2014.574%205.108-14.574h5.144Zm-20.218%2010.002c0%20.69-.036%201.262-.155%201.94h-15.943c.631%202.87%202.714%204.728%205.882%204.728%202.131%200%203.607-.882%204.703-2.525h4.87c-1.762%204.144-5.204%206.692-9.657%206.692-6.084%200-10.537-4.858-10.537-10.49%200-6.108%204.524-10.776%2010.335-10.776%206.239%200%2010.442%204.954%2010.502%2010.43Zm-4.763-1.405c-.333-2.846-2.643-4.858-5.691-4.858-2.894%200-5.287%201.929-5.621%204.858h11.312Zm-72.667%203.44c0%204.787-3.287%208.371-9.419%208.371H119.363V64.66c-1.917.274-3.87.69-5.811%201.238l4.537%2011.121h-5.418l-3.596-9.585c-5.144%202.084-10.085%205.216-14.217%209.585h-4.786L101.8%2048.312h4.56l5.68%2013.883a44.112%2044.112%200%200%201%207.323-1.774V48.312h9.084c1.703%200%203.156.143%204.061.393%203.453.929%205.727%203.667%205.727%207.323%200%201.917-.738%204.179-2.81%205.691%203.06%201.56%204.501%204.025%204.501%206.93Zm-15.634-8.667a62.664%2062.664%200%200%201%202.06-.036c1.703.012%203.239.131%204.608.37%201.441-.549%202.357-1.727%202.357-3.537%200-1.941-.881-3.144-2.488-3.667-.548-.18-1.358-.286-2.322-.286h-4.215v7.156Zm-16.55%203.905-3.715-9.894-6.394%2016.502c2.833-2.595%206.263-4.858%2010.109-6.608Zm27.254%204.74c0-2.775-3.131-4.347-8.513-4.418-.715%200-1.441.011-2.191.047v8.252h5.918c2.548%200%204.786-1.37%204.786-3.882Z'%20clip-rule='evenodd'/%3e%3c/g%3e%3cdefs%3e%3clinearGradient%20id='b'%20x1='51.47'%20x2='85.916'%20y1='62.946'%20y2='62.946'%20gradientUnits='userSpaceOnUse'%3e%3cstop%20stop-color='%23CD9F28'/%3e%3cstop%20offset='1'%20stop-color='%23ECD80B'/%3e%3c/linearGradient%3e%3cclipPath%20id='a'%3e%3cpath%20fill='%23fff'%20d='M51.47%2045.728h186.104V80.14H51.47z'/%3e%3c/clipPath%3e%3c/defs%3e%3c/svg%3e)


More from Crown


Explore Other Assets


© 2026 MaintainX. All rights reserved.