


Bosch Table Saw 4100
Need answers fast?
Explore the manual using AI.
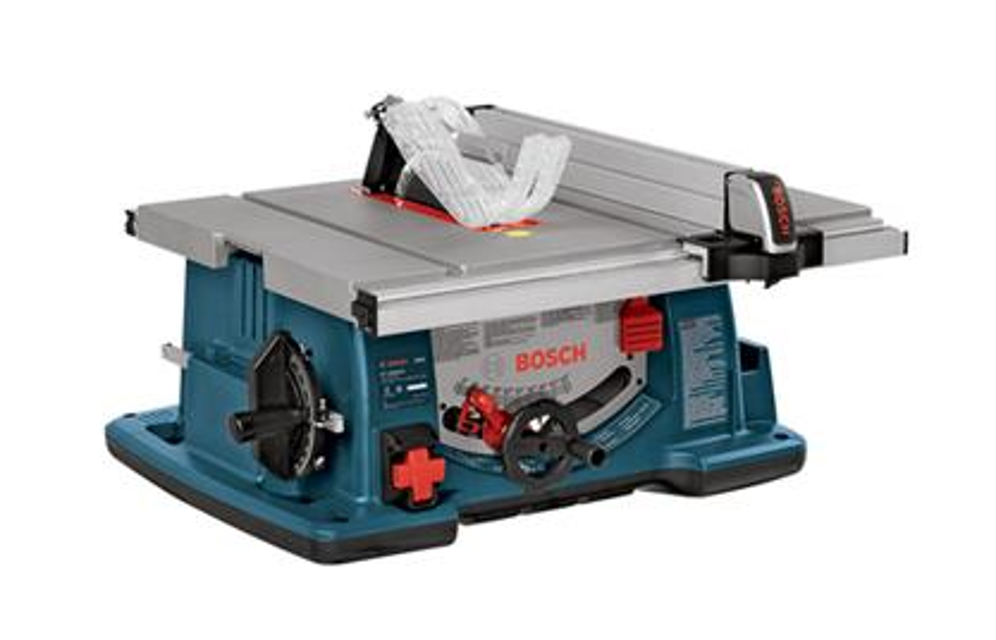
The Bosch Table Saw 4100 is a high-performance, portable table saw designed for precision cutting in various woodworking applications. Known for its durability and safety features, this model is ideal for both professional and DIY users seeking reliable performance and ease of use.
Turn manuals into instant answers
with your AI-powered assistantTurn manuals into instant answers
with your AI-powered assistant
Manual for Bosch Table Saw 4100
Complete asset maintenance, one click away
Get instant access to all the maintenance information you need. Empower technicians to perform preventive maintenance with asset packages, ready to use right out of the box.

Documents & Manuals
Find all the essential guides in one place.
 Tensioning Guide
- Belt-diagram
- C-120 pulleys
+ 13 more

Work Order Templates
Pre-built workflows to keep your asset running smoothly.
- Daily Electrical System Inspection
- Replace Roller and Pulley
- Install Engine B-120
+ 29 more

Procedures
Integrate maintenance plans directly into your work orders.
- Motion Industries
- Applied Industrial Technologies
- Electrical Brothers
+ 5 more

Parts
Access the parts list for your equipment in MaintainX.
- Drive Motor
- B2 Rollers
- Tensioning System
+ 40 more
Bosch Table Saw 4100
Create an account to install this asset package.
Maintenance Plans for Bosch Table Saw Model 4100
Integrate maintenance plans directly into your work orders in MaintainX.
Adjusting Riving Knife
Raise the Saw Blade 2 to maximum height and set the bevel angle to 0°
Remove the Barrier Guard Assembly and Anti-Kickback Device
Remove the Table Insert
Place the Rip Fence 3 on the right side and slide it until it touches the tips of the Saw Blade 2 - Lock fence
Loosen Hex Nut 6 with 10mm open end wrench. Slightly loosen Clamping Screws 8 (1/4-1/2 turns) using a 5mm Allen wrench. Loosen Set Screw 7 using a flat screwdriver
Make two folds in a small piece of paper (6\ x 6\") forming three layers. Paper 5 is used as a \"Spacing Gauge\""
Insert folded paper 5 between Riving Knife 1 and Fence 3
Hold Riving Knife and paper firmly against Fence. Lightly tighten the clamp screws 8. Remove the paper - Slide fence away from blade
Slowly turn the Set Screw 7 while watching the Riving Knife tilt until it is in line with the blade

Table Saw Cleaning
Warning: Turn off the saw and unplug the power cord before cleaning.
Excessive saw dust or other debris removed from the carriage and table saws' front rail?
Is the digital carriage exposed to rain?
If moisture needs to be removed, unplug the saw, and wipe carriage with a soft cloth.
Moisture removed from the digital carriage?
Do not use any cleaning solvents, oils, or lubricants on the digital carriage.
Sign off on the table saw cleaning
Table Pointer Adjustment
Warning: Make sure the machine is turned off before starting the adjustment process.
Loosen pointer adjustment screw 1
Adjust pointer 2
Tighten screw 1
The table pointer should always be adjusted relative to fence pointer.
Adjust fence pointer to zero
Slide fence to the right until it hits the stop plate on front rail and lock fence in place
Note measurement on lower scale (at or near 13.5\)"
Adjust the table pointer 2 to the same reading on upper scale as that shown on the fence pointer
Mounting The Table Saw
Warning: Ensure the table saw is not connected to a power source during installation.
Is the table saw to be used in a permanent location?
Enter the thickness of the workbench
Enter the length of the bolts used
Are the holes in the base of the tool marked relative to the saw's mounting location?
Enter the number of holes drilled through the workbench
Is the table saw aligned with the holes drilled in the workbench?
Enter the number of bolts inserted through the holes in the base and supporting surface
Sign off on the table saw mounting
Table Saw Lubrication
Warning: This procedure requires trained personnel with PPE!
Is the tool older than six months?
If the tool is older than six months, return it to the nearest Service Center for the following steps:
Brushes replaced
Parts cleaned and inspected
Relubricated with fresh lubricant
Electrical system tested
All repairs done
The following parts should be oiled occasionally with SAE No. 20 or No. 30 oil, or WD 40 (Fig. 69):
Parts for Bosch Table Saw 4100
Access the parts list for your equipment in MaintainX.
Carbon-Brush Set
2610997207
Brush-Cover
2610916802
Brush-Cover
2610911859
Washer
2610910013
Bearing Sleeve
2610996932
Carbon-Brush Set
2610997207
Brush-Cover
2610916802
Brush-Cover
2610911859
Washer
2610910013
Bearing Sleeve
2610996932
Carbon-Brush Set
2610997207
Brush-Cover
2610916802
Brush-Cover
2610911859
Washer
2610910013
Bearing Sleeve
2610996932
Unlock efficiency
with MaintainX CoPilot
MaintainX CoPilot is your expert colleague, on call 24/7, helping your team find the answers they need to keep equipment running.
Reduce Unplanned Downtime
Ensure your team follows consistent procedures to minimize equipment failures and costly delays.
Maximize Asset Availability
Keep your assets running longer and more reliably, with standardized maintenance workflows from OEM manuals.
Lower Maintenance Costs
Turn any technician into an expert to streamline operations, maintain more assets, and reduce overall costs.
Thousands of companies manage their assets with MaintainX

'%3e%3cpath%20fill='url(%23b)'%20d='M66.008%2080.068c-5.084-.786-9.763-3.834-12.442-8.68a16.942%2016.942%200%200%201-1.87-5.18c1.096.19%202.203.476%203.298.87%206.525%202.333%2010.836%207.68%2011.014%2012.99ZM51.47%2061.576c.488-5.524%203.62-10.716%208.847-13.597a17.132%2017.132%200%200%201%2011.335-1.882c-.798%208.145-7.43%2014.848-16.038%2015.599-1.417.119-2.799.07-4.144-.12Zm28.564-11.478a17.513%2017.513%200%200%201%203.727%204.62c4.608%208.335%201.584%2018.813-6.75%2023.409a16.988%2016.988%200%200%201-4.359%201.679%2019.624%2019.624%200%200%201-3.977-12.776c.346-7.561%204.942-13.931%2011.36-16.932Z'/%3e%3cpath%20fill='%23110F0D'%20fill-rule='evenodd'%20d='M142.831%2048.324h4.977V77.03h-4.977V48.324Zm27.278%2013.002c.322%201.048.453%202.263.453%203.62v12.073h-4.787V66.208c0-.75-.047-1.572-.154-2.143-.453-2.382-1.822-3.572-4.215-3.572-2.31%200-3.882%201.274-4.43%203.476-.143.596-.226%201.405-.226%202.25v10.8h-4.787V56.623h4.477v2.989c1.536-2.5%203.906-3.43%206.371-3.43%203.488%200%206.263%201.68%207.298%205.144Zm24.636%207.323c0%203.882-2.358%206.525-5.763%207.727-1.298.453-2.632.643-4.62.643h-10.169V48.324h9.085c1.691%200%203.156.143%204.049.38%203.465.93%205.727%203.68%205.727%207.335%200%202.441-.81%204.156-2.762%205.644%202.905%201.417%204.453%203.727%204.453%206.966Zm-15.634-8.656h4.584c1.024%200%201.917-.143%202.536-.417%201.215-.548%201.905-1.608%201.905-3.167%200-1.548-.643-2.572-1.845-3.132-.691-.31-1.762-.452-2.763-.452h-4.417v7.168Zm10.716%208.465c0-1.536-.893-3.37-3.227-3.893-.428-.095-1.036-.143-1.571-.143h-5.918v8.085h5.501c.56%200%201.429-.048%201.953-.167%201.94-.453%203.262-1.846%203.262-3.882Zm47.747-11.847-8.097%2020.408h-4.429l-8.109-20.408h5.191l5.192%2014.574%205.108-14.574h5.144Zm-20.218%2010.002c0%20.69-.036%201.262-.155%201.94h-15.943c.631%202.87%202.714%204.728%205.882%204.728%202.131%200%203.607-.882%204.703-2.525h4.87c-1.762%204.144-5.204%206.692-9.657%206.692-6.084%200-10.537-4.858-10.537-10.49%200-6.108%204.524-10.776%2010.335-10.776%206.239%200%2010.442%204.954%2010.502%2010.43Zm-4.763-1.405c-.333-2.846-2.643-4.858-5.691-4.858-2.894%200-5.287%201.929-5.621%204.858h11.312Zm-72.667%203.44c0%204.787-3.287%208.371-9.419%208.371H119.363V64.66c-1.917.274-3.87.69-5.811%201.238l4.537%2011.121h-5.418l-3.596-9.585c-5.144%202.084-10.085%205.216-14.217%209.585h-4.786L101.8%2048.312h4.56l5.68%2013.883a44.112%2044.112%200%200%201%207.323-1.774V48.312h9.084c1.703%200%203.156.143%204.061.393%203.453.929%205.727%203.667%205.727%207.323%200%201.917-.738%204.179-2.81%205.691%203.06%201.56%204.501%204.025%204.501%206.93Zm-15.634-8.667a62.664%2062.664%200%200%201%202.06-.036c1.703.012%203.239.131%204.608.37%201.441-.549%202.357-1.727%202.357-3.537%200-1.941-.881-3.144-2.488-3.667-.548-.18-1.358-.286-2.322-.286h-4.215v7.156Zm-16.55%203.905-3.715-9.894-6.394%2016.502c2.833-2.595%206.263-4.858%2010.109-6.608Zm27.254%204.74c0-2.775-3.131-4.347-8.513-4.418-.715%200-1.441.011-2.191.047v8.252h5.918c2.548%200%204.786-1.37%204.786-3.882Z'%20clip-rule='evenodd'/%3e%3c/g%3e%3cdefs%3e%3clinearGradient%20id='b'%20x1='51.47'%20x2='85.916'%20y1='62.946'%20y2='62.946'%20gradientUnits='userSpaceOnUse'%3e%3cstop%20stop-color='%23CD9F28'/%3e%3cstop%20offset='1'%20stop-color='%23ECD80B'/%3e%3c/linearGradient%3e%3cclipPath%20id='a'%3e%3cpath%20fill='%23fff'%20d='M51.47%2045.728h186.104V80.14H51.47z'/%3e%3c/clipPath%3e%3c/defs%3e%3c/svg%3e)


More from Bosch


Explore Other Assets


© 2026 MaintainX. All rights reserved.