


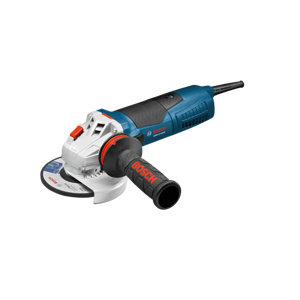
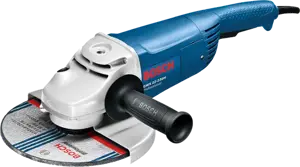
Bosch Rotary Hammer GBH-4-DFE
Need answers fast?
Explore the manual using AI.
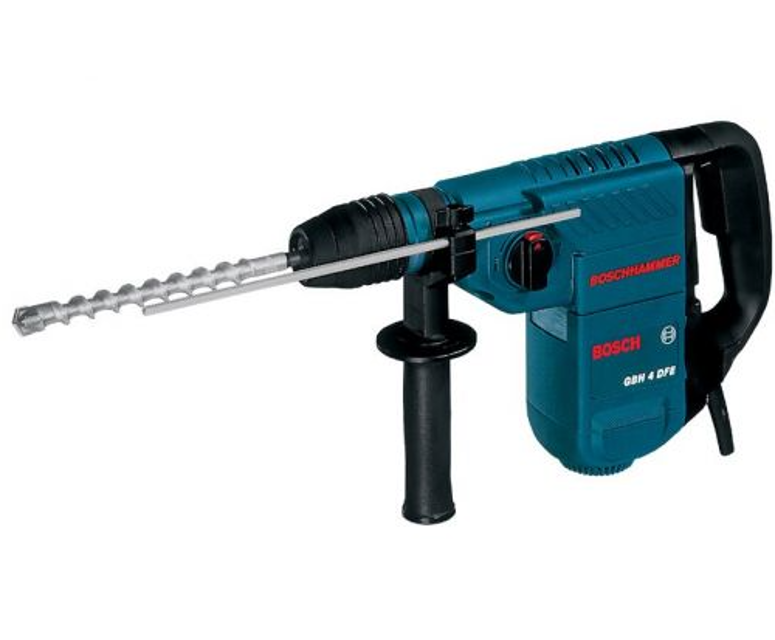
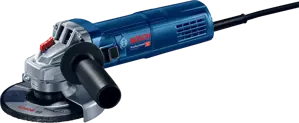
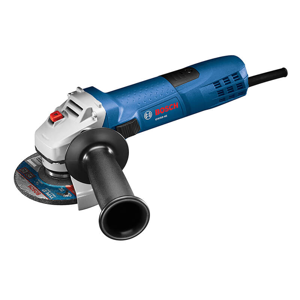
The Bosch Rotary Hammer GBH-4-DFE is a powerful and versatile tool designed for heavy-duty drilling and chiseling tasks. Known for its durability and performance, this rotary hammer is ideal for professional contractors and DIY enthusiasts alike, ensuring efficient operation in various applications.
Turn manuals into instant answers
with your AI-powered assistantTurn manuals into instant answers
with your AI-powered assistant
Manual for Bosch Rotary Hammer GBH-4-DFE
Complete asset maintenance, one click away
Get instant access to all the maintenance information you need. Empower technicians to perform preventive maintenance with asset packages, ready to use right out of the box.

Documents & Manuals
Find all the essential guides in one place.
 Tensioning Guide
- Belt-diagram
- C-120 pulleys
+ 13 more

Work Order Templates
Pre-built workflows to keep your asset running smoothly.
- Daily Electrical System Inspection
- Replace Roller and Pulley
- Install Engine B-120
+ 29 more

Procedures
Integrate maintenance plans directly into your work orders.
- Motion Industries
- Applied Industrial Technologies
- Electrical Brothers
+ 5 more

Parts
Access the parts list for your equipment in MaintainX.
- Drive Motor
- B2 Rollers
- Tensioning System
+ 40 more
Bosch Rotary Hammer GBH-4-DFE
Create an account to install this asset package.
Maintenance Plans for Bosch Rotary Hammer Model GBH-4-DFE
Integrate maintenance plans directly into your work orders in MaintainX.
Tool Replacement
Warning: Ensure the tool is not connected to any power source before starting the procedure.
Is the dust protection cap damaged?
If the dust protection cap is damaged, contact the after-sales service.
Upload a photo of the SDS-plus drilling tool
Is the tool properly inserted and latched?
If the tool is not properly latched, remove and reinsert it.
Is the tool without SDS-plus properly inserted and latched?
If the tool without SDS-plus is not properly latched, remove and reinsert it.
Sign off on the tool replacement

Tool Holder Replacement
Dismounting the SDS-plus Tool Holder or the Quick change keyless chuck
Turn the mode selector switch 7 temporarily to the “drilling” position in order to lock the tool holder.
Firmly turn the locking sleeve 3 in the direction of the arrow and pull off the tool holder 1 or the quick change keyless chuck 12 toward the front.
After removing, protect the tool holder 1 or the quick change keyless chuck 12 against contamination. Lightly lubricate the engaging grooves, if required.
Mounting the SDS-plus Tool Holder or the Quick change keyless chuck
Turn the locking sleeve 3 in the direction of the arrow and pull it back at the same time, until the tool holder 1 or the quick change keyless chuck 12 engages.
The tool holder 1 or the quick change keyless chuck 12 is automatically locked. Check the locking effect by pulling the tool holder.
Sign off on the tool holder replacement
Rotary Hammer Maintenance
Warning: Disconnect the machine from power before starting maintenance
Machine and ventilation slots clean
Dust protection cap in good condition
If dust protection cap is damaged, send to after-sales service
Service indicator light on
If service indicator light is on, send to after-sales service
10-digit article number from the machine's type plate
Warning: Do not connect the blue or brown wire to the earth terminal of the plug
Sign off on the rotary hammer maintenance
Parts for Bosch Rotary Hammer GBH-4-DFE
Access the parts list for your equipment in MaintainX.
Fastening Clamp
1601302018
Armature With Fan 220-230V
1614010128
Motor Housing BLUE
1615108059
Hammer Piston
1618700063
Toothed Shaft Z=3/9
1617000500
Fastening Clamp
1601302018
Armature With Fan 220-230V
1614010128
Motor Housing BLUE
1615108059
Hammer Piston
1618700063
Toothed Shaft Z=3/9
1617000500
Fastening Clamp
1601302018
Armature With Fan 220-230V
1614010128
Motor Housing BLUE
1615108059
Hammer Piston
1618700063
Toothed Shaft Z=3/9
1617000500
Unlock efficiency
with MaintainX CoPilot
MaintainX CoPilot is your expert colleague, on call 24/7, helping your team find the answers they need to keep equipment running.
Reduce Unplanned Downtime
Ensure your team follows consistent procedures to minimize equipment failures and costly delays.
Maximize Asset Availability
Keep your assets running longer and more reliably, with standardized maintenance workflows from OEM manuals.
Lower Maintenance Costs
Turn any technician into an expert to streamline operations, maintain more assets, and reduce overall costs.
Thousands of companies manage their assets with MaintainX

'%3e%3cpath%20fill='url(%23b)'%20d='M66.008%2080.068c-5.084-.786-9.763-3.834-12.442-8.68a16.942%2016.942%200%200%201-1.87-5.18c1.096.19%202.203.476%203.298.87%206.525%202.333%2010.836%207.68%2011.014%2012.99ZM51.47%2061.576c.488-5.524%203.62-10.716%208.847-13.597a17.132%2017.132%200%200%201%2011.335-1.882c-.798%208.145-7.43%2014.848-16.038%2015.599-1.417.119-2.799.07-4.144-.12Zm28.564-11.478a17.513%2017.513%200%200%201%203.727%204.62c4.608%208.335%201.584%2018.813-6.75%2023.409a16.988%2016.988%200%200%201-4.359%201.679%2019.624%2019.624%200%200%201-3.977-12.776c.346-7.561%204.942-13.931%2011.36-16.932Z'/%3e%3cpath%20fill='%23110F0D'%20fill-rule='evenodd'%20d='M142.831%2048.324h4.977V77.03h-4.977V48.324Zm27.278%2013.002c.322%201.048.453%202.263.453%203.62v12.073h-4.787V66.208c0-.75-.047-1.572-.154-2.143-.453-2.382-1.822-3.572-4.215-3.572-2.31%200-3.882%201.274-4.43%203.476-.143.596-.226%201.405-.226%202.25v10.8h-4.787V56.623h4.477v2.989c1.536-2.5%203.906-3.43%206.371-3.43%203.488%200%206.263%201.68%207.298%205.144Zm24.636%207.323c0%203.882-2.358%206.525-5.763%207.727-1.298.453-2.632.643-4.62.643h-10.169V48.324h9.085c1.691%200%203.156.143%204.049.38%203.465.93%205.727%203.68%205.727%207.335%200%202.441-.81%204.156-2.762%205.644%202.905%201.417%204.453%203.727%204.453%206.966Zm-15.634-8.656h4.584c1.024%200%201.917-.143%202.536-.417%201.215-.548%201.905-1.608%201.905-3.167%200-1.548-.643-2.572-1.845-3.132-.691-.31-1.762-.452-2.763-.452h-4.417v7.168Zm10.716%208.465c0-1.536-.893-3.37-3.227-3.893-.428-.095-1.036-.143-1.571-.143h-5.918v8.085h5.501c.56%200%201.429-.048%201.953-.167%201.94-.453%203.262-1.846%203.262-3.882Zm47.747-11.847-8.097%2020.408h-4.429l-8.109-20.408h5.191l5.192%2014.574%205.108-14.574h5.144Zm-20.218%2010.002c0%20.69-.036%201.262-.155%201.94h-15.943c.631%202.87%202.714%204.728%205.882%204.728%202.131%200%203.607-.882%204.703-2.525h4.87c-1.762%204.144-5.204%206.692-9.657%206.692-6.084%200-10.537-4.858-10.537-10.49%200-6.108%204.524-10.776%2010.335-10.776%206.239%200%2010.442%204.954%2010.502%2010.43Zm-4.763-1.405c-.333-2.846-2.643-4.858-5.691-4.858-2.894%200-5.287%201.929-5.621%204.858h11.312Zm-72.667%203.44c0%204.787-3.287%208.371-9.419%208.371H119.363V64.66c-1.917.274-3.87.69-5.811%201.238l4.537%2011.121h-5.418l-3.596-9.585c-5.144%202.084-10.085%205.216-14.217%209.585h-4.786L101.8%2048.312h4.56l5.68%2013.883a44.112%2044.112%200%200%201%207.323-1.774V48.312h9.084c1.703%200%203.156.143%204.061.393%203.453.929%205.727%203.667%205.727%207.323%200%201.917-.738%204.179-2.81%205.691%203.06%201.56%204.501%204.025%204.501%206.93Zm-15.634-8.667a62.664%2062.664%200%200%201%202.06-.036c1.703.012%203.239.131%204.608.37%201.441-.549%202.357-1.727%202.357-3.537%200-1.941-.881-3.144-2.488-3.667-.548-.18-1.358-.286-2.322-.286h-4.215v7.156Zm-16.55%203.905-3.715-9.894-6.394%2016.502c2.833-2.595%206.263-4.858%2010.109-6.608Zm27.254%204.74c0-2.775-3.131-4.347-8.513-4.418-.715%200-1.441.011-2.191.047v8.252h5.918c2.548%200%204.786-1.37%204.786-3.882Z'%20clip-rule='evenodd'/%3e%3c/g%3e%3cdefs%3e%3clinearGradient%20id='b'%20x1='51.47'%20x2='85.916'%20y1='62.946'%20y2='62.946'%20gradientUnits='userSpaceOnUse'%3e%3cstop%20stop-color='%23CD9F28'/%3e%3cstop%20offset='1'%20stop-color='%23ECD80B'/%3e%3c/linearGradient%3e%3cclipPath%20id='a'%3e%3cpath%20fill='%23fff'%20d='M51.47%2045.728h186.104V80.14H51.47z'/%3e%3c/clipPath%3e%3c/defs%3e%3c/svg%3e)


More from Bosch


Explore Other Assets


© 2026 MaintainX. All rights reserved.