


Bosch Gas Slide-In Range HGI8056UC/04
Need answers fast?
Explore the manual using AI.
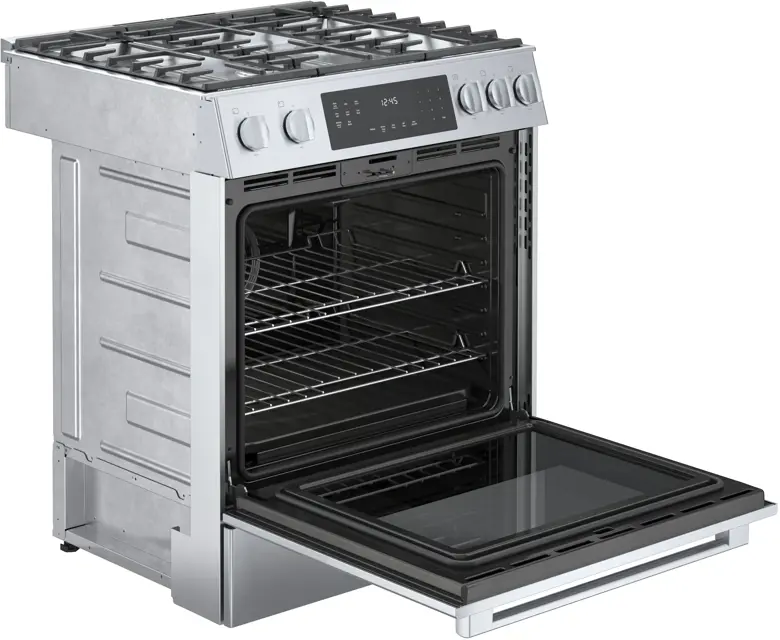
The Bosch Gas Slide-In Range HGI8056UC/04 is a high-performance cooking appliance designed for precision and efficiency. With its advanced features and sleek design, this range offers exceptional cooking capabilities, making it an ideal choice for both home chefs and culinary enthusiasts. Experience superior cooking with Bosch's innovative technology.
Turn manuals into instant answers
with your AI-powered assistantTurn manuals into instant answers
with your AI-powered assistant
Manual for Bosch Gas Slide-In Range HGI8056UC/04
Complete asset maintenance, one click away
Get instant access to all the maintenance information you need. Empower technicians to perform preventive maintenance with asset packages, ready to use right out of the box.

Documents & Manuals
Find all the essential guides in one place.
 Tensioning Guide
- Belt-diagram
- C-120 pulleys
+ 13 more

Work Order Templates
Pre-built workflows to keep your asset running smoothly.
- Daily Electrical System Inspection
- Replace Roller and Pulley
- Install Engine B-120
+ 29 more

Procedures
Integrate maintenance plans directly into your work orders.
- Motion Industries
- Applied Industrial Technologies
- Electrical Brothers
+ 5 more

Parts
Access the parts list for your equipment in MaintainX.
- Drive Motor
- B2 Rollers
- Tensioning System
+ 40 more
Bosch Gas Slide-In Range HGI8056UC/04
Create an account to install this asset package.
Maintenance Plans for Bosch Gas Slide-In Range Model HGI8056UC/04
Integrate maintenance plans directly into your work orders in MaintainX.
Control Knobs Replacement
WARNING! To avoid possible electric shock, do not reach through the control opening into rough-in box located under the cook top.
Turn the control knob to the OFF position.
Gently lift the knob up and off.
Gently pull the grommet from the sides and lift out.
To replace the control knob and grommet, carefully insert the grommet into the opening. Make sure that the main top is seated in the track around the entire perimeter of the grommet.
Replace the control knob by placing indicator line at the OFF position. Press down firmly.
Sign off on the control knobs replacement

Cooktop Maintenance
NOTICE: Humidity might enter the appliance interior, if you remove the control knobs during cleaning. This may damage the appliance. Do not remove the control knobs when cleaning the appliance.
Let the appliance cool down.
Clean with a sponge, water and soap.
Dry with a soft cloth.
NOTICE: Do not clean the burner parts in the dishwasher. They may be damaged.
Wait until the appliance has cooled.
Scrub with a non-metallic brush and soapy water.
Dry the burners completely. If there are water droplets or damp patches on the cooktop when you start cooking, the enamel may be damaged.
Reassemble the burner parts. Ensure that the burner caps are correctly positioned on the burner bases.
Oven Door Replacement
WARNING: Failure to follow these instructions when removing the oven door may lead to personal injury or product damage.
Make sure oven is cool and power to the oven has been turned off before removing the door. Failure to do so could result in electrical shock or burns.
The oven door is heavy and parts of it are fragile. Use both hands to remove the oven door.
The door front is glass. Handle it carefully to avoid breakage.
Grasp only the side of the oven door. Do not grasp the handle. It may swing in your hand and cause damage or injury.
To avoid injury from hinge bracket snapping closed, be sure both levers are securely in place before removing the door.
Do not force the door open or closed. The hinge could be damaged and cause damage or injury.
Do not lay the removed door on sharp or pointed objects as this could break the glass. Lay it on a flat, smooth surface, positioned so that the door cannot fall over.
Open the oven door to its fully open position.
Oven Light Bulb Replacement
WARNING! Light socket is live when door is open if main power supply is not turned off.
Main power supply turned off at the service panel
WARNING! Make sure the appliance and lights are cool and power to the appliance has been turned off before replacing the light bulb(s). Failure to do so could result in electrical shock or burns.
Appliance and lights are cool and power has been turned off
The lenses must be in place when using the appliance.
Lenses in place
The lenses serve to protect the light bulb from breaking.
The lenses are made of glass. Handle carefully to avoid breaking. Broken glass can cause an injury.
Lenses handled carefully and not broken
Warming Drawer Cleaning
Warning: To prevent burns, do not remove the drawer while hot. Be sure the drawer is empty before removing.
Drawer removed for cleaning?
Type of detergent used for drawer interior cleaning
Hard water spots or scale removed with white vinegar?
Type of cleaner used for painted surfaces
Abrasive cleaning agents, steel wool pads and oven cleaners avoided?
Direction of grain for drawer exterior frame cleaning
Type of cleaner used for drawer exterior frame cleaning
Water spots removed with a cloth dampened with white vinegar?
Parts for Bosch Gas Slide-In Range HGI8056UC/04
Access the parts list for your equipment in MaintainX.
Air Duct
11000514
Bracket
00632523
Bracket
11004836
Burner
11004375
Burner
12050559
Air Duct
11000514
Bracket
00632523
Bracket
11004836
Burner
11004375
Burner
12050559
Air Duct
11000514
Bracket
00632523
Bracket
11004836
Burner
11004375
Burner
12050559
Unlock efficiency
with MaintainX CoPilot
MaintainX CoPilot is your expert colleague, on call 24/7, helping your team find the answers they need to keep equipment running.
Reduce Unplanned Downtime
Ensure your team follows consistent procedures to minimize equipment failures and costly delays.
Maximize Asset Availability
Keep your assets running longer and more reliably, with standardized maintenance workflows from OEM manuals.
Lower Maintenance Costs
Turn any technician into an expert to streamline operations, maintain more assets, and reduce overall costs.
Thousands of companies manage their assets with MaintainX

'%3e%3cpath%20fill='url(%23b)'%20d='M66.008%2080.068c-5.084-.786-9.763-3.834-12.442-8.68a16.942%2016.942%200%200%201-1.87-5.18c1.096.19%202.203.476%203.298.87%206.525%202.333%2010.836%207.68%2011.014%2012.99ZM51.47%2061.576c.488-5.524%203.62-10.716%208.847-13.597a17.132%2017.132%200%200%201%2011.335-1.882c-.798%208.145-7.43%2014.848-16.038%2015.599-1.417.119-2.799.07-4.144-.12Zm28.564-11.478a17.513%2017.513%200%200%201%203.727%204.62c4.608%208.335%201.584%2018.813-6.75%2023.409a16.988%2016.988%200%200%201-4.359%201.679%2019.624%2019.624%200%200%201-3.977-12.776c.346-7.561%204.942-13.931%2011.36-16.932Z'/%3e%3cpath%20fill='%23110F0D'%20fill-rule='evenodd'%20d='M142.831%2048.324h4.977V77.03h-4.977V48.324Zm27.278%2013.002c.322%201.048.453%202.263.453%203.62v12.073h-4.787V66.208c0-.75-.047-1.572-.154-2.143-.453-2.382-1.822-3.572-4.215-3.572-2.31%200-3.882%201.274-4.43%203.476-.143.596-.226%201.405-.226%202.25v10.8h-4.787V56.623h4.477v2.989c1.536-2.5%203.906-3.43%206.371-3.43%203.488%200%206.263%201.68%207.298%205.144Zm24.636%207.323c0%203.882-2.358%206.525-5.763%207.727-1.298.453-2.632.643-4.62.643h-10.169V48.324h9.085c1.691%200%203.156.143%204.049.38%203.465.93%205.727%203.68%205.727%207.335%200%202.441-.81%204.156-2.762%205.644%202.905%201.417%204.453%203.727%204.453%206.966Zm-15.634-8.656h4.584c1.024%200%201.917-.143%202.536-.417%201.215-.548%201.905-1.608%201.905-3.167%200-1.548-.643-2.572-1.845-3.132-.691-.31-1.762-.452-2.763-.452h-4.417v7.168Zm10.716%208.465c0-1.536-.893-3.37-3.227-3.893-.428-.095-1.036-.143-1.571-.143h-5.918v8.085h5.501c.56%200%201.429-.048%201.953-.167%201.94-.453%203.262-1.846%203.262-3.882Zm47.747-11.847-8.097%2020.408h-4.429l-8.109-20.408h5.191l5.192%2014.574%205.108-14.574h5.144Zm-20.218%2010.002c0%20.69-.036%201.262-.155%201.94h-15.943c.631%202.87%202.714%204.728%205.882%204.728%202.131%200%203.607-.882%204.703-2.525h4.87c-1.762%204.144-5.204%206.692-9.657%206.692-6.084%200-10.537-4.858-10.537-10.49%200-6.108%204.524-10.776%2010.335-10.776%206.239%200%2010.442%204.954%2010.502%2010.43Zm-4.763-1.405c-.333-2.846-2.643-4.858-5.691-4.858-2.894%200-5.287%201.929-5.621%204.858h11.312Zm-72.667%203.44c0%204.787-3.287%208.371-9.419%208.371H119.363V64.66c-1.917.274-3.87.69-5.811%201.238l4.537%2011.121h-5.418l-3.596-9.585c-5.144%202.084-10.085%205.216-14.217%209.585h-4.786L101.8%2048.312h4.56l5.68%2013.883a44.112%2044.112%200%200%201%207.323-1.774V48.312h9.084c1.703%200%203.156.143%204.061.393%203.453.929%205.727%203.667%205.727%207.323%200%201.917-.738%204.179-2.81%205.691%203.06%201.56%204.501%204.025%204.501%206.93Zm-15.634-8.667a62.664%2062.664%200%200%201%202.06-.036c1.703.012%203.239.131%204.608.37%201.441-.549%202.357-1.727%202.357-3.537%200-1.941-.881-3.144-2.488-3.667-.548-.18-1.358-.286-2.322-.286h-4.215v7.156Zm-16.55%203.905-3.715-9.894-6.394%2016.502c2.833-2.595%206.263-4.858%2010.109-6.608Zm27.254%204.74c0-2.775-3.131-4.347-8.513-4.418-.715%200-1.441.011-2.191.047v8.252h5.918c2.548%200%204.786-1.37%204.786-3.882Z'%20clip-rule='evenodd'/%3e%3c/g%3e%3cdefs%3e%3clinearGradient%20id='b'%20x1='51.47'%20x2='85.916'%20y1='62.946'%20y2='62.946'%20gradientUnits='userSpaceOnUse'%3e%3cstop%20stop-color='%23CD9F28'/%3e%3cstop%20offset='1'%20stop-color='%23ECD80B'/%3e%3c/linearGradient%3e%3cclipPath%20id='a'%3e%3cpath%20fill='%23fff'%20d='M51.47%2045.728h186.104V80.14H51.47z'/%3e%3c/clipPath%3e%3c/defs%3e%3c/svg%3e)


More from Bosch


Explore Other Assets


© 2026 MaintainX. All rights reserved.