


Biro Mixer/Grinder F1000N
Need answers fast?
Explore the manual using AI.
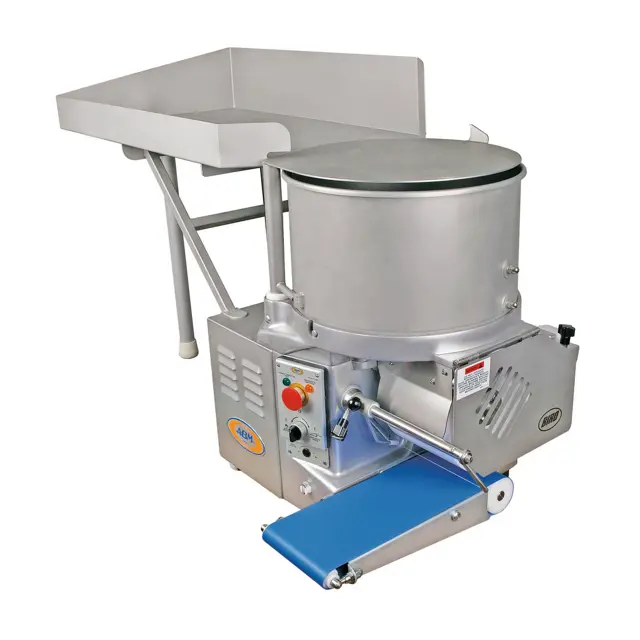
The Biro Mixer/Grinder F1000N is a high-performance industrial mixer designed for efficient food processing. Known for its durability and reliability, this equipment is essential for achieving consistent mixing and grinding results in various applications. Optimize your operations with the Biro F1000N for superior performance.
Turn manuals into instant answers
with your AI-powered assistantTurn manuals into instant answers
with your AI-powered assistant
Manual for Biro Mixer/Grinder F1000N
Complete asset maintenance, one click away
Get instant access to all the maintenance information you need. Empower technicians to perform preventive maintenance with asset packages, ready to use right out of the box.

Documents & Manuals
Find all the essential guides in one place.
 Tensioning Guide
- Belt-diagram
- C-120 pulleys
+ 13 more

Work Order Templates
Pre-built workflows to keep your asset running smoothly.
- Daily Electrical System Inspection
- Replace Roller and Pulley
- Install Engine B-120
+ 29 more

Procedures
Integrate maintenance plans directly into your work orders.
- Motion Industries
- Applied Industrial Technologies
- Electrical Brothers
+ 5 more

Parts
Access the parts list for your equipment in MaintainX.
- Drive Motor
- B2 Rollers
- Tensioning System
+ 40 more
Biro Mixer/Grinder F1000N
Create an account to install this asset package.
Maintenance Plans for Biro Mixer/Grinder Model F1000N
Integrate maintenance plans directly into your work orders in MaintainX.
6 Monthly Chain Maintenance
1. Chains should be protected against dirt and moisture.
2. Chain life will vary appreciably depending upon its lubrication.
3. The better the lubrication, the longer the chain life.
4. Lubrication effectiveness will vary with the amount of lubrication and frequency of application.
5. Ideally, a lubricant film should always be present between the working parts.
6. Manually lubricate the chain after the 1st six weeks then every 6 months thereafter.
a. Lubrication: The chain is accessible by removing the rear panel. Remove 8 Pan Head Screws, carefully pull down on the panel to remove it from the Base Cover. Spray or brush lubricant on chain.
b. Tension: The chain is accessible by removing the rear panel. Remove 8 Pan Head Screws, carefully pull down on the panel to remove it from the Base Cover. Adjust tension as neccesary using eccentric gears. Total chain flex should be ⅛” to ⅜” for proper chain tension. Do not over tension as this can cause excessive wear and premature failure of drive system.;

1 Daily Food Former Inspection
WARNING! ALWAYS Turn Off, Unplug From Power Source and Perform Lockout/Tagout Procedure to This Machine BEFORE Cleaning, Servicing or Any Other Reason.
NEVER Touch This Machine Without Training and Authorization By Your Supervisor.
ALWAYS Read Operation and Parts Manual BEFORE Operating, Cleaning or Servicing.
DO NOT Alter or Modify This Machine in any Way From its Original Form.
NEVER Attempt to Open Hopper Cover While Former is Running.
ALWAYS Keep Hands Clear of the Rotating Drum and Other Moving Parts.
ALWAYS Clean and Inspect Machine Daily.
NEVER Leave Machine Unattended While the Former is Running.
PROMPTLY REPLACE Any Worn or Illegible Warning Labels.
Initial 6 Weeks Chain Lubrication
Warning: Ensure the machine is turned off and unplugged before starting the procedure
Rear panel removed
Number of Pan Head Screws removed
Panel removed from the Base Cover
Lubricant applied on chain
Sign off on the chain lubrication
1 Daily Food Former Cleaning
WARNING! ALWAYS Turn Off, Unplug From Power Source and Perform Lockout/Tagout Procedure to This Machine BEFORE Cleaning, Servicing or Any Other Reason.
ALWAYS Thoroughly Clean Equipment at Least Daily.
ONLY Use Lukewarm Water and Some Neutral Detergent.
ONLY Use Recommended Cleaning Equipment, Materials and Procedures.
NEVER Use a High Pressure Sprayer During Cleaning.
NEVER Spray Water or Other Liquid Substances directly at Motor, Power Switch or any Other Electrical Components.
Turn off and disconnect from power source. Perform lockout/tagout procedures before cleaning.
Parts to be removed have been made accessible and can be removed without tools.
Wash removed parts with a soft cloth, and warm soapy water, rinse with clean warm water.
4 Monthly Bearings Greasing
Warning: This procedure requires trained personnel with PPE!
Removed 8 Pan Head Screws and rear panel?
Located first fitting under the hopper base?
Located second fitting on the Drum Shaft Bearing Housing?
Upload a photo of the greased fittings
Did you add grease?
Checked for overgreasing and seals displacement?
Sign off on the bearings greasing
Parts for Biro Mixer/Grinder F1000N
Access the parts list for your equipment in MaintainX.
Rear Panel
F93M0003
Centering Disc
F93M0040
Start Switch, Green
F93M0117B
Plate Cap
F93M0096T
Socket Head Screw, M6-1.0 x 16, SS
GVT327
Rear Panel
F93M0003
Centering Disc
F93M0040
Start Switch, Green
F93M0117B
Plate Cap
F93M0096T
Socket Head Screw, M6-1.0 x 16, SS
GVT327
Rear Panel
F93M0003
Centering Disc
F93M0040
Start Switch, Green
F93M0117B
Plate Cap
F93M0096T
Socket Head Screw, M6-1.0 x 16, SS
GVT327
Unlock efficiency
with MaintainX CoPilot
MaintainX CoPilot is your expert colleague, on call 24/7, helping your team find the answers they need to keep equipment running.
Reduce Unplanned Downtime
Ensure your team follows consistent procedures to minimize equipment failures and costly delays.
Maximize Asset Availability
Keep your assets running longer and more reliably, with standardized maintenance workflows from OEM manuals.
Lower Maintenance Costs
Turn any technician into an expert to streamline operations, maintain more assets, and reduce overall costs.
Thousands of companies manage their assets with MaintainX

'%3e%3cpath%20fill='url(%23b)'%20d='M66.008%2080.068c-5.084-.786-9.763-3.834-12.442-8.68a16.942%2016.942%200%200%201-1.87-5.18c1.096.19%202.203.476%203.298.87%206.525%202.333%2010.836%207.68%2011.014%2012.99ZM51.47%2061.576c.488-5.524%203.62-10.716%208.847-13.597a17.132%2017.132%200%200%201%2011.335-1.882c-.798%208.145-7.43%2014.848-16.038%2015.599-1.417.119-2.799.07-4.144-.12Zm28.564-11.478a17.513%2017.513%200%200%201%203.727%204.62c4.608%208.335%201.584%2018.813-6.75%2023.409a16.988%2016.988%200%200%201-4.359%201.679%2019.624%2019.624%200%200%201-3.977-12.776c.346-7.561%204.942-13.931%2011.36-16.932Z'/%3e%3cpath%20fill='%23110F0D'%20fill-rule='evenodd'%20d='M142.831%2048.324h4.977V77.03h-4.977V48.324Zm27.278%2013.002c.322%201.048.453%202.263.453%203.62v12.073h-4.787V66.208c0-.75-.047-1.572-.154-2.143-.453-2.382-1.822-3.572-4.215-3.572-2.31%200-3.882%201.274-4.43%203.476-.143.596-.226%201.405-.226%202.25v10.8h-4.787V56.623h4.477v2.989c1.536-2.5%203.906-3.43%206.371-3.43%203.488%200%206.263%201.68%207.298%205.144Zm24.636%207.323c0%203.882-2.358%206.525-5.763%207.727-1.298.453-2.632.643-4.62.643h-10.169V48.324h9.085c1.691%200%203.156.143%204.049.38%203.465.93%205.727%203.68%205.727%207.335%200%202.441-.81%204.156-2.762%205.644%202.905%201.417%204.453%203.727%204.453%206.966Zm-15.634-8.656h4.584c1.024%200%201.917-.143%202.536-.417%201.215-.548%201.905-1.608%201.905-3.167%200-1.548-.643-2.572-1.845-3.132-.691-.31-1.762-.452-2.763-.452h-4.417v7.168Zm10.716%208.465c0-1.536-.893-3.37-3.227-3.893-.428-.095-1.036-.143-1.571-.143h-5.918v8.085h5.501c.56%200%201.429-.048%201.953-.167%201.94-.453%203.262-1.846%203.262-3.882Zm47.747-11.847-8.097%2020.408h-4.429l-8.109-20.408h5.191l5.192%2014.574%205.108-14.574h5.144Zm-20.218%2010.002c0%20.69-.036%201.262-.155%201.94h-15.943c.631%202.87%202.714%204.728%205.882%204.728%202.131%200%203.607-.882%204.703-2.525h4.87c-1.762%204.144-5.204%206.692-9.657%206.692-6.084%200-10.537-4.858-10.537-10.49%200-6.108%204.524-10.776%2010.335-10.776%206.239%200%2010.442%204.954%2010.502%2010.43Zm-4.763-1.405c-.333-2.846-2.643-4.858-5.691-4.858-2.894%200-5.287%201.929-5.621%204.858h11.312Zm-72.667%203.44c0%204.787-3.287%208.371-9.419%208.371H119.363V64.66c-1.917.274-3.87.69-5.811%201.238l4.537%2011.121h-5.418l-3.596-9.585c-5.144%202.084-10.085%205.216-14.217%209.585h-4.786L101.8%2048.312h4.56l5.68%2013.883a44.112%2044.112%200%200%201%207.323-1.774V48.312h9.084c1.703%200%203.156.143%204.061.393%203.453.929%205.727%203.667%205.727%207.323%200%201.917-.738%204.179-2.81%205.691%203.06%201.56%204.501%204.025%204.501%206.93Zm-15.634-8.667a62.664%2062.664%200%200%201%202.06-.036c1.703.012%203.239.131%204.608.37%201.441-.549%202.357-1.727%202.357-3.537%200-1.941-.881-3.144-2.488-3.667-.548-.18-1.358-.286-2.322-.286h-4.215v7.156Zm-16.55%203.905-3.715-9.894-6.394%2016.502c2.833-2.595%206.263-4.858%2010.109-6.608Zm27.254%204.74c0-2.775-3.131-4.347-8.513-4.418-.715%200-1.441.011-2.191.047v8.252h5.918c2.548%200%204.786-1.37%204.786-3.882Z'%20clip-rule='evenodd'/%3e%3c/g%3e%3cdefs%3e%3clinearGradient%20id='b'%20x1='51.47'%20x2='85.916'%20y1='62.946'%20y2='62.946'%20gradientUnits='userSpaceOnUse'%3e%3cstop%20stop-color='%23CD9F28'/%3e%3cstop%20offset='1'%20stop-color='%23ECD80B'/%3e%3c/linearGradient%3e%3cclipPath%20id='a'%3e%3cpath%20fill='%23fff'%20d='M51.47%2045.728h186.104V80.14H51.47z'/%3e%3c/clipPath%3e%3c/defs%3e%3c/svg%3e)


Explore Other Assets


© 2026 MaintainX. All rights reserved.