


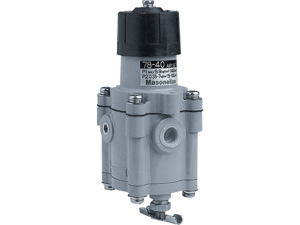
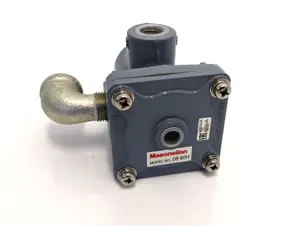
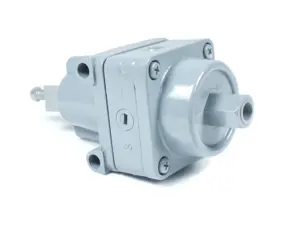
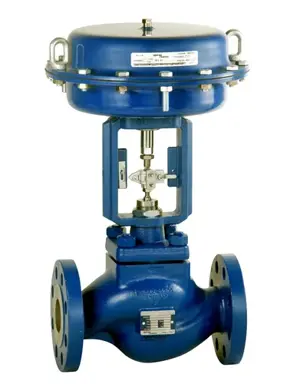
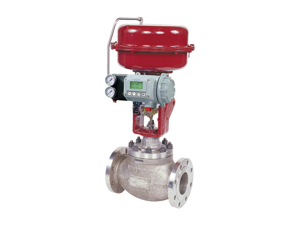
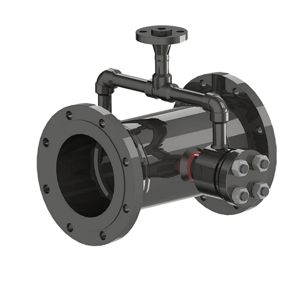
Baker Hughes Self Operating Pressure Regulators 173 Series
Need answers fast?
Explore the manual using AI.
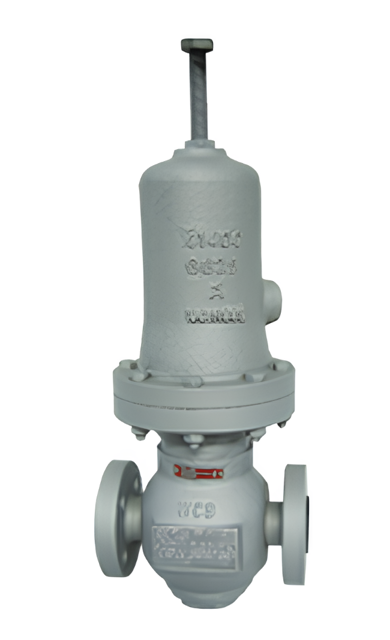
The Baker Hughes Self Operating Pressure Regulators 173 Series are designed for reliable pressure control in various industrial applications. Known for their durability and efficiency, these regulators ensure optimal performance and safety in fluid systems, making them a trusted choice for maintenance planners and operators alike.
Turn manuals into instant answers
with your AI-powered assistantTurn manuals into instant answers
with your AI-powered assistant
Manual for Baker Hughes Self Operating Pressure Regulators 173 Series
Complete asset maintenance, one click away
Get instant access to all the maintenance information you need. Empower technicians to perform preventive maintenance with asset packages, ready to use right out of the box.

Documents & Manuals
Find all the essential guides in one place.
 Tensioning Guide
- Belt-diagram
- C-120 pulleys
+ 13 more

Work Order Templates
Pre-built workflows to keep your asset running smoothly.
- Daily Electrical System Inspection
- Replace Roller and Pulley
- Install Engine B-120
+ 29 more

Procedures
Integrate maintenance plans directly into your work orders.
- Motion Industries
- Applied Industrial Technologies
- Electrical Brothers
+ 5 more

Parts
Access the parts list for your equipment in MaintainX.
- Drive Motor
- B2 Rollers
- Tensioning System
+ 40 more
Baker Hughes Self Operating Pressure Regulators 173 Series
Create an account to install this asset package.
Maintenance Plans for Baker Hughes Self Operating Pressure Regulators Model 173 Series
Integrate maintenance plans directly into your work orders in MaintainX.
Differential Pressure Regulator Maintenance
The required maintenance interval will vary depending on application. The user must establish a suitable maintenance schedule depending on the operating conditions. Prior to disassembly, remove all system pressure from the regulator. Before starting the above operation, make sure the recommended spare parts are available (See the parts listed in Figures 9 and 10).
(Refer to Figures 9 and 10) All of the components are now ready to be inspected. Replace any worn items. Clean all parts.
Pay particular attention to the condition of the disc of the plug (24), both elastomeric and metal, and the seat.
If the seat is worn, it may be able to be restored by lapping using a metal disc and abrasive paste.
The diaphragm should be replaced if it shows any damage. The same applies to the Teflon diaphragm protector (if included).
Gaskets should not be reused.; If preferred, the regulator may be returned to an authorized Baker Hughes repair center to be reconditioned.
The diaphragm may require replacement without having to make other repairs. If the regulator is easy to access and isolate, it can be replaced while leaving the regulator installed in the piping. In this case, isolate the regulator and vent all pressure.; To prevent accidental pressurization while working on the regulator, make sure that the isolation valves are locked. Remove the actuator following the instructions in section 4.5.2.
Replace and install the diaphragm and reassemble the actuator as shown in section 4.5, 4.5.3 and 4.5.6.
Check calibration once more when the regulator is returned to service.;

Pressure Regulator Maintenance
The required maintenance interval varies depending on application. The user must establish a suitable interval based on the operating conditions. Prior to disassembly, remove all system pressure from the regulator.
Before starting the above operation, make sure the recommended spare parts are available (refer to the parts list indicated in Figures 1 through 5).
The diaphragm may require replacement without having to make other repairs. If the regulator is easy to access and isolate, it can be replaced while leaving the regulator installed in the piping. In this case, isolate the regulator and vent all pressure.
To prevent accidental pressurization while working on the regulator, make sure that the isolation valves are locked. Remove the actuator following the instructions in section 3.4.1.2.
Replace and install the diaphragm and reassemble the actuator as shown in section 3.4.2.4. Check calibration once more when the regulator is returned to service.;
Parts for Baker Hughes Self Operating Pressure Regulators 173 Series
Access the parts list for your equipment in MaintainX.
Diaphragm
8
Spring Case
11
Spring
12
Diaphragm Plate (Upper)
6
Gasket Set
2
Diaphragm
8
Spring Case
11
Spring
12
Diaphragm Plate (Upper)
6
Gasket Set
2
Diaphragm
8
Spring Case
11
Spring
12
Diaphragm Plate (Upper)
6
Gasket Set
2
Unlock efficiency
with MaintainX CoPilot
MaintainX CoPilot is your expert colleague, on call 24/7, helping your team find the answers they need to keep equipment running.
Reduce Unplanned Downtime
Ensure your team follows consistent procedures to minimize equipment failures and costly delays.
Maximize Asset Availability
Keep your assets running longer and more reliably, with standardized maintenance workflows from OEM manuals.
Lower Maintenance Costs
Turn any technician into an expert to streamline operations, maintain more assets, and reduce overall costs.
Thousands of companies manage their assets with MaintainX

'%3e%3cpath%20fill='url(%23b)'%20d='M66.008%2080.068c-5.084-.786-9.763-3.834-12.442-8.68a16.942%2016.942%200%200%201-1.87-5.18c1.096.19%202.203.476%203.298.87%206.525%202.333%2010.836%207.68%2011.014%2012.99ZM51.47%2061.576c.488-5.524%203.62-10.716%208.847-13.597a17.132%2017.132%200%200%201%2011.335-1.882c-.798%208.145-7.43%2014.848-16.038%2015.599-1.417.119-2.799.07-4.144-.12Zm28.564-11.478a17.513%2017.513%200%200%201%203.727%204.62c4.608%208.335%201.584%2018.813-6.75%2023.409a16.988%2016.988%200%200%201-4.359%201.679%2019.624%2019.624%200%200%201-3.977-12.776c.346-7.561%204.942-13.931%2011.36-16.932Z'/%3e%3cpath%20fill='%23110F0D'%20fill-rule='evenodd'%20d='M142.831%2048.324h4.977V77.03h-4.977V48.324Zm27.278%2013.002c.322%201.048.453%202.263.453%203.62v12.073h-4.787V66.208c0-.75-.047-1.572-.154-2.143-.453-2.382-1.822-3.572-4.215-3.572-2.31%200-3.882%201.274-4.43%203.476-.143.596-.226%201.405-.226%202.25v10.8h-4.787V56.623h4.477v2.989c1.536-2.5%203.906-3.43%206.371-3.43%203.488%200%206.263%201.68%207.298%205.144Zm24.636%207.323c0%203.882-2.358%206.525-5.763%207.727-1.298.453-2.632.643-4.62.643h-10.169V48.324h9.085c1.691%200%203.156.143%204.049.38%203.465.93%205.727%203.68%205.727%207.335%200%202.441-.81%204.156-2.762%205.644%202.905%201.417%204.453%203.727%204.453%206.966Zm-15.634-8.656h4.584c1.024%200%201.917-.143%202.536-.417%201.215-.548%201.905-1.608%201.905-3.167%200-1.548-.643-2.572-1.845-3.132-.691-.31-1.762-.452-2.763-.452h-4.417v7.168Zm10.716%208.465c0-1.536-.893-3.37-3.227-3.893-.428-.095-1.036-.143-1.571-.143h-5.918v8.085h5.501c.56%200%201.429-.048%201.953-.167%201.94-.453%203.262-1.846%203.262-3.882Zm47.747-11.847-8.097%2020.408h-4.429l-8.109-20.408h5.191l5.192%2014.574%205.108-14.574h5.144Zm-20.218%2010.002c0%20.69-.036%201.262-.155%201.94h-15.943c.631%202.87%202.714%204.728%205.882%204.728%202.131%200%203.607-.882%204.703-2.525h4.87c-1.762%204.144-5.204%206.692-9.657%206.692-6.084%200-10.537-4.858-10.537-10.49%200-6.108%204.524-10.776%2010.335-10.776%206.239%200%2010.442%204.954%2010.502%2010.43Zm-4.763-1.405c-.333-2.846-2.643-4.858-5.691-4.858-2.894%200-5.287%201.929-5.621%204.858h11.312Zm-72.667%203.44c0%204.787-3.287%208.371-9.419%208.371H119.363V64.66c-1.917.274-3.87.69-5.811%201.238l4.537%2011.121h-5.418l-3.596-9.585c-5.144%202.084-10.085%205.216-14.217%209.585h-4.786L101.8%2048.312h4.56l5.68%2013.883a44.112%2044.112%200%200%201%207.323-1.774V48.312h9.084c1.703%200%203.156.143%204.061.393%203.453.929%205.727%203.667%205.727%207.323%200%201.917-.738%204.179-2.81%205.691%203.06%201.56%204.501%204.025%204.501%206.93Zm-15.634-8.667a62.664%2062.664%200%200%201%202.06-.036c1.703.012%203.239.131%204.608.37%201.441-.549%202.357-1.727%202.357-3.537%200-1.941-.881-3.144-2.488-3.667-.548-.18-1.358-.286-2.322-.286h-4.215v7.156Zm-16.55%203.905-3.715-9.894-6.394%2016.502c2.833-2.595%206.263-4.858%2010.109-6.608Zm27.254%204.74c0-2.775-3.131-4.347-8.513-4.418-.715%200-1.441.011-2.191.047v8.252h5.918c2.548%200%204.786-1.37%204.786-3.882Z'%20clip-rule='evenodd'/%3e%3c/g%3e%3cdefs%3e%3clinearGradient%20id='b'%20x1='51.47'%20x2='85.916'%20y1='62.946'%20y2='62.946'%20gradientUnits='userSpaceOnUse'%3e%3cstop%20stop-color='%23CD9F28'/%3e%3cstop%20offset='1'%20stop-color='%23ECD80B'/%3e%3c/linearGradient%3e%3cclipPath%20id='a'%3e%3cpath%20fill='%23fff'%20d='M51.47%2045.728h186.104V80.14H51.47z'/%3e%3c/clipPath%3e%3c/defs%3e%3c/svg%3e)


More from Baker Hughes


Explore Other Assets


© 2026 MaintainX. All rights reserved.