


Baker Hughes Large Mass Flow Energy Management Control Valves 72000 Series
Need answers fast?
Explore the manual using AI.
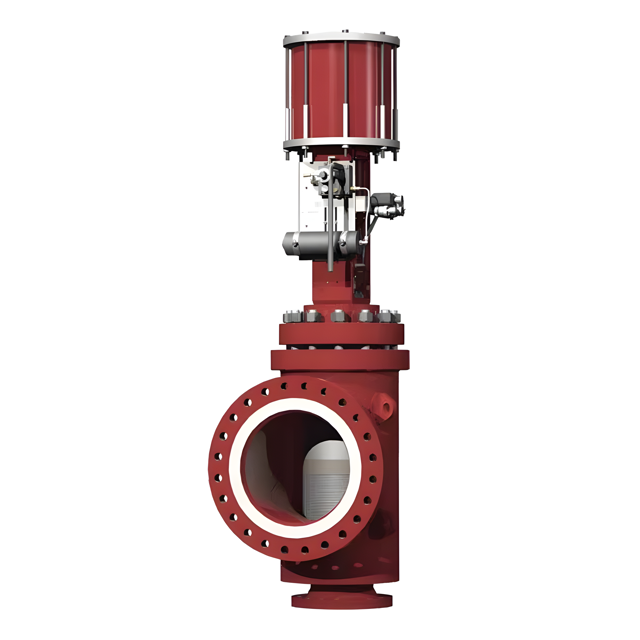
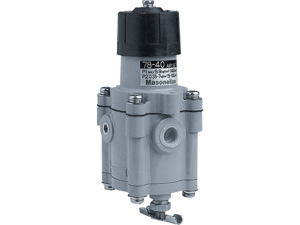
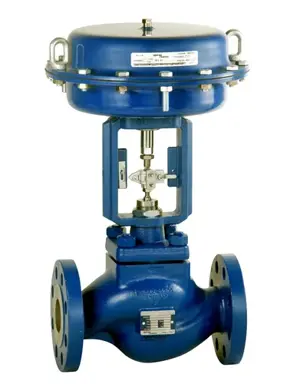
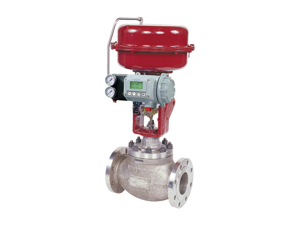
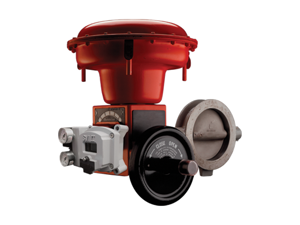
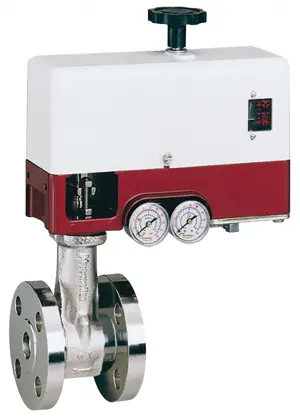
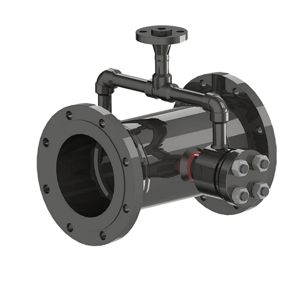
The Baker Hughes Large Mass Flow Energy Management Control Valves 72000 Series are designed for precision flow control in industrial applications. These valves ensure optimal energy management and efficiency, making them essential for modern energy systems. Their robust design and advanced technology provide reliable performance in demanding environments.
Turn manuals into instant answers
with your AI-powered assistantTurn manuals into instant answers
with your AI-powered assistant
Manual for Baker Hughes Large Mass Flow Energy Management Control Valves 72000 Series
Complete asset maintenance, one click away
Get instant access to all the maintenance information you need. Empower technicians to perform preventive maintenance with asset packages, ready to use right out of the box.

Documents & Manuals
Find all the essential guides in one place.
 Tensioning Guide
- Belt-diagram
- C-120 pulleys
+ 13 more

Work Order Templates
Pre-built workflows to keep your asset running smoothly.
- Daily Electrical System Inspection
- Replace Roller and Pulley
- Install Engine B-120
+ 29 more

Procedures
Integrate maintenance plans directly into your work orders.
- Motion Industries
- Applied Industrial Technologies
- Electrical Brothers
+ 5 more

Parts
Access the parts list for your equipment in MaintainX.
- Drive Motor
- B2 Rollers
- Tensioning System
+ 40 more
Baker Hughes Large Mass Flow Energy Management Control Valves 72000 Series
Create an account to install this asset package.
Maintenance Plans for Baker Hughes Large Mass Flow Energy Management Control Valves Model 72000 Series
Integrate maintenance plans directly into your work orders in MaintainX.
Gaskets Maintenance
Gasket seating surfaces must be free of dents, scratches, corrosion, or other types of damage. Clean mating surfaces as required and replace any non-conforming parts. Spiral wound gaskets (Items 25, 26 & 27) must always be replaced after disassembly.;

Seal Rings Maintenance
- Seal rings (9), back-up rings (28), retaining rings (23), and conical springs (14) should be inspected periodically. It is recommended to routinely replace these parts, but they may be re-used if they are free from scratches, erosion, corrosion, or other damage.
- Compressed graphite seal rings must be replaced each time the plug is removed from the valve.;
Metal Seal Maintenance
For the two piece bonnet configurations: - Prior to reassembly, the metal seal (6) should be inspected for cracks or signs of wear. The metal seal can be reused if it is free from scratches, erosion, corrosion, or any other type of damage.
- If slight wear exists on the metal seal, a new layer of coating should be re-applied to the original condition by the factory or a Masoneilan Authorized Repair Center (MARC'). For emergency repairs in the field, the metal seal may be coated with a molybdenum disulfide based spray on lubricant such as MolyKote®.
- Prior to reassembly of the valve, inspect the inside of the valve body around the area where the metal seal seats. It is common to find slight ridges or depressions from where the seal was originally seated. During initial assembly these depressions aid in the sealing of the valve, however these areas can become leak paths during reassembly if the surface is not restored to its original finish as described below.
- To prevent this potential leakage, machine the seating angle of the bonnet at 40 degrees by approximately 0.1 inches (2.5 mm) deep, thus causing the metal seal to seat further down inside the valve body (on a new undeformed surface). Refer to Figure 7 for details.;
Conical Springs Maintenance
- For Models that use a conical spring design, always inspect the body bore surface adjacent to where the conical spring (14) is seated. If this surface has been deformed or if there is a groove where the seal seats, the surface should be cleaned and honed prior to reassembling the valve.
- If the refinishing procedure is unsuccessful, the factory should be consulted for further instructions.;
Valve with Graphite Packing Maintenance
To replace graphite packing, it is necessary to separate the valve plug stem from the actuator stem.
1. Remove the packing flange nuts (16) from the packing flange studs (15).
2. Lift the packing flange (17) and packing follower (18) up along the valve stem (7).
3. By means of a puller, remove the packing (19) being careful not to damage the sealing surface of the packing box or the valve plug stem.
4. Replace the packing (19). Press a back-up ring (car-bon/ graphite/Inconel braided ring) into the bonnet (2). Next press the expanded graphite rings into the packing area one at a time. Press an additional back-up ring into packing area.
5. Reassemble the packing follower (18) and the packing flange (17).
6. Tighten the packing flange nuts (16) without over-compressing the packing rings.
7. Open and close the valve several times then retighten the packing as required.
8. Put the valve back into service and check for leakage. Tighten packing flange nuts (16) as required.;
Parts for Baker Hughes Large Mass Flow Energy Management Control Valves 72000 Series
Access the parts list for your equipment in MaintainX.
Bonnet
-
Body Stud
-
Cage (V-Log or Lo-dB)
-
Seat Ring
-
Packing Flange Nut
-
Bonnet
-
Body Stud
-
Cage (V-Log or Lo-dB)
-
Seat Ring
-
Packing Flange Nut
-
Bonnet
-
Body Stud
-
Cage (V-Log or Lo-dB)
-
Seat Ring
-
Packing Flange Nut
-
Unlock efficiency
with MaintainX CoPilot
MaintainX CoPilot is your expert colleague, on call 24/7, helping your team find the answers they need to keep equipment running.
Reduce Unplanned Downtime
Ensure your team follows consistent procedures to minimize equipment failures and costly delays.
Maximize Asset Availability
Keep your assets running longer and more reliably, with standardized maintenance workflows from OEM manuals.
Lower Maintenance Costs
Turn any technician into an expert to streamline operations, maintain more assets, and reduce overall costs.
Thousands of companies manage their assets with MaintainX

'%3e%3cpath%20fill='url(%23b)'%20d='M66.008%2080.068c-5.084-.786-9.763-3.834-12.442-8.68a16.942%2016.942%200%200%201-1.87-5.18c1.096.19%202.203.476%203.298.87%206.525%202.333%2010.836%207.68%2011.014%2012.99ZM51.47%2061.576c.488-5.524%203.62-10.716%208.847-13.597a17.132%2017.132%200%200%201%2011.335-1.882c-.798%208.145-7.43%2014.848-16.038%2015.599-1.417.119-2.799.07-4.144-.12Zm28.564-11.478a17.513%2017.513%200%200%201%203.727%204.62c4.608%208.335%201.584%2018.813-6.75%2023.409a16.988%2016.988%200%200%201-4.359%201.679%2019.624%2019.624%200%200%201-3.977-12.776c.346-7.561%204.942-13.931%2011.36-16.932Z'/%3e%3cpath%20fill='%23110F0D'%20fill-rule='evenodd'%20d='M142.831%2048.324h4.977V77.03h-4.977V48.324Zm27.278%2013.002c.322%201.048.453%202.263.453%203.62v12.073h-4.787V66.208c0-.75-.047-1.572-.154-2.143-.453-2.382-1.822-3.572-4.215-3.572-2.31%200-3.882%201.274-4.43%203.476-.143.596-.226%201.405-.226%202.25v10.8h-4.787V56.623h4.477v2.989c1.536-2.5%203.906-3.43%206.371-3.43%203.488%200%206.263%201.68%207.298%205.144Zm24.636%207.323c0%203.882-2.358%206.525-5.763%207.727-1.298.453-2.632.643-4.62.643h-10.169V48.324h9.085c1.691%200%203.156.143%204.049.38%203.465.93%205.727%203.68%205.727%207.335%200%202.441-.81%204.156-2.762%205.644%202.905%201.417%204.453%203.727%204.453%206.966Zm-15.634-8.656h4.584c1.024%200%201.917-.143%202.536-.417%201.215-.548%201.905-1.608%201.905-3.167%200-1.548-.643-2.572-1.845-3.132-.691-.31-1.762-.452-2.763-.452h-4.417v7.168Zm10.716%208.465c0-1.536-.893-3.37-3.227-3.893-.428-.095-1.036-.143-1.571-.143h-5.918v8.085h5.501c.56%200%201.429-.048%201.953-.167%201.94-.453%203.262-1.846%203.262-3.882Zm47.747-11.847-8.097%2020.408h-4.429l-8.109-20.408h5.191l5.192%2014.574%205.108-14.574h5.144Zm-20.218%2010.002c0%20.69-.036%201.262-.155%201.94h-15.943c.631%202.87%202.714%204.728%205.882%204.728%202.131%200%203.607-.882%204.703-2.525h4.87c-1.762%204.144-5.204%206.692-9.657%206.692-6.084%200-10.537-4.858-10.537-10.49%200-6.108%204.524-10.776%2010.335-10.776%206.239%200%2010.442%204.954%2010.502%2010.43Zm-4.763-1.405c-.333-2.846-2.643-4.858-5.691-4.858-2.894%200-5.287%201.929-5.621%204.858h11.312Zm-72.667%203.44c0%204.787-3.287%208.371-9.419%208.371H119.363V64.66c-1.917.274-3.87.69-5.811%201.238l4.537%2011.121h-5.418l-3.596-9.585c-5.144%202.084-10.085%205.216-14.217%209.585h-4.786L101.8%2048.312h4.56l5.68%2013.883a44.112%2044.112%200%200%201%207.323-1.774V48.312h9.084c1.703%200%203.156.143%204.061.393%203.453.929%205.727%203.667%205.727%207.323%200%201.917-.738%204.179-2.81%205.691%203.06%201.56%204.501%204.025%204.501%206.93Zm-15.634-8.667a62.664%2062.664%200%200%201%202.06-.036c1.703.012%203.239.131%204.608.37%201.441-.549%202.357-1.727%202.357-3.537%200-1.941-.881-3.144-2.488-3.667-.548-.18-1.358-.286-2.322-.286h-4.215v7.156Zm-16.55%203.905-3.715-9.894-6.394%2016.502c2.833-2.595%206.263-4.858%2010.109-6.608Zm27.254%204.74c0-2.775-3.131-4.347-8.513-4.418-.715%200-1.441.011-2.191.047v8.252h5.918c2.548%200%204.786-1.37%204.786-3.882Z'%20clip-rule='evenodd'/%3e%3c/g%3e%3cdefs%3e%3clinearGradient%20id='b'%20x1='51.47'%20x2='85.916'%20y1='62.946'%20y2='62.946'%20gradientUnits='userSpaceOnUse'%3e%3cstop%20stop-color='%23CD9F28'/%3e%3cstop%20offset='1'%20stop-color='%23ECD80B'/%3e%3c/linearGradient%3e%3cclipPath%20id='a'%3e%3cpath%20fill='%23fff'%20d='M51.47%2045.728h186.104V80.14H51.47z'/%3e%3c/clipPath%3e%3c/defs%3e%3c/svg%3e)


More from Baker Hughes


Explore Other Assets


© 2026 MaintainX. All rights reserved.