


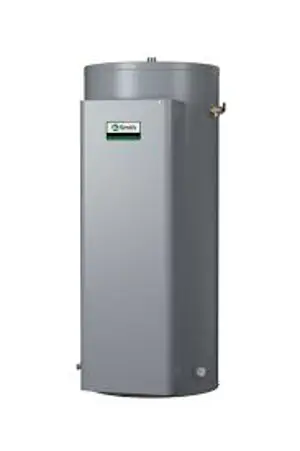
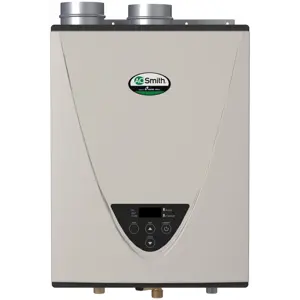
A.O. Smith Commercial Gas Tankless Water Heater ATI-340H-P
Need answers fast?
Explore the manual using AI.
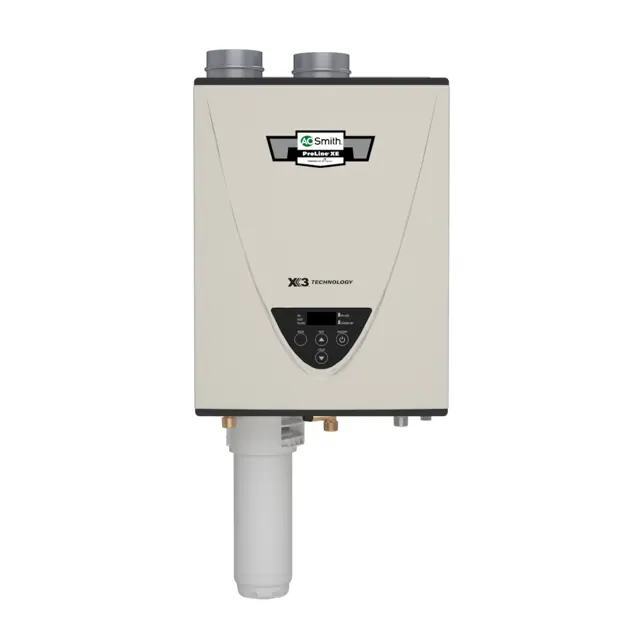
The AO Smith Commercial Gas Tankless Water Heater ATI-340H-P offers efficient, on-demand hot water for commercial applications. Designed for durability and performance, this model ensures reliable operation while minimizing energy consumption, making it an ideal choice for businesses seeking high-quality water heating solutions.
Turn manuals into instant answers
with your AI-powered assistantTurn manuals into instant answers
with your AI-powered assistant
Manual for A.O. Smith Commercial Gas Tankless Water Heater ATI-340H-P
Complete asset maintenance, one click away
Get instant access to all the maintenance information you need. Empower technicians to perform preventive maintenance with asset packages, ready to use right out of the box.

Documents & Manuals
Find all the essential guides in one place.
 Tensioning Guide
- Belt-diagram
- C-120 pulleys
+ 13 more

Work Order Templates
Pre-built workflows to keep your asset running smoothly.
- Daily Electrical System Inspection
- Replace Roller and Pulley
- Install Engine B-120
+ 29 more

Procedures
Integrate maintenance plans directly into your work orders.
- Motion Industries
- Applied Industrial Technologies
- Electrical Brothers
+ 5 more

Parts
Access the parts list for your equipment in MaintainX.
- Drive Motor
- B2 Rollers
- Tensioning System
+ 40 more
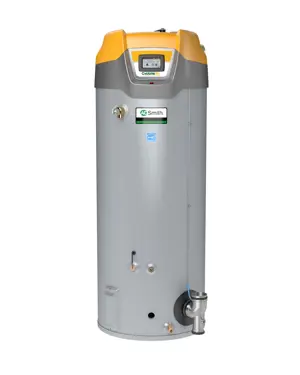
A.O. Smith Commercial Gas Tankless Water Heater ATI-340H-P
Create an account to install this asset package.
Maintenance Plans for A.O. Smith Commercial Gas Tankless Water Heater Model ATI-340H-P
Integrate maintenance plans directly into your work orders in MaintainX.
1 Yearly Commercial Gas Tankless Water Heater Maintenance
WARNING! Turn off the electrical power supply and close the manual gas shutoff valve and the manual water control valve before servicing.
WARNING! Failure to do so could result in severe personal injury, or death.
Are all openings for combustion and ventilation air unblocked?
Is the venting system free of leaks, corrosion, blockages or damage?
Is the burner free of dust, lint, grease or dirt?
Is the area around the water heater clear? Are there any combustible materials, gasoline or any flammable vapors and liquids?
Is the relief valve discharging periodically due to thermal expansion in a closed water supply system?
If the relief valve discharges periodically, it may be due to thermal expansion in a closed water supply system. Contact the water supplier or local plumbing inspector on how to correct this situation.
Are the burner flames visually checked through the burner window in the burner assembly located at the middle of the water heater?

1 Yearly Unit Draining & Filter Cleaning
Close the manual gas shutoff valve.
Turn off power to the unit and wait a couple of seconds. Turn on again.
Wait 30 seconds, and then turn off power to the unit.
Close the inlet water valve.
If the heater is part of an Easy-Link or Multi-Unit System, close the inlet and outlet water valves to isolate the heater.
Open all hot water taps in the house. When the residual water flow has ceased, close all hot water taps.
Have a bucket or pan to catch the water from the unit’s drain plugs. If Isolation valves are installed, open the drains to drain the water. If isolation valves are not installed, unscrew the two drain plugs (large and small) to drain all the water out of the unit. Do not lose the o-rings that will be on the two drain plugs.
Wait a few minutes to ensure all water has completely drained from the unit.
Clean the filter: Check the water filter located within the cold inlet. With a tiny brush, clean the water filter of any debris which may have accumulated and reinsert the filter back into the cold water inlet.
Inlet Gas Pressure Measuring
WARNING: Turn off all electric power to the water heater if service is to be performed.
Turn the manual gas valve located on the outside of the unit to the off position.
Failure to follow these steps could lead to fire or explosion, resulting in personal injury or death.
The water heater cannot perform properly without sufficient inlet gas pressure. Below are instructions on how to check the inlet gas pressure. THIS IS ONLY TO BE DONE BY A LICENSED PROFESSIONAL.
Shut off the manual gas valve on the gas supply line.
Remove the screw from the pressure port which is located on the gas inlet of the water heater shown in the diagram on the right.
Connect the manometer to the pressure port and zero the manometer.
Re-open the manual gas valve. Verify that there are no gas leaks.
With all gas burning equipment off, take a reading of the static gas pressure and make a note of it.
Parts for A.O. Smith Commercial Gas Tankless Water Heater ATI-340H-P
Access the parts list for your equipment in MaintainX.
Rod Holder Gasket
100074219
Truss Head Screw M4×6 SUS3
100074512
Junction Box
100074668
Igniter Rod
100074222
Outlet Drain Plug
100074383
Rod Holder Gasket
100074219
Truss Head Screw M4×6 SUS3
100074512
Junction Box
100074668
Igniter Rod
100074222
Outlet Drain Plug
100074383
Rod Holder Gasket
100074219
Truss Head Screw M4×6 SUS3
100074512
Junction Box
100074668
Igniter Rod
100074222
Outlet Drain Plug
100074383
Unlock efficiency
with MaintainX CoPilot
MaintainX CoPilot is your expert colleague, on call 24/7, helping your team find the answers they need to keep equipment running.
Reduce Unplanned Downtime
Ensure your team follows consistent procedures to minimize equipment failures and costly delays.
Maximize Asset Availability
Keep your assets running longer and more reliably, with standardized maintenance workflows from OEM manuals.
Lower Maintenance Costs
Turn any technician into an expert to streamline operations, maintain more assets, and reduce overall costs.
Thousands of companies manage their assets with MaintainX

'%3e%3cpath%20fill='url(%23b)'%20d='M66.008%2080.068c-5.084-.786-9.763-3.834-12.442-8.68a16.942%2016.942%200%200%201-1.87-5.18c1.096.19%202.203.476%203.298.87%206.525%202.333%2010.836%207.68%2011.014%2012.99ZM51.47%2061.576c.488-5.524%203.62-10.716%208.847-13.597a17.132%2017.132%200%200%201%2011.335-1.882c-.798%208.145-7.43%2014.848-16.038%2015.599-1.417.119-2.799.07-4.144-.12Zm28.564-11.478a17.513%2017.513%200%200%201%203.727%204.62c4.608%208.335%201.584%2018.813-6.75%2023.409a16.988%2016.988%200%200%201-4.359%201.679%2019.624%2019.624%200%200%201-3.977-12.776c.346-7.561%204.942-13.931%2011.36-16.932Z'/%3e%3cpath%20fill='%23110F0D'%20fill-rule='evenodd'%20d='M142.831%2048.324h4.977V77.03h-4.977V48.324Zm27.278%2013.002c.322%201.048.453%202.263.453%203.62v12.073h-4.787V66.208c0-.75-.047-1.572-.154-2.143-.453-2.382-1.822-3.572-4.215-3.572-2.31%200-3.882%201.274-4.43%203.476-.143.596-.226%201.405-.226%202.25v10.8h-4.787V56.623h4.477v2.989c1.536-2.5%203.906-3.43%206.371-3.43%203.488%200%206.263%201.68%207.298%205.144Zm24.636%207.323c0%203.882-2.358%206.525-5.763%207.727-1.298.453-2.632.643-4.62.643h-10.169V48.324h9.085c1.691%200%203.156.143%204.049.38%203.465.93%205.727%203.68%205.727%207.335%200%202.441-.81%204.156-2.762%205.644%202.905%201.417%204.453%203.727%204.453%206.966Zm-15.634-8.656h4.584c1.024%200%201.917-.143%202.536-.417%201.215-.548%201.905-1.608%201.905-3.167%200-1.548-.643-2.572-1.845-3.132-.691-.31-1.762-.452-2.763-.452h-4.417v7.168Zm10.716%208.465c0-1.536-.893-3.37-3.227-3.893-.428-.095-1.036-.143-1.571-.143h-5.918v8.085h5.501c.56%200%201.429-.048%201.953-.167%201.94-.453%203.262-1.846%203.262-3.882Zm47.747-11.847-8.097%2020.408h-4.429l-8.109-20.408h5.191l5.192%2014.574%205.108-14.574h5.144Zm-20.218%2010.002c0%20.69-.036%201.262-.155%201.94h-15.943c.631%202.87%202.714%204.728%205.882%204.728%202.131%200%203.607-.882%204.703-2.525h4.87c-1.762%204.144-5.204%206.692-9.657%206.692-6.084%200-10.537-4.858-10.537-10.49%200-6.108%204.524-10.776%2010.335-10.776%206.239%200%2010.442%204.954%2010.502%2010.43Zm-4.763-1.405c-.333-2.846-2.643-4.858-5.691-4.858-2.894%200-5.287%201.929-5.621%204.858h11.312Zm-72.667%203.44c0%204.787-3.287%208.371-9.419%208.371H119.363V64.66c-1.917.274-3.87.69-5.811%201.238l4.537%2011.121h-5.418l-3.596-9.585c-5.144%202.084-10.085%205.216-14.217%209.585h-4.786L101.8%2048.312h4.56l5.68%2013.883a44.112%2044.112%200%200%201%207.323-1.774V48.312h9.084c1.703%200%203.156.143%204.061.393%203.453.929%205.727%203.667%205.727%207.323%200%201.917-.738%204.179-2.81%205.691%203.06%201.56%204.501%204.025%204.501%206.93Zm-15.634-8.667a62.664%2062.664%200%200%201%202.06-.036c1.703.012%203.239.131%204.608.37%201.441-.549%202.357-1.727%202.357-3.537%200-1.941-.881-3.144-2.488-3.667-.548-.18-1.358-.286-2.322-.286h-4.215v7.156Zm-16.55%203.905-3.715-9.894-6.394%2016.502c2.833-2.595%206.263-4.858%2010.109-6.608Zm27.254%204.74c0-2.775-3.131-4.347-8.513-4.418-.715%200-1.441.011-2.191.047v8.252h5.918c2.548%200%204.786-1.37%204.786-3.882Z'%20clip-rule='evenodd'/%3e%3c/g%3e%3cdefs%3e%3clinearGradient%20id='b'%20x1='51.47'%20x2='85.916'%20y1='62.946'%20y2='62.946'%20gradientUnits='userSpaceOnUse'%3e%3cstop%20stop-color='%23CD9F28'/%3e%3cstop%20offset='1'%20stop-color='%23ECD80B'/%3e%3c/linearGradient%3e%3cclipPath%20id='a'%3e%3cpath%20fill='%23fff'%20d='M51.47%2045.728h186.104V80.14H51.47z'/%3e%3c/clipPath%3e%3c/defs%3e%3c/svg%3e)


More from A.O. Smith


Explore Other Assets


© 2026 MaintainX. All rights reserved.